Cheap And Easy Motion Tracking

[Koppany Horvarth] set out to create a dirt-cheap optical tracking rig for VR that uses only two cameras and a certain amount of math to do its thing. He knew he could do theoretically, and wouldn’t cost a lot of money, but still required a lot of work and slightly absurd amount of math.

While playing around with a webcam that he’d set up to run an object-tracking Python script and discovered that his setup tended to display a translucent object with a LED inside of it as pure, washed-out white. This gave [Koppany] the idea that he could use such a light as part of his object tracking project. He 3D-printed 50mm hollow spheres out of transparent PLA, illuminated via a LED and powered by a 5V power supply hacked from an old USB cable. After dealing with some lens flares, he sanded down the PLA a little to diffuse the light and it worked like a charm.

To learn more check out his GitHub code repository. You can also take inspiration in some of the other motion tracking posts we’ve published in the past, like motion tracking on the cheap with a PIC and this OpenCV Airsoft turret.

Remote Controlled Streaming Speakers

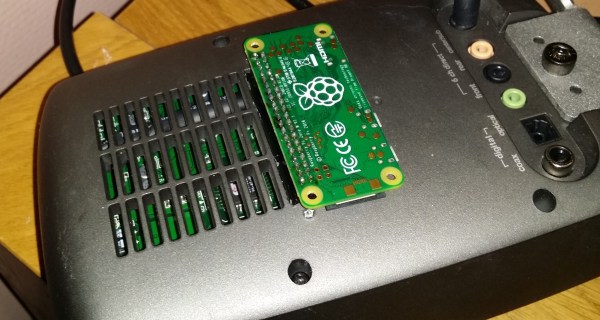
For want of a better use of a spare Raspberry Pi Zero W and a set of LogitechZ-680 surround sound speakers, [Andre van Kammen] hacked them together to make them stream music playing from his phone.

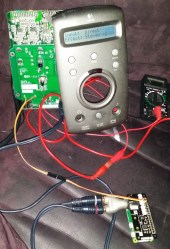
It was stumbling across the Pi Music Box distribution that really got the ball rolling, and the purchase of a pHAT DAC laid the foundation. Cracking open the speakers’ controller case, [Kammen] was able to get 5V of power off some terminals even when the speakers were on standby — awesome! — which the Pi could use. Power and volume are controlled via the Pi’s GPIO pins with a diode to drop the voltage and prevent shorts.

Now, how to tell whether the speakers are on or off? Well, a pin on the display connector changes to 4.3V when it’s on, so wiring a 10k resistor and a diode to said pin is a hackable solution. Finishing off the wired connections, it proved possible to cram the pHAT DAC inside the controller case with the GPIO header sticking out the back to mount the Pi upon with no other external wires — double awesome!

Continue reading “Remote Controlled Streaming Speakers”

Bodging On More Flash Memory

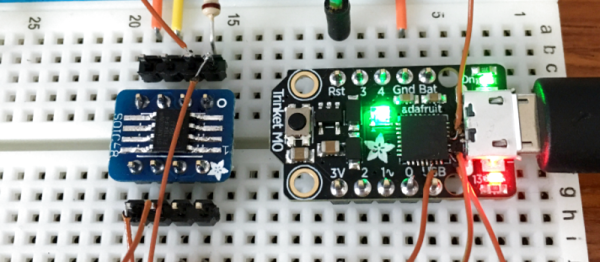
[Curmudegeoclast] found himself running out of flash memory on a Trinket M0 board, so he decided to epoxy and fly-wire a whopping 2 MB of extra flash on top of the original CPU.

We’ll just get our “kids these days” rant out of the way up front: the stock SAMD21 ARM chip has 256 kB (!) of flash to begin with, and is on a breakout board with only five GPIO pins, for a 51 kB / pin ratio! And now he’s adding 2 MB more? That’s madness. The stated reason for [Curmudegeoclast]’s exercise is MicroPython, which takes up a big chunk of flash just for the base language. We suspect that there’s also a fair amount of “wouldn’t it be neat?” in the mix as well. Whatever.

The hack is a classic. It starts off with sketchy wires soldered to pins and breadboarded up with a SOIC expander board. Following that proof of concept, some degree of structural integrity is brought to the proceedings by gluing the flash chip, dead-bug, on top of the microcontroller. We love the (0805?) SPI pullup resistor that was also point-to-point soldered into place. We would not be able to resist the temptation to entomb the whole thing in hot glue for “long-term” stability, but there are better options out there, too.

This hack takes a minimalist board, and super-sizes it, and for that, kudos. What would you stuff into 2 MB of free flash on a tiny little microcontroller? Any of you out there using MicroPython or CircuitPython care to comment on the flash memory demands? 256 kB should be enough for anyone.

DIY Wireless Sprinkler System? Don’t Mind If I Do.

What to do once you have a sprinkler system installed on your property: buy a sprinkler control system or make your own? The latter, obviously.

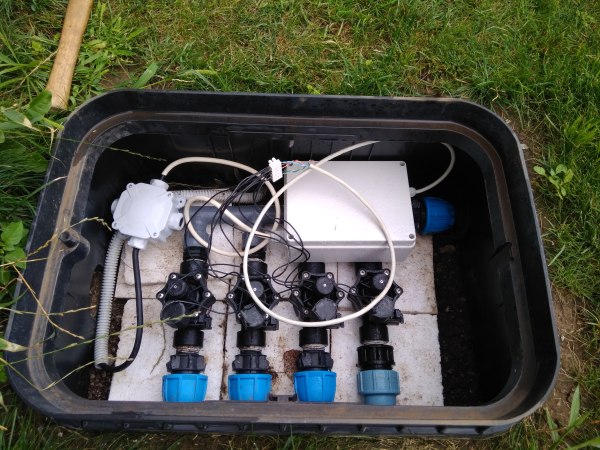
[danaman] was determined to hack together a cheap, IoT-enabled system but it wasn’t easy — taking the better part of a year to get working. Instead of starting right from scratch, he used the open-source Sustainable Irrigation Platform(SIP) control software — a Python sprinkler scheduler with some features [danman] was looking for(eg: it won’t activate if there’s rain in the forecast). Since he wasn’t running it with a Raspberry Pi as recommended, [danman] wrote a Python plugin that runs on his home server as a daemon which listens to TCP port 20000 for connections and then updates the relevant relays. Ok, software done; on to the relay controller box!

Continue reading “DIY Wireless Sprinkler System? Don’t Mind If I Do.”

Tough Pi-ano Can Take A Punch

There will be no delicate solos for [24 Hour Engineer’s] Tough Pi-ano. It was built to soak punishment from aggressive youngsters in musical therapy, specifically those on the autism spectrum and those with Down’s syndrome. The Tough Pi-ano will be bolted to a wall with heavy-duty shelf brackets so it can’t fall on anyone. The keyboard is covered in plastic and it doesn’t have any exposed metal so there will be no splinters.

[24 Hour Engineer] made a short video demonstration and if you listen closely, he has a pun in all but one sentence. We love that kind of easter egg in YouTube videos. Check it out after the break.

Inside the 48-key instrument are four Raspberry Pi Zeros where each Pi controls one octave. The redundancy ensures that a hardware failure only drops out a single octave and the kids can keep playing until replacement parts arrive. Each Pi has identical programming and a thumbwheel switch tells it which octave it will be emulating.

Programming was done with Python and Pygame and all the inputs are run to a homemade “hat” where the wires are soldered. Pygame’s sole responsibility is to monitor the GPIO and then play the appropriate note when a button is pressed, slapped, punched or sat upon.

Similar in name, the Touch Piano has no moving parts or perhaps you would rather use your Raspberry Pi in an upright piano.

Continue reading “Tough Pi-ano Can Take A Punch”

Nerf Gun Ammo Counter And Range Finder

The proliferation of breakout boards that the DIY electronics movement has allowed has been staggering. Buy a few different boards, wire them together to a microcontroller or credit-card computer (both on their own breakout board) and write a bit of code, and you can create some really interesting things. Take Reddit user [Lord_of_Bone]’s Nerf Gun ammo counter and range finder, for example, a great example of having a great idea and looking around for the ways to implement it.

For the range finder, [Lord_of_Bone] looked to an ultrasonic rangefinder. For the ammo counter, [Lord_of_Bone] chose a proximity sensor. To run everything, the Raspberry Pi Zero was used and the visuals were supplied by a Rainbow Hat. The range finder is self-explanatory. The proximity sensor is located at the end of the gun’s muzzle and when it detects a Nerf dart passing by it reduces the ammo count by one. Blu-tack is used to hold everything in place, but [Lord_of_Bone] plans to use Sugru when he’s past the prototype stage.

The one problem [Lord_of_Bone] has with the build is that there’s no way to tell how many Nerf bullets are in the magazine. Currently the wielder must push a button when reloading to reset the count to a preset amount. We’re sure that [Lord_of_Bone] would appreciate any suggestions the Hack-A-Day crowd could offer.

[Lord_of_Bone] gives a full bill of materials, Python code, a lot of pictures and step-by-step instructions so that you, too, can determine how far away your target is, and whether or not you have enough ammo to hit them. We have quite a few Nerf mods on the site, and [Lord_of_Bone] could take a look at this article about how to keep track of your Nerf ammo, and here’s a different method of determining if a Nerf dart has been fired (and measuring its speed.)

[via Reddit] Continue reading “Nerf Gun Ammo Counter And Range Finder”

We Should Stop Here, It’s Bat Country!

[Roland Meertens] has a bat detector, or rather, he has a device that can record ultrasound – the type of sound that bats use to echolocate. What he wants is a bat detector. When he discovered bats living behind his house, he set to work creating a program that would use his recorder to detect when bats were around.

[Roland]’s workflow consists of breaking up a recording from his backyard into one second clips, loading them in to a Python program and running some machine learning code to determine whether the clip is a recording of a bat or not and using this to determine the number of bats flying around. He uses several Python libraries to do this including Tensorflow and LibROSA.

The Python code breaks each one second clip into twenty-two parts. For each part, he determines the max, min, mean, standard deviation, and max-min of the sample – if multiple parts of the signal have certain features (such as a high standard deviation), then the software has detected a bat call. Armed with this, [Roland] turned his head to the machine learning so that he could offload the work of detecting the bats. Again, he turned to Python and the Keras library.

With a 95% success rate, [Roland] now has a bat detector! One that works pretty well, too. For more on detecting bats and machine learning, check out the bat detector in this list of ultrasonic projects and check out this IDE for working with Tensorflow and machine learning.