What do you do when you buy a broken shredder and, upon disassembly, find its gears in pieces? You might reach towards your 3D printer – this one’s not that kind of shredder, however. [New Yorkshire Workshop] gives us a master class on reviving equipment and putting it to good use – this one’s assigned to help turn their cardboard stores into briquettes for their wood burner.
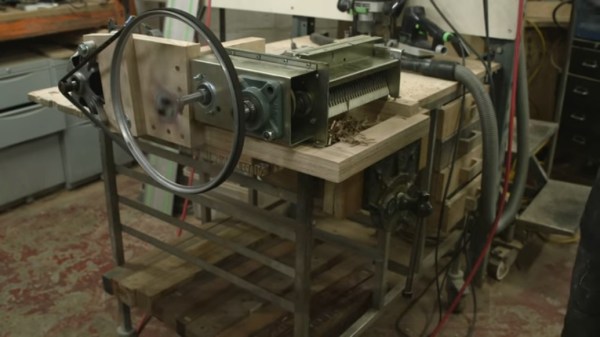
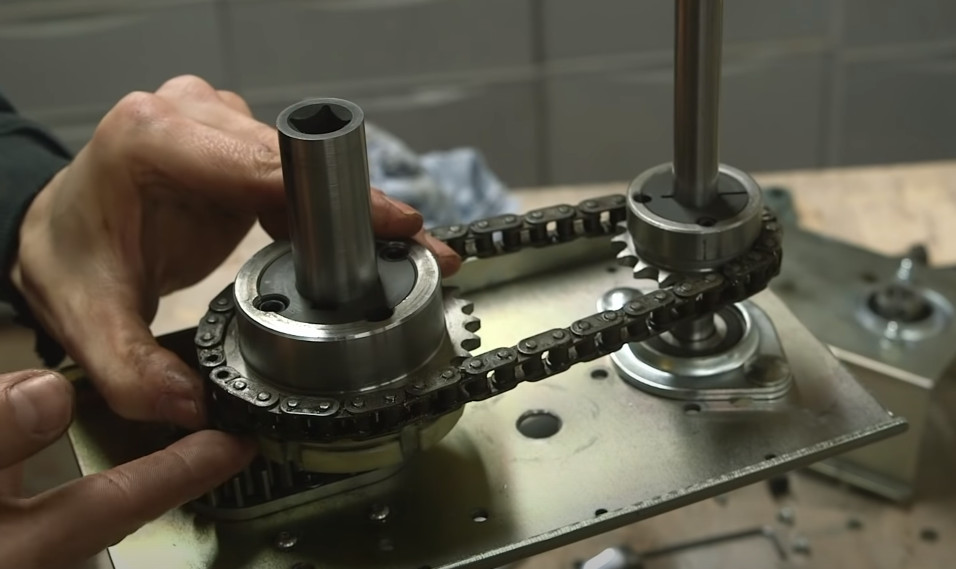
But first, of course, it had to be fixed – and fixed it was, the crucial parts re-designed and re-built around a sturdy wooden frame. It was made into a machine built to last; an effort not unlikely to have been fueled with frustration after seeing just how easily the stock gears disintegrated. The stock gear-based transmission was replaced with a sprocket and chain mechanism, the motor was wired through a speed controller, and a washing machine pulley was used to transfer power from the motor to the freshly cleaned and re-oiled shredder mechanism itself. This shredder lost its shell along the way, just like a crab does as it expands – and this machine grew in size enough to become a sizeable benchtop appliance.
 After cutting loads of cardboard into shredder-fitting pieces, they show us the end result – unparalleled cardboard shredding power, producing bags upon bags of thinly sliced cardboard ready to be turned into fuel, making the workshop a bit warmer to work in. The video flows well and is a sight to see – it’s a pleasure to observe someone who knows their way around the shop like folks over at [New Yorkshire Workshop] do, and you get a lot of insights into the process and all the little tricks that they have up their sleeves.
The endgoal is not reached – yet. The shredder’s output is not quite suitable for their briquette press, a whole project by itself, and we are sure to see the continuation of this story in their next videos – a hydraulic briquette press was suggested as one of the possible ways to move from here, and their last video works on exactly that. Nevertheless, this one’s a beast of a shredder. After seeing this one, if you suddenly have a hunger for powerful shredders, check this 3D printed one out.
Continue reading “Shredder Rebuilt From The Ashes, Aims To Produce More Ashes”