Blink A Pi, Win A Prize

You can plug in a Raspberry Pi, and you can blink a LED. You can visualize data, and now there’s a contest on Hackaday.io to show off your skills. Right now, we’re opening up the Visualize It With Pi contest on Hackaday.io. The challenge? Visualize data with LED strips and panels. Is that ‘data’ actually just a video of Never Gonna Give You Up? We’ll find out soon enough.

The goal of this contest is to combine a Raspberry Pi and its immense processing power and the blinky goodness of LED strips and panels to visualize and interpret data in novel and artistic ways. We’re looking for animation. clarity, and flamboyant flickering. Want some ideas? Check out the World of Light or the American Constitution Candle. We’re looking for the most blinky you can do with a Pi, and yes, there will be prizes.

Prizes
BlinkyTile Explorers Kit

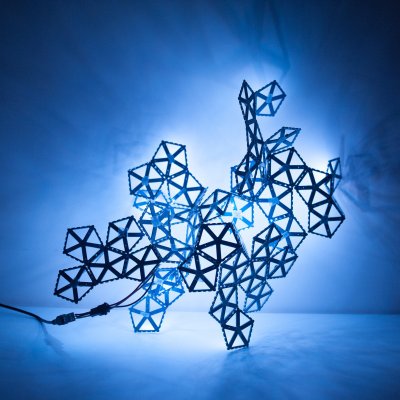
Prizes for the best blinky include, of course, more blinky. The best visualizations from a directly connected sensor, data from an Internet Source, and data from an esoteric data source will each receive some Blinkytape. This is a strip of WS2812b LEDs with an ATMega32u4 embedded on the end. Plug a USB power supply into the Blinkytape, and you get a strip of LEDs in whatever color you want with the ability to push animation frames to the chip on the strip. The Grand Prize winner for this contest will also receive Blinkytile Explorers Kit, a Serpentine LED strip, a LED ring, and two meters of ultra thin LED strip.

Let’s Do This!

The requirements for the contest are simple: just use a Raspberry Pi to drive LED strips or panels, post it as a new project on Hackaday.io, and submit the project to the contest. We’re looking for a full description, source, schematics, and photos and videos of the finished version of the project — do everything you can to show off your work! The contest is open right now, and ends at 08:00 Pacific on October 1st. We know you like to blink those LEDs, so get crackin’.

Buttery Smooth Fades With The Power Of HSV

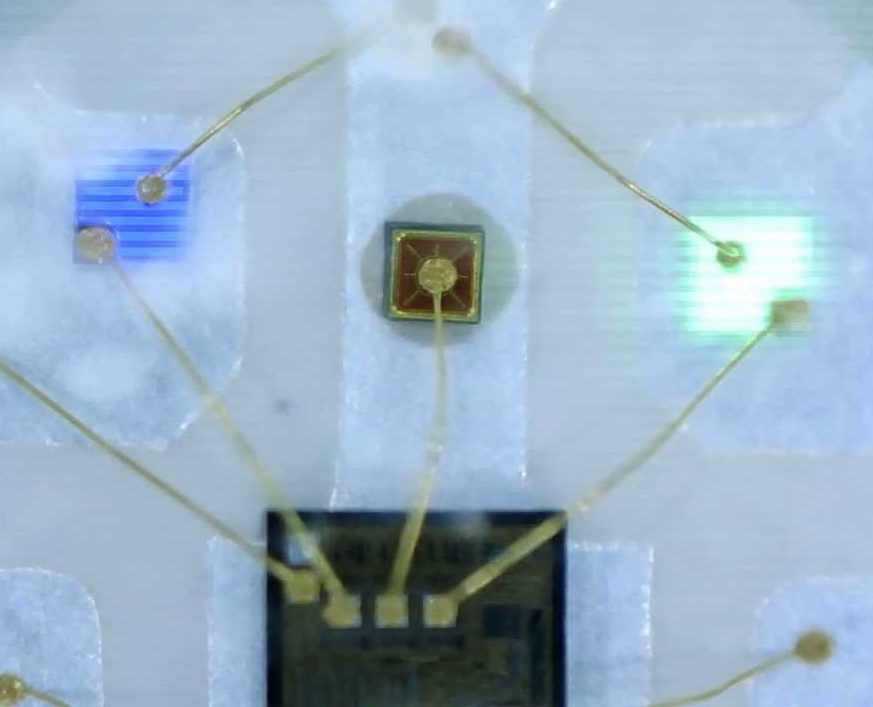
In firmware-land we usually refer to colors using RGB. This is intuitively pleasing with a little background on color theory and an understanding of how multicolor LEDs work. Most of the colorful LEDs we are use not actually a single diode. They are red, green, and blue diodes shoved together in tight quarters. (Though interestingly very high end LEDs use even more colors than that, but that’s a topic for another article.) When all three light up at once the emitted light munges together into a single color which your brain perceives. Appropriately the schematic symbol for an RGB LED without an onboard controller typically depicts three discrete LEDs all together. So it’s clear why representing an RGB LED in code as three individual values {R, G, B} makes sense. But binding our representation of color in firmware to the physical system we accidentally limit ourselves.

The inside of an RGB LED

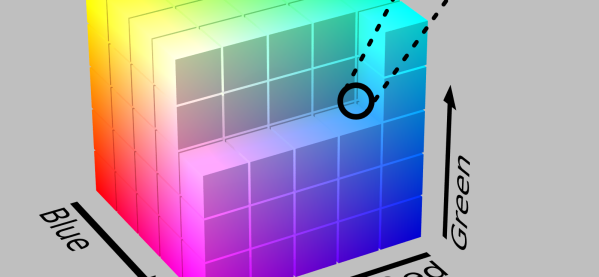
Last time we talked about color spaces, we learned about different ways to represent color spatially. The key insight was that these models called color spaces could be used to represent the same colors using different groups of values. And in fact that the grouped values themselves could be used to describe multidimensional spacial coordinates. But that post was missing the punchline. “So what if you can represent colors in a cylinder!” I hear you cry. “Why do I care?” Well, it turns out that using colorspace can make some common firmware tasks easier. Follow on to learn how!

Continue reading “Buttery Smooth Fades With The Power Of HSV”

Mc Lighting Takes The Pain Out Of Blinking

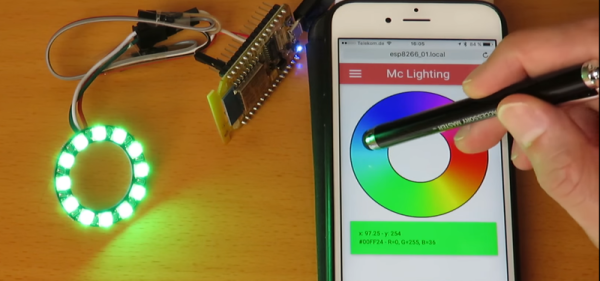
If you want to blink a ton of WS2812-alike LED pixels over WiFi, the hardware side of things is easy enough: an LED strip, and ESP8266 unit, and a beefy enough power supply to feed them. But the software side — that’s where it can be a bit of a pain.

Enter Mc Lighting. It makes the software side of things idiot-proof. Flash the firmware onto the ESP8266, and you’ve got your choice of REST, WebSockets, or MQTT to get the data in. This means that it’ll work with Homekit, NodeRed, or an ESP-hosted web interface that you can pull up from any smartphone.

The web interface is particularly swell, and has a bunch of animations built in. (Check out the video below.) This means that you can solder some wires, flash an ESP, and your least computer-savvy relatives can be controlling the system in no time. And speaking of videos, Mc Lighting’s author [Tobias] has compiled a playlist of projects that use the library, also just below. The docs on GitHub are great, and also check out the wiki.

So what are you waiting for? Do you or your loved ones need some blink in your life? And while you’re ordering LED strips, get two. You’re going to want to build TWANG! as well.

Continue reading “Mc Lighting Takes The Pain Out Of Blinking”

Color Spaces: The Model At The End Of The Rainbow

When I learned about colors in grade school everything started with red, yellow, and blue and getting fancier colors was easy. I mixed some blue into my yellow to get green, or into red to get purple, and so on. After painting enough terrifying “art” for my parents, this made intuitive sense. That is until my mind was blown by the revelation that this wasn’t always true! 

To make the same colors with light instead of paint I had to use red, green, and blue, not yellow. It was until much later when trying harness banks of RGB LEDs that this knowledge became useful. I was struggling to make my rogue diodes look quite the way I wanted when I stumbled into the realization that maybe there was another approach. What did the numbers representing R G and B actually mean? Why those parameters? Could there be others? [Elliot Williams] has written about the importance of gamma correction and adjustment for human perception of color, but we can ask a more fundamental question. Why do we represent color this way at all?

Continue reading “Color Spaces: The Model At The End Of The Rainbow”

Lasers, Mirrors, And Sensors Combine In An Optical Bench Game

Who would have thought you could make a game out of an optical bench? [Chris Mitchell] did, and while we were skeptical at first, his laser Light Bender game has some potential. Just watch your eyes.

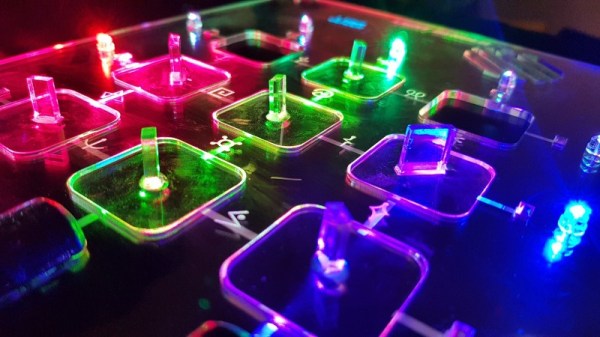
The premise is simple: direct the beam of a colored laser to the correct target before time runs out. [Chris] used laser-cut acrylic for his playfield, which has nine square cutouts arranged in a grid. Red, green, and blue laser pointers line the bottom of the grid, with photosensors and RGB LEDs lining the grid on the other three sides. Play starts with a random LED lighting up in one of the three colors, acting as a target. The corresponding color laser comes on, and the player has to insert mirrors or pass-through blocks in the grid to create a path to the target. The faster you hit the CdS cell, the higher your score. It’s simple, but it looks really engaging. We can imagine all sorts of upgrades, like lighting up two different targets at once, or adding a beamsplitter block to hit two targets with the same color. Filters and polarizers could add to the optical fun too.

We like builds that are just for fun, especially when they’re well-crafted and have a slight air of danger. The balloon-busting killbots project we featured recently comes to mind.

Continue reading “Lasers, Mirrors, And Sensors Combine In An Optical Bench Game”

Interactive Plant Lamps For Quiet Spaces

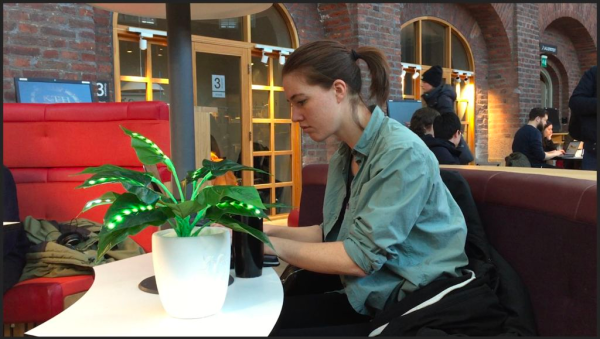
If you’ve spent any serious time in libraries, you’ve probably noticed that they attract people who want or need to be alone without being isolated. In this space, a kind of silent community is formed. This phenomenon was the inspiration [MoonAnchor23] needed to build a network of connected house plants for a course on physical interaction and realization. But you won’t find these plants unleashing their dry wit on twitter. They only talk to each other and to nearby humans.

No living plants were harmed during this project—the leaves likely wouldn’t let much light through, anyway. The plants are each equipped with a strip of addressable RGB LEDs and a flex sensor controlled by an Arduino Uno. Both are hot glued to the undersides of the leaves and hidden with green tape. By default, the plants are set to give ambient light. But if someone strokes the leaf with the flex sensor, it sends a secret message to the other plant that induces light patterns.

Right now, the plants communicate over Bluetooth using an OpenFrameworks server on a local PC. Eventually, the plan is use a master-slave configuration so the plants can be farther apart. Stroke that mouse button to see a brief demo video after the break. [MoonAnchor23] also built LED mushroom clusters out of silicone and cling wrap using a structural soldering method by [DIY Perks] that’s also after the break. These work similarly but use force-sensing resistors instead of flex-sensing.

Networking several plants together could get expensive pretty quickly, but DIY flex sensors would help keep the BOM costs down. Continue reading “Interactive Plant Lamps For Quiet Spaces”

Smartphone Controlled Periodic Table Of Elements

It wouldn’t be much of a stretch to say that here at Hackaday, we’re about as geeky as they come. Having said that, even we were surprised to hear that there are people out there who collect elements. Far be it from us to knock how anyone else wishes to fill their days, but telling somebody at a party that you collect chemical elements is like one step up from saying you’ve got a mold and fungus collection at home. Even then, at least a completed mold and fungus collection won’t be radioactive.

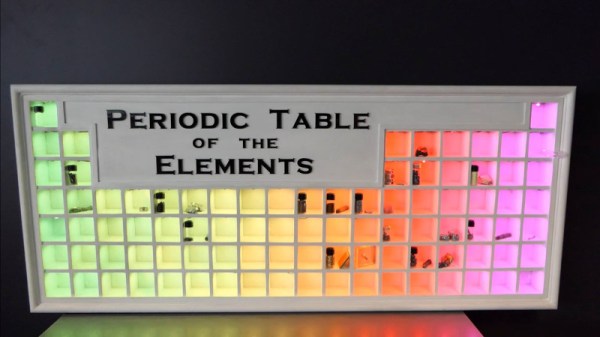
But if you’re going to spend your spare time working on a nerdy and potentially deadly collection, you might as well put it into an appropriate display case. You can’t just leave your Polonium sitting around on the kitchen counter. That’s the idea behind the interactive periodic table built by [Maclsk], and we’ve got to admit, if we get to put it in a case this awesome we might have to start our own collection.

A large portion of this project is building the wooden display case itself as, strangely enough, IKEA doesn’t currently stock a shelving unit that’s in the shape of the periodic table. The individual cells and edge molding are made of pine, the back panel is MDF, and the front of the display is faced off with thin strips of balsa to cover up all the joints. Holes were then drilled into the back of each cell for the LED wiring, and finally the entire frame was painted white.

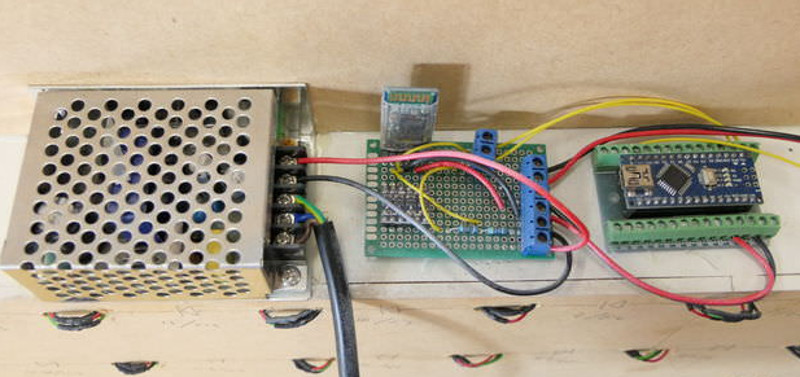
Each cell contains an WS2812B RGB LED, which at maximum brightness draws 60mA. Given the 90 cells of the display case, [Maclsk] calculated a 5.4A power supply would be needed to keep everything lit up. However, he found a 4A power supply that made his budget happier, which he reasons will be fine as long as he doesn’t try to crank every cell up to maximum at the same time. Control for the display is provided by an Arduino Nano and HC05 Bluetooth module.

The final piece of the project was the Android application that allows the user to control the lighting. But it doesn’t just change colors and brightness, it’s actually a way to visualize information about the elements themselves. The user can do things like highlight certain groups of elements (say, only the radioactive ones), or light up individual cells in order of the year each element was discovered. Some of the information visualizations are demonstrated in the video below, and honestly, we’ve seen museum displays that weren’t this well done.

We last caught up with [Maclsk] when he created a very slick robotic wire cutting machine, which we can only assume was put to work for this particular project. Too bad he didn’t have a robot to handle the nearly 540 soldering joints it took to wire up all these LEDs.

[via /r/DIY]

Continue reading “Smartphone Controlled Periodic Table Of Elements”