A Minimalist Weather Clock With A Unique Display

If you’re looking for a home hub to display weather, time, and important family information, the formula is pretty simple: build yet another “magic mirror” project. We’re not complaining — magic mirrors look great. But if all you need is time and weather, this elegant pixel display is something just a little bit different.

Among his many criteria for the perfect hack, [Dominic] lists usefulness, visual appeal, and low cost. We’ll agree that his minimalist weather clock hits all those marks, and with the careful selection of a 16 x 32-pixel RGB display module, [Dominic] ended up giving back to the community by developing an Arduino driver for it. He points out that strips of Neopixels could have been used for the display, but they’d have ended up costing more, so the LED matrix was a sensible choice. A 3D-printed separator grid and a paper diffuser provide the proper pixelated look, and some simple animated icons display the two-day weather forecast. We find the time and temperature numerals a little hard to read, but it’s not bad considering the limited resolution of the display. And the case is a nice bit of woodworking too. Not a bad result for only €43.

We’re intrigued by the P10 LED matrix module [Dominic] used for this one. It might be a good choice for a word clock and weather station, or with his driver, a display for just about anything.

A Lightsaber, With Rave Mode

How often after being exposed to Star Wars did you dream of having your own working lightsaber? These days — well, we don’t quite have the technology to build crystal-based weapons, but tailor-made lightsabers like redditor [interweber]’s are very much real.

Piggybacking off the Korbanth Graflex 2.0 kit — a sort of bare-bones lightsaber ready to personalize — [interweber] is using a Teensy 3.5 to handle things under the hilt. Instead of taking the easy route and cramming everything into said handle, a 3D printed a cradle for the electronics and speaker keep things secure. The blade is made up of two meters of APA102 LEDs.

As well as all the sound effects appropriate to ‘an elegant weapon for a more civilized age’, a cluster of buttons handle the various functions; , playing and cycling through music(more on that in a second), changing the color of the lightsaber — Jedi today, Sith tomorrow — enabling a flickering effect that mimics Kylo Ren’s lightsaber, color cycling, and a…. rave mode?

Continue reading “A Lightsaber, With Rave Mode”

1.5 Million Dollars Buys 850,000 LEDs And 29 Raspberry Pis

You think you like RGB LEDs? Columbus, OH art professor [Matthew Mohr] has more blinkenlove than you! His airport– convention-center-scale installation piece is an incredible 850,000 RGB LEDs wrapped around a 14-foot tall face-shaped sculpture that projection-maps participants’ faces onto the display. To capture images, there is also a purpose-built room with even illumination and a slew of Raspberry Pi cameras to take pictures of the person’s face from many angles simultaneously.

Besides looking pretty snazzy, the scale of this is just crazy. For instance, if you figure that the usual strip of 60 WS2812s can draw just about 9.6 watts full on, that scales up to 136 kW(!) for the big head. And getting the control signals right? Forgeddaboutit. Prof. [Mohr], if you’re out there, leave us some details in the comments.

(Edit: He did! And his website is back up after being DOSed. And they’re custom LEDs that are even brighter to compete with daylight in the space.)

What is it with airports and iconic LED art pieces? Does anyone really plan their stopovers to see public art? How many of you will fly through Columbus on purpose now?

Color Sensor From An RGB LED And A Photocell

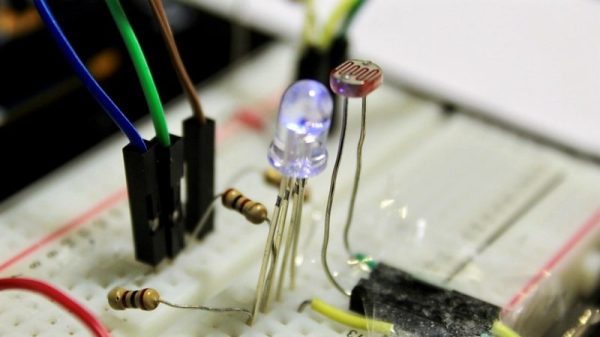
When you need to quantify the color of an object, you’ve got quite a few options. You can throw a Raspberry Pi camera and OpenCV at the problem and approach it through software, or you can buy an off-the-shelf RGB sensor and wire it up to an Arduino. Or you can go back to basics and build this reflective RGB sensor from an LED and a photocell.

The principle behind [TechMartian]’s approach is simplicity itself: shine different colored lights on an object and measure how much light it reflects. If you know the red, green, and blue components of the light that correspond to maximum reflectance, then you know the color of the object. Their sensor uses a four-lead RGB LED, but we suppose a Neopixel could be used as well. The photosensor is a simple cadmium sulfide cell, which measures the intensity of light bouncing back from an object as an Arduino drives the LED through all possible colors with PWM signals. The sensor needs to be white balanced before use but seems to give sensible results in the video below. One imagines that a microcontroller-free design would be possible too, with 555s sweeping the PWN signals and op-amps taking care of detection.

And what’s the natural endpoint for a good RGB sensor? A candy sorter, or course, of which we have many examples, from the sleek and polished to the slightly more hackish.

Continue reading “Color Sensor From An RGB LED And A Photocell”

Boredom + Lasers = Projector!

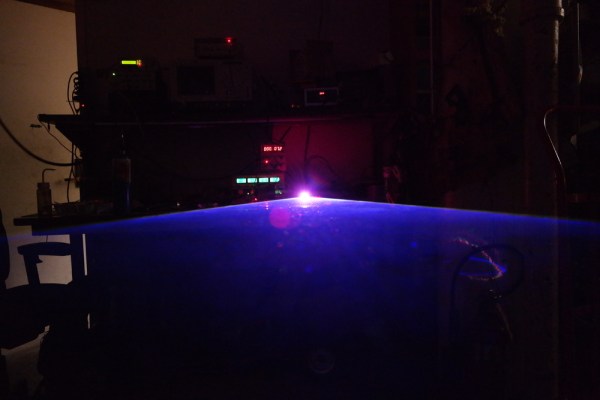
[Krazer], a post-doctoral researcher at MIT, loves him some lasers. When out of boredom one afternoon he hatched an idea for a laser projector, it grew until a few years later he wound up with this RGB laser for a projector — Mark IV no less.

In addition to 3D-printing the parts, the major innovation with this version is the ability to re-align the lasers as needed; tweaking the vertical alignment is controlled by a screw on the laser mounts while the horizontal alignment is done the same way on the mirror mounts. This simplifies the design and reduces the possibility of part failure or warping over time. An additional aluminium base epoxied to the projector aims to keep the whole from deforming and adds stability. With the help of a mirror for the final alignment — sometimes you must use what you have— the projector is ready to put on a show.

True to the spirit of the art [Krazer] used all open source software for this iteration, and sharing his designs means you can build your own for around $200. As always with lasers take extra precautions to protect your eyes! This 200mW setup is no joke, but that doesn’t mean fun and games are out of the question.

Rushing The Design And Construction Of LED Centerpieces

‘Dragon Flame’ RGB LED table centerpieces, by [Alex Lao]
Sometimes the most important thing is getting something done.

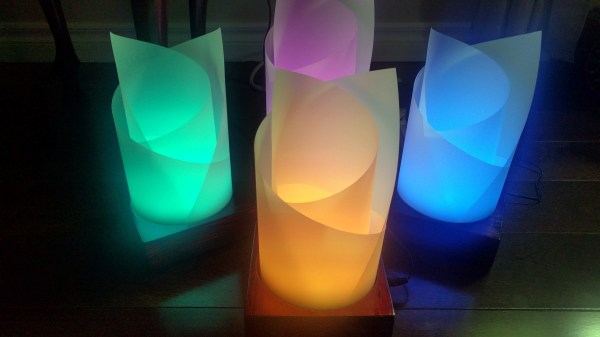
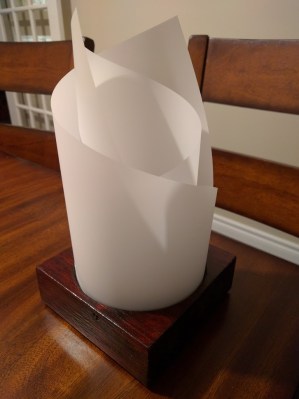
[Alex Lao] was recently in such a situation. His sister was getting married and he designed, built, and delivered twenty RGB LED table centerpieces in a rush. There were no prototypes made, and when the parts arrived all twenty were built all at once over a single weekend. These table centerpieces are illuminated by RGB LEDs and battery-powered, but have an option to be powered by a wall adapter.

[Alex] helpfully shared some tips on reducing the production risks and helping ensure results in such a limited time frame. His advice boils down to this: reduce the unknowns. For Alex this meant re-using code and components from a previous project — even if they were not optimal — so that known-good schematic and footprint libraries could be used for the design.

From one perspective, the PIC32 microcontroller inside each lamp is overkill for an LED centerpiece. From another perspective, it was in fact the perfect part to use because it was the fastest way for [Alex] to get the devices working with no surprises.

For an added perspective on needing to get production right the first time on a much larger scale, be sure to check out getting an installation made up of 25,000 PCBs right the first time.

A Hypnotizing Interactive Art Piece For Visualizing Color Theory

Digital color theory can be a tricky concept to wrap one’s mind around – particularly if you don’t have experience with digital art. The RGB color model is about as straightforward as digital color mixing gets: you simply set the intensity of red, green, and blue individually. The result is the mixing of the three colors, based on their individual intensity and the combined wavelength of all three. However, this still isn’t nearly as intuitive as mixing paint together like you did in elementary school.

To make RGB color theory more tangible, [Tore Knudsen and Justin Daneman] set out to build a system for mixing digital colors in a way that reflects physical paint mixing. Their creation uses three water-filled containers (one each for red, green, and blue) to adjust the color on the screen. The intensity of each color is increased by pouring more water into the corresponding container, and decreased by removing water with a syringe.

An Arduino is used to detect the water levels, and controls what the user sees on the screen. In one mode, the user can experiment with how the color levels affect the way a picture looks. The game mode is even more interesting, with the goal being to mix colors to match a randomly chosen color that is displayed on the screen.

The practical applications for this project may be somewhat limited, but as an interactive art piece it’s hypnotizing. And, it may just help you with understanding RGB colors for your next project.

Continue reading “A Hypnotizing Interactive Art Piece For Visualizing Color Theory”