Listen, it hurts to hear, but somebody needs to say it. It’s over, OK? You’ve got to admit it and move on. Sure, you could get away with it for a week or two in January, but now it’s just getting weird. No matter how hard you fight it, the facts are the facts: the holidays are over. It’s time to pack up all those lights and decorations before the neighbors really start talking.
But don’t worry, because there’s an upside. Retailers are now gearing up for their next big selling season, which means right now clearance racks the world over are likely to be playing home to holiday lights and decor. That wouldn’t have been very interesting to the average hacker or maker a few years ago, after all, there’s only so much you can do with a string of twinkle lights. But today, holiday decorations are dripping with the sort of high-tech features you’d expect from gadgets that are actively aiming to be obsolete within the next ten months or so.
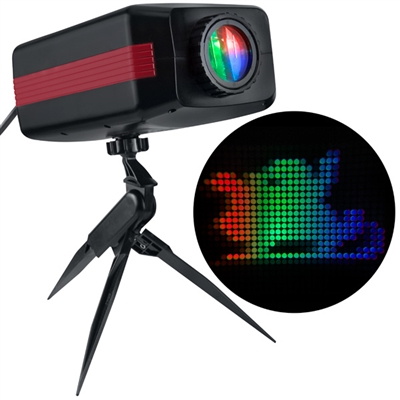
Case in point, the “AppLights Personalized Projection” which I found sulking around the clearance section of the Home Depot a couple weeks back. This device advertises the ability to project multi-color custom messages and animations on your wall, and is configured over Bluetooth with a companion application on your Android or iOS device. At a minimum we can assume the device must contain a fairly powerful RGB LED, an LCD to shine the light through, and some sort of Bluetooth-compatible microcontroller. For $20 USD, I thought it was worth taking a shot on.
Around this time last year, the regular Hackaday reader may recall I did a teardown for a Christmas laser projector. Inside we found red, green, and blue lasers of considerable power, as well as all the optics and support hardware to get them running. It was a veritable laser playground for $14. Let’s see if the AppLights projector turns out to be a similar electronic cornucopia, and whether or not we’ve got a new Hackaday Holiday tradition on our hands.
Continue reading “Teardown: AppLights Personalized Projection”