Protect Your Coffee Machine With A Filter Monitor

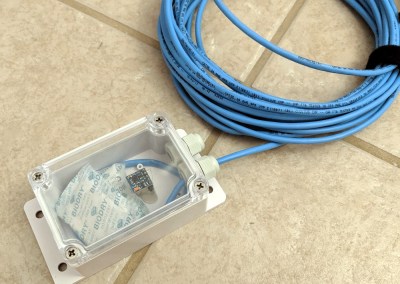
Coffee machines are delicate instruments, likely to be damaged by limescale. Thus they will often have a filter present, but filters have a limited capacity of water upon which they can be effective. At Make Bournemouth, they have approached the problem of when to change filters on their coffee machine by applying a bit of high-tech.

The water passing through the filter is monitored by a couple of DFRobot TDS modules, a flow meter, and a DS18B20 temperature sensor. The data from these is fed into an ESP32 dev board, which makes it available by a web interface for handy accessibility through a smartphone. It can then be used to work out how much of the filter’s capacity has been used, and indicate when a replacement is needed. All the code is available in a GitHub repository, and with luck now Bournemouth’s hackerspace will never see the coffee machine succumb to limescale.

Of course, this isn’t the first coffee maker water hack we’ve brought you. A year or two ago we told you about somebody making their pod coffee maker auto-fill too.

Storm Chasers Score Bullseye On Tornado With Instrument-Packed Rocket

Model rockets are a heck of a lot of fun, and not a few careers in science and engineering were jump-started by the thrilling woosh and rotten-egg stench of an Estes rocket launch. Adding simple instrumentation to the rocket doubles the fun by allowing telemetry to be sent back, or perhaps aiding in recovery of a lost rocket. Sending an instrument-laden rocket into a tornado is quite a few notches past either of those scenarios, and makes them look downright boring by comparison.

A first and hopefully obvious point: just don’t do this. [ChasinSpin] and [ReedTimmer] are experienced storm chasers, and have a small fleet of purpose-built armored vehicles at their disposal. One such vehicle, the Dominator, served as a mobile launch pad for their rocket as they along with [Sean Schofer] and [Aaron Jayjack] chased what developed into an EF4 monster tornado near Lawrence, Kansas on May 28. They managed to score a direct hit on the developing tornado, only 100 feet (30 meters) away at the time, and which took the rocket to 35,000 ft (10.6 km) and dragged it almost 30 miles (42 km) downrange. They lost touch with it but miraculously recovered it from a church parking lot.

They don’t offer a lot of detail on the rocket itself, but honestly it looks pretty much off-the-shelf, albeit launched from an aimable launchpad. [ChasinSpin] does offer a few details on the instrument package, though – a custom PCB with GPS, IMU, a temperature/humidity/barometric pressure sensor, and a LoRa link to send a data packet back every second. The card also supported an SD card for high-resolution measurements at 10 times per second. Check out the launch in the video below, and be sure to mouse around to get a look at the chaotic environment they were working in.

Even if this isn’t as cool as sending a sounding rocket into an aurora, it’s still really cool. We’re looking forward to seeing what kind of data this experiment collected, and what it reveals about the inner workings of these powerful storms.

Continue reading “Storm Chasers Score Bullseye On Tornado With Instrument-Packed Rocket”

Better Simulators With Homemade Potentiometers

Perhaps you’ve played a flight simulator before, using something like a mouse and keyboard. That’s a fine experience, but like any other activity you can get a lot more out of it if you put a little more effort into the experience. Some will upgrade to a joystick for a modest improvement, and others will build incredible accurate cockpit replicas down to the smallest detail. The builders of these “pits” are always looking for ways of improving their setups, and it’s from this world that we find a method of building specialized, inexpensive hall-effect sensors.

A hall-effect sensor is a circuit that outputs a voltage based on the presence of an external magnetic field. These can be used to make compasses, but with a permanent magnet in close proximity can also be used to create a potentiometer-like device at lower cost and with higher precision than a similarly-priced pot. There was a method of building these in the simulator world using the housing of a Bic pen and some strong glue, but [LocNar] has improved on this method as well. He repurposed some bearings and some stock metal tubing in order to fabricate a professional-level sensor at a fraction of the cost.

This build is essentially a solution for anyone needing a potentiometer that’s easier to build, less expensive, has higher precision, and interacts with a digital input in a much more predictable (and programmable) way. Certainly this has applications in the simulator world, but will work for many other applications. If you’ve never thought about the intricacies (and shortcomings) of potentiometers, some other folks have taken a deep dive into that as well.

Thanks to [Keith O] for the tip!

LED Matrix And A Phototransistor Make A Reverse Camera

A digital camera has an array of sensors that captures light reflected or transmitted onto it. This build is something closer to a reverse camera – a single sensor that makes images on a matrix of LEDs. And we think it’s pretty neat.

We have to admit to being a little confused by [marciot]’s LED matrix scanner when we first stumbled upon it. From the video below we thought that the LEDs in the matrix were being used both to detect incident light and as a display. We’ve seen LEDs used as photodiodes before, so such a contraption could work, but that’s not what’s going on here. A phototransistor is wired to an Arduino Uno and positioned above a 32×32 RGB LED matrix. A scanning routine rasters over the LEDs in the matrix while the sensor watches, and then the program turns on the LEDs that the sensor saw during the scan. Positioned far above the matrix, a large disc of light results, making it look like the phototransistor is beaming light down onto the matrix. The effect is reinforced by placing something between the sensor and the matrix, which casts a virtual shadow. Used close to the LEDs the sensor acts more like a light pen.

It’s a cool effect and it looks like a fun project to throw together. Refresh time could perhaps be a bit snappier, though; maybe an ESP32 could help with that.

Continue reading “LED Matrix And A Phototransistor Make A Reverse Camera”

Flexible PCB Contest Round Up

The 2019 Hackaday Prize, which was announced last week, is very much on everyone’s mind, so much so that we’ve already gotten a great response with a lot of really promising early entries. As much as we love that, the Prize isn’t the only show in town, and we’d be remiss to not call attention to our other ongoing contest: The Flexible PCB Contest.

The idea of the Flexible PCB Contest is simple: design something that needs a flexible PCB. That’s it. Whether it’s a wearable, a sensor, or a mechanism that needs to transmit power and control between two or more moving elements, if a flexible PCB solves a problem, we want to know about it.

We’ve teamed up with Digi-Key for this contest, and 60 winners will receive free fabrication of three copies of their flexible PCB design, manufactured through the expertise of OSH Park. And here’s the beauty part: all you need is an idea! No prototype is necessary. Just come up with an idea and let us know about it. Maybe you have a full schematic, or just a simple Fritzing project. Heck, even a block diagram will do. Whatever your idea is for a flexible PCB project, we want to see it.

To get the creative juices going, here’s a look at a few of the current entries

The Flexible PCB Contest goes through May 29, so you’ve got plenty of time to get an idea together.

Flex PCBs Make Force-Mapping Pressure Sensor For Amputee

What prosthetic limbs can do these days is nothing short of miraculous, and can change the life of an amputee in so many ways. But no matter what advanced sensors and actuators are added to the prosthetic, it has to interface with the wearer’s body, and that can lead to problems.

Measuring and mapping the pressure on the residual limb is the business of this flexible force-sensing matrix. The idea for a two-dimensional force map came from one of [chris.coulson]’s classmates, an amputee who developed a single-channel pressure sensor to help him solve a painful fitting problem. [chris.coulson] was reminded of a piezoresistive yoga mat build from [Marco Reps], which we featured a while back, and figured a scaled-down version might be just the thing to map pressure points across the prosthetic interface. Rather than the expensive and tediously-applied web of copper tape [Marco] used, [chris] chose flexible PCBs to sandwich the Velostat piezoresistive material. An interface board multiplexes the 16 elements of the sensor array to a PIC which gathers and records testing data. [chris] even built a test stand with a solenoid to apply pressure to the sensor and test its frequency response to determine what sorts of measurements are possible.

We think the project is a great application for flex PCBs, and a perfect entry into our Flexible PCB Contest. You should enter too. Even though [chris] has a prototype, you don’t need one to enter: just an idea would do. Do something up on Fritzing, make a full EAGLE schematic, or just jot a block diagram down on a napkin. We want to see your ideas, and if it’s good enough you can win a flex PCB to get you started. What are you waiting for?

Make A Non-Contact Voltage Probe

You’ve probably seen probes that detect live wires in, for example, home wiring, without having to actually probe the wire. These are sometimes used to test strings of Christmas lights, too. We’ve even seen the sensors built into a voltmeter. [Crazy Couple] has a few do-it-yourself versions that can do the job. You can see the circuits in the video below.

A contactless probe picks up the changing magnetic field around an unshielded wire with an AC voltage on it. Current doesn’t have to be flowing since it picks up the voltage (for example, you can detect voltage on a switch that is turned off or a Christmas tree light that is burned out. There are several different circuits using chips ranging from a CMOS IC to a 555. There’s also a version with three bipolar transistors.

Continue reading “Make A Non-Contact Voltage Probe”