Displaying Incoming Server Attacks By Giving Server Logs A Scoreboard

In the server world, it’s a foregone conclusion that ports shouldn’t be exposed to the greater Internet if they don’t need to be. There are malicious bots everywhere that will try and randomly access anything connected to a network, and it’s best just to shut them off completely. If you have to have a port open, like 22 for SSH, it’ll need to be secured properly and monitored so that the administrator can keep track of it. Usually this is done in a system log and put to the side, but [Nick] wanted a more up-front reminder of just how many attempts were being made to log into his systems.

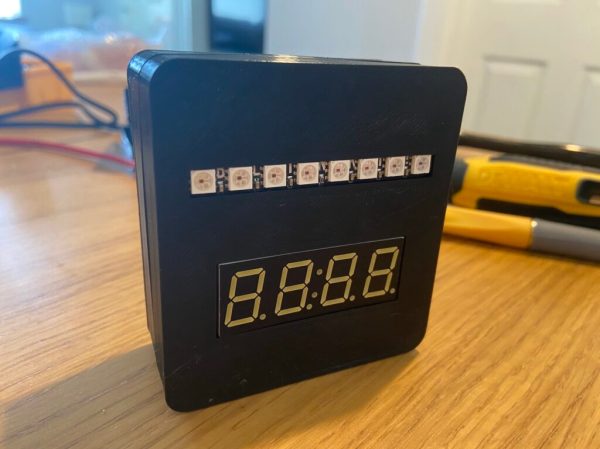
This build actively monitors attempts to log into his server on port 22 and notifies him via a numerical display and series of LEDs. It’s based on a Raspberry Pi Zero W housed in a 3D-printed case, and works by interfacing with a program called fail2ban running on the server. fail2ban‘s primary job is to block IP addresses that fail a certain number of login attempts on a server, but being FOSS it can be modified for situations like this. With some Python code running on the Pi, it is able to gather data fed to it from fail2ban and display it.

[Nick] was able to see immediate results too. Within 24 hours he saw 1633 login attempts on a server with normal login enabled, which was promptly shown on the display. A video of the counter in action is linked below. You don’t always need a secondary display if you need real-time information on your server, though. This Pi server has its own display built right in to its case.

Continue reading “Displaying Incoming Server Attacks By Giving Server Logs A Scoreboard”

Mechanical Seven-Segment Display Really Sticks Out From The Pack

We’ve been displaying numbers using segmented displays for almost 120 years now, an invention that predates the LEDs that usually power the ubiquitous devices by a half-dozen decades or so. But LEDs are far from the only way to run a seven-segment display — check out this mechanical seven-segment display for proof of that.

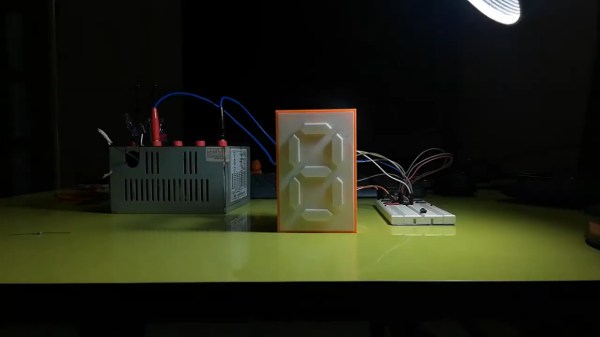
We’ve been seeing a lot of mechanical seven-segment displays lately, and when we first spotted [indoorgeek]’s build, we thought it would be a variation on the common “flip-dot” mechanism. But this one is different; to form each numeral, the necessary segments protrude from the face of the display slightly. Everything is 3D-printed from white filament, yielding a clean look when the retracted but casting a sharp shadow when extended. Each segment carries a small magnet on the back which snuggles up against the steel core of a custom-wound electromagnet, which repels the magnet when energized and extends the segment. We thought for sure it would be loud, but the video below shows that it’s really quiet.

While we like the subtle contrast of the display, it might not be enough for some users, especially where side-lighting is impractical. In that case, they might want to look at this earlier similar display and try contrasting colors on the sides of each segment.

Continue reading “Mechanical Seven-Segment Display Really Sticks Out From The Pack”

Mechanical Seven-Segment Display Mixes Art With Hacking

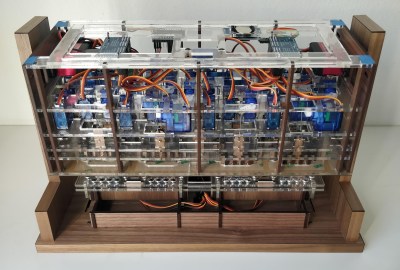
We’re not sure what to call this one. Is it a circuit sculpture? Sort of, but it moves, so perhaps it’s a kinetic circuit sculpture. Creator [Tomohiro Tsuchita] calls it “something beautiful but totally useless,” which we find a tad harsh. But whatever you call it, we think this mechanical seven-segment display is really, really cool.

Before anyone gets to thinking that this is something like the other mechanical seven-segment displays we’ve seen lately, think again. This one is not addressable; it simply goes through the ten digits in order. So you won’t be building a clock from it, although we suppose the mechanism could be modified to allow that. Then again, looking at that drive train of laser-cut acrylic cams, maybe not. Each segment has its own cam with lobes or valleys for each segment. A cam follower lowers and raises the segments as the cams rotate on a common shaft. A full-rotation servo powers the display under the control of a Micro:bit; the microcontroller is overkill for now but will be used in version two, which will allow the speed to change in response to sensors.

Watching this display change at its stately pace is strangely soothing. We love the look of this, but then again, we’re partial to objets d’art-circuit. After all, we ran a circuit sculpture contest earlier in the year, and just wrapped up a Hack Chat dedicated to the subject.

Continue reading “Mechanical Seven-Segment Display Mixes Art With Hacking”

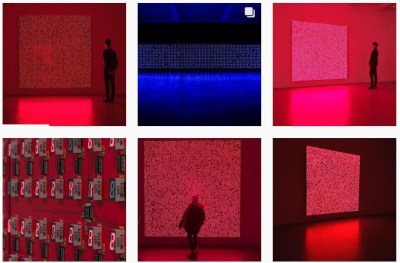
Daisy Chained Seven Segment Art Display


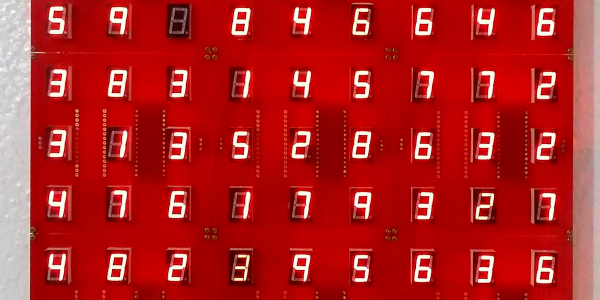
This seven segment art display makes use of a 81 seven segment red common cathode LED displays. The LEDs are arranged onto 100x100mm boards that each contain an Arduino Nano and 9 seven segment displays, daisy chained through three-pin headers located on the sides of the boards. The pins (power, ground, and serial) provide the signals necessary for propagating a program across each of the connected boards.

The first board – with two Arduino Nanos – sends instructions for which digits to light and drives the display, sending the instructions over to the next board on the chain.

In a multiplexed arrangement, a single Arduino Nano is able to drive up to 12 seven segment displays, but only 9 needed to be driven for the program, keeping D13’s built in LED and the serial pins free. Since no resistors are featured on the boards, current limiting is done through software. This was inspired by the Bubble LED displays on the Sinclair Scientific Calculator, and was done in order to achieve a greater brightness by controlling the current through the duty cycle.

The time between digits lighting up is 2ms, giving them some time to cool down. The animations in the demos featured falling and incrementing digits, as well as a random number generator using a linear feedback shift register.

Continue reading “Daisy Chained Seven Segment Art Display”

Making A Digital Clock A Little More Intuitive

Digital clocks are extremely useful and generally considered pretty easy to read. However, they can sometimes have rather arcane interfaces for setting the time and alarms. For [Michael Wessel], he noted that in the 1980s he had to routinely help his grandparents set their clocks for this very reason. That inspired his most recent project – a digital clock that’s intuitive to use.

Many digital clocks work in the same way, in which a digit of the time is set, before another button is pressed to cycle to the next digit. This can get confusing, so [Michael] went a different way. Instead, each digit can be cycled through using its own button, which can make things easier. It’s not readily apparent how one chooses to set the time, date, or alarm, but it’s an interesting take on how to create such an interface.

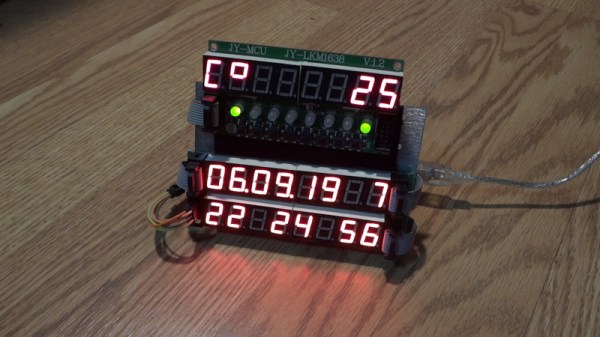
The clock relies on an Arduino Mega to run the show, with an RTC for timekeeping and a temperature sensor to boot. There’s also a sound sensor, which allows the alarms to be shut off with the clap of a hand or by shouting “STOP” at the alarm. Overall, it’s a tidy build with that hacker-favourite seven-segment aesthetic. Of course, you can take that very concept to its extremes, too. Video after the break.

Continue reading “Making A Digital Clock A Little More Intuitive”

Tiny Two-Digit Thermometer Has Long Battery Life

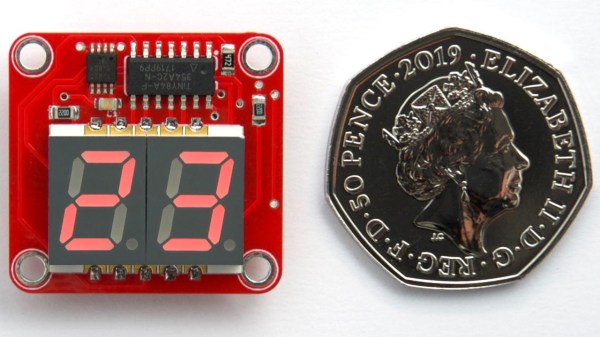
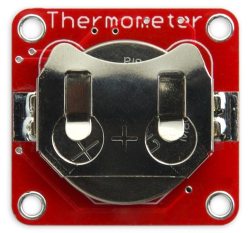
Like most of his work, this tiny two-digit thermometer shows that [David Johnson-Davies] has a knack for projects that make efficient use of hardware. No pin is left unused between the DS18B20 temperature sensor, the surface mount seven-segment LED displays, and the ATtiny84 driving it all. With the temperature flashing every 24 seconds and the unit spending the rest of the time in a deep sleep, a good CR2032 coin cell should power the device for nearly a year. The board itself measures only about an inch square.

You may think that a display that flashes only once every 24 seconds might be difficult to actually read in practice, and you’d be right. [David] found that it was indeed impractical to watch the display, waiting an unknown amount of time to read some briefly-flashed surprise numbers. To solve this problem, the decimal points flash shortly before the temperature appears. This countdown alerts the viewer to an incoming display, at the cost of a virtually negligible increase to the current consumption.

[David]’s project write-up explains how everything functions. He also steps through the different parts of the source code to explain how everything works, including the low power mode. The GitHub repository holds all the source files, and the board can also be ordered direct from OSH Park via their handy shared projects feature.

Low power consumption adds complexity to projects, but the payoffs can easily be worth the time spent implementing them. We covered a detailed look into low power WiFi microcontrollers that is still relevant, and projects like this weather station demonstrate practical low power design work.

Random Word Pairings Mark The Time On This Unusual Clock

Gosh, the fun we had when digital calculators became affordable enough that mere grade school students could bring one to class. The discovery that the numbers could be construed as the letters of various dirty words when viewed upside down was the source of endless mirth. They were simpler times.

This four-letter-word “clock” aims to recreate that whimsical time a bit, except with full control over the seven-segment displays and no need to look at it upside down. This descends from a word clock [WhiskeyTangoHotel] made previously and relies on a library of over 1000 four-letter words that can be reasonably displayed using seven-segment displays, most of them SFW but some mildly not. A PICAXE is used to select two of the four-letter words to display every second or so, making this a clock only by the loosest of definitions. Word selection is pseudorandom, seeded by noise from a floating ADC pin, but some of the word pairings in the video below seem to belie a non-random sense of humor. As is, there are over a million pairings possible; it might be fun to add in the full set of two- and three-letter words as well and see what sort of merriment ensues.

While we like the Back to the Future vibe here, we’ve seen some other really nice word clocks lately. There was the one that used PCBs as the mask for the characters, and then a rear-projection word clock that really looks great.

Continue reading “Random Word Pairings Mark The Time On This Unusual Clock”