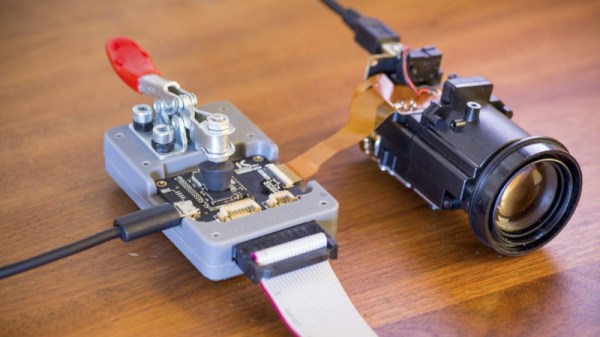
If you’re familiar with the DSLR camera market, you’d know that modern lenses are works of technological art. Crammed full of motors and delicate electronic assemblies, they’re bursting with features such as autofocus, optical stabilization and zoom. [Saulius Lukse] has been experimenting with motorized lenses for webcam applications, and has built a controller to make working with them a snap.
The controller is capable of controlling up to 3 stepper motors, as well as a voice coil, which should be enough for the vast majority of lenses out there. Microstepping is supported, which is key for optical systems in which tiny adjustments can make a big difference. The controller speaks USB and I2C, and is now based on an STM32 chip, having been upgraded from an earlier version which used the venerable ATmega328. The board is designed to be as compact as possible, to enable it to neatly fit inside camera and lens assemblies.
The board has been used to successfully control an 18x zoom lens, among others. Combining such a lens with a webcam and a good pan and tilt mechanism would create a highly capable surveillance package, or an excellent vision system for a robot.
It’s not the first time we’ve seen work from [Kurokesu] in these parts – they’ve done work on pedestrian detection before, too.
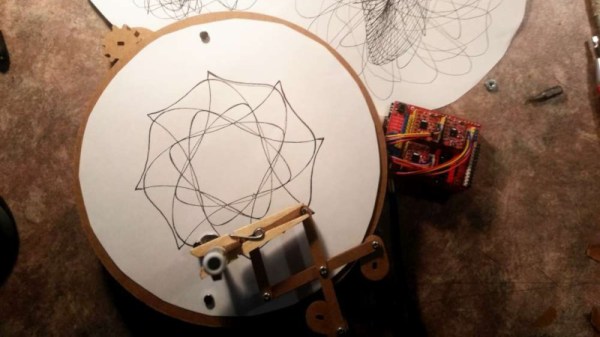
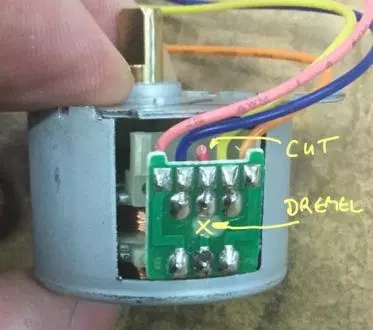
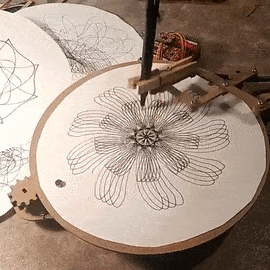 The machine uses a rotating turntable to spin a piece of drawing paper. A pen is then placed in a pantograph mechanism, controlled by another two stepper motors. The build uses the common 28BYJ-48 motor, which are a unipolar, 5-wire design. A common hack is to open these motors up and cut a trace in order to convert them to bipolar operation, netting more torque at the expense of being more complex to drive. [InventorArtist] worked in collaboration with [Doug Commons], who had the idea of instead simply drilling a hole through the case of the motor to cut the trace. This saves opening the motor, and makes the conversion a snap.