Laser Engraver Uses All Of The DVD Drive

For the last ten to fifteen years, optical drives have been fading out of existence. There’s little reason to have them around anymore unless you are serious about archiving data or unconvinced that streaming platforms will always be around. While there are some niche uses for them still, we’re seeing more and more get repurposed for parts and other projects like this tabletop laser engraver.

The build starts with a couple optical drives, both of which are dismantled. One of the shells is saved to use as a base for the engraver, and two support structures are made out of particle board and acrylic to hold the laser and the Y axis mechanism. Both axes are made from the carriages of the disassembled hard drives, with the X axis set into the base to move the work piece. A high-output laser module is fitted to the Y axis with a heat sink, and an Arduino and a pair of A4988 motor controllers are added to the mix to turn incoming G-code into two-dimensional movement.

We’ve actually seen a commercial laser engraver built around the same concept, but the DIY approach is certainly appealing if you’ve got some optical drives collecting dust. Otherwise you could use them to build a scanning laser microscope.

Continue reading “Laser Engraver Uses All Of The DVD Drive”

Wood game piece being carved by a CNC mill with a hacked rotary axis

This $12 CNC Rotary Axis Will Make Your Head Spin

[legolor] brings us a great, cheap rotary axis to add to your small 3 axis CNC mills. How are you going to generate G-Code for this 4th axis? That’s the great part, and the hack, that [legolor] really just swapped the Y axis for the rotation. To finish the workflow and keep things cheap accessible to all there’s a great trick to “unwrap” your 3D model so your CAM software of choice thinks it’s still using a linear Y axis and keeps your existing workflow largely intact. While this requires an extra step in Blender to do the unwrapping, we love the way this hack changes as little of the rest of your process as possible. The Blender script might be useful for many other purposes too.

Wood game pieces carved from wood by a CNC mill with a hacked rotary axis

The results speak for themselves too! We thought the 3D printed parts were suspect in a CNC setup, but for the small scale of game pieces and milling wood, the setup is stable enough to produce a surprisingly accurate and detailed finish. If you want to try the same approach with something larger or a tougher material, [legolor] has a suggestion of a tailstock setup that’s still under $100 USD. Continue reading “This $12 CNC Rotary Axis Will Make Your Head Spin”

Mag Loop Antenna Has A Brain

Magnetic loop antennas are great if you are limited on space since they are just a potentially small loop of wire. The problem is, they are sharply tuned. You normally have an adjustment capacitor to tune the antenna to different frequencies. [TekMakerUK] built one with a motor and an Arduino that he can tune from an Android phone. You can see more about the project in the video below.

If you want to transmit, the capacitor is often the weak part of the system. Luckily, some old gear yielded a capacitor with multiple sections and enough plate distance to handle the 5W desired. Of course, motor driving a capacitor isn’t a new idea, but this setup is nice since it uses a stepper motor and a rotary encoder.

Continue reading “Mag Loop Antenna Has A Brain”

A white, house-shaped clock with the words "TEMPUS NECTIT" written in faux Roman script in black on a strip of silver at the base of the "roof." a white power cord extends from the left of the enclosure, and the center of the clock is a 22 pin knitting machine wheel with one pin covered in silver metalic. A white plastic peg extends from the bottom right of the enclosure to hold the feedstock yarn.

Tempus Nectit, A DIY Knitting Clock With Instructions

We’re no strangers to unusual clocks here at Hackaday, and some of our favorites make time a little more tangible like [Kyle Rankin]’s knitting clock.

Inspired by our coverage of [Siren Elise Wilhelmsen]’s knitting clock, [Rankin] decided to build one of his own. Since details on the build from the original artist were sparse, he had to reverse engineer how the device worked. He identified that a knitting clock is essentially a knitting machine with a stepper motor replacing the hand crank.

Using a Raspberry Pi with an Adafruit motor hat connected to a stepper motor and a 3D printed motor adapter, [Rankin] was able to drive the knitting machine to do a complete round of knitting every twelve hours. By marking one of the knitting pegs as an hour hand, the clock works as a traditional clock in addition to its year-long knitting task. [Rankin] says he still has some fine tuning to work on, but that he’s happy to have had the chance to combine so many of his interests into a single project.

If you’re looking for more knitting hacks, check out this knitted keyboard instrument or a knitted circuit board.

Continue reading “Tempus Nectit, A DIY Knitting Clock With Instructions”

Stepper Killer Killer Killed, Repair Attempted

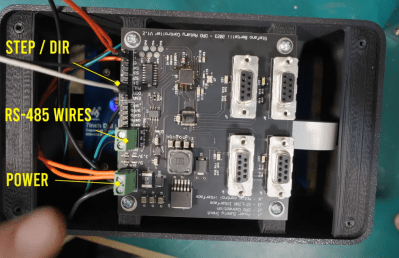
The low-cost servo motor in [Clough42]’s lathe’s electronic leadscrew bit the dust recently, and he did a great job documenting his repair attempts ( see video below the break ). When starting the project a few years ago, he studied a variety of candidate motors, including a ClearPath servo motor from Teknic’s “Stepper Killer” family. While that motor was well suited, [Clough42] picked a significantly lower-cost servo motor from China which he dubbed the “Stepper Killer Killer”.

He does a very thorough post-mortem of the motor’s integrated servo controller, checking the circuits and connections on the interface PCB first. Not finding any obvious problem, he proceeds to the main PCB which contains the microcontroller, motor driver transistors, and power supplies. There is no visible damage, but a check of the logic power supply shows 1.65V where 3.3V is expected. Looking at the board with a smart-phone mounted IR camera, he quickly finds the bad news — the microcontroller has shorted out.

Continue reading “Stepper Killer Killer Killed, Repair Attempted”

3-DOF Robot Arm Wrist Without The Motor Weight

A major challenge of robotic arms is the weight of the actuators, especially closer to the end of the arm. The long lever arm means more torque is required from the other actuators, and everything flexes a bit more. To get around this, [RoTechnic] moved the wrist stepper motors off the arms entirely.

He built a push-pull mechanism that uses braided fishing line to transfer motion to the robot arm’s wrist using Bowden tubes. The motors are mounted on the arm’s base, with a drum and two lengths of fishing line on the shafts. The lines pass through an adjustable tensioner before entering the Bowden tubes. This drum mechanism is also present on each of the three rotating axes of the wrist.

[RoTechnic] used an Arduino-powered RAMPS board as a controller, which is programmed to accept over the serial interface. He created a simple GUI and scripting interface in Jupyter Labs to generate and send command, which seems like an excellent solution for testing.

We can see this mechanism being a useful for a variety of motion applications, and definitely something to add to the idea toolbox. It is somewhat similar to some other cable-operated joints we’ve seen in humanoid robots and other 3D printed arms.

Continue reading “3-DOF Robot Arm Wrist Without The Motor Weight”

Flux: A Forty Foot Long Kinetic Art Piece

No office space is complete without some eye-catching art piece to gawp at whilst you mull over your latest problem. But LED-based displays are common enough to be boring these days. Kinetic art pieces are where it’s at, and this piece called Flux is a perfect example.

Commissioned for the Toronto office of a very popular e-commerce platform and constructed by [Nicholas Stedman], Flux consists of twenty identical planks on the ceiling, arranged in a line forty feet long. Each plank has a pair of rotating prisms, constructed from a stack of foam sheets, finished with metallic paint. The prisms are spun by individual stepper motors, each of which is driven by a TMC2160-based module, making them whisper-quiet.

A simple 3D printed bracket holds a small PCB holding an AMS AS5600 rotary magnetic encoder, onto the rear of the stepper motor. This allows for closed-loop feedback to the shared Arduino, which is very important for a sculpture such as this. Each Arduino is hooked up to a Raspberry Pi, running a simple application written in node.js which is responsible for coordinating movement, as well as uploading updated firmware images as required. A simple, but very effective build, we think!

Even more fun are kinetic art installations that are reactive to some data source, such as Adad, which visualizes lightning strike data. If these builds are just too big and complex, we’ve seen many examples of smaller desktop toys, such as this 3D printed tumbling chain demo for example.

Continue reading Flux: A Forty Foot Long Kinetic Art Piece”