Smooth Moves From Cheap Motors

Building an electric motor isn’t hard or technically challenging, but these motors have very little in the way of control. A stepper motor is usually employed in applications that need precision, but adding this feature to a motor adds complexity and therefore cost. There is a small $3 stepper motor available, but the downside to this motor is that it’s not exactly the Cadillac of motors, nor was it intended to be. With some coaxing, though, [T-Kuhn] was able to get a lot out of this small, cheap motor.

To test out the motors, [T-Kuhn] built a small robotic arm. He began by programming his own pulse generating algorithm that mimics a sine wave in order to smooth out the movement of the motor. An Arduino isn’t fast enough to do these computations, though, so he upgraded to using the ESP32. He also was able to implement the inverse kinematics on his own. The result of all this work for a specific platform and motor type is a robotic arm that has a very low cost but delivers performance of much more expensive hardware.

The robot arm was built by [T-Kuhn] too, and all of the details on that build, as well as all the schematics and code, are available on the project site if you need a low-cost robot arm or a good stepper motor controller for a low cost. There are many other ways of getting the most out of other types of low-cost motors as well.

Continue reading “Smooth Moves From Cheap Motors”

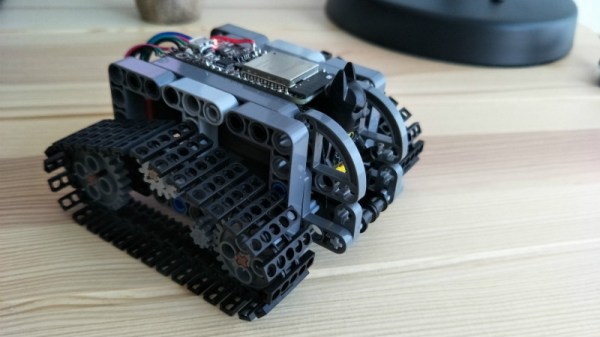
Mini LEGO Technic Tank Patrols Your Desk Under ESP32 Control

We probably don’t have to tell the readers of Hackaday that LEGO isn’t just for kids; we’ve seen plenty of projects that live in an enclosure made of the multi-color bricks, and let’s not even get started on the Mindstorms builds we’ve seen over the years. But while LEGO (and especially the Technic product line) is fine for prototyping and putting together quick projects, the stock electronic components aren’t exactly top of the line. Which is why [Jason Kirsons] has been working on bridging the gap between LEGO and “real” parts.

His LEGO Technic tank is a perfect example of this principle. While the tank design itself is standard LEGO fare, he’s gone all in on the electronics. With an Adafruit Feather ESP32, custom motor controller board, and NEMA 8 steppers with 3D printed Technic adapters, this little tank has a lot more going on under the hood than you might expect. While this project is more a proof of concept than anything, the methods [Jason] demonstrates might be something to consider the next time you’re building with Billund’s best.

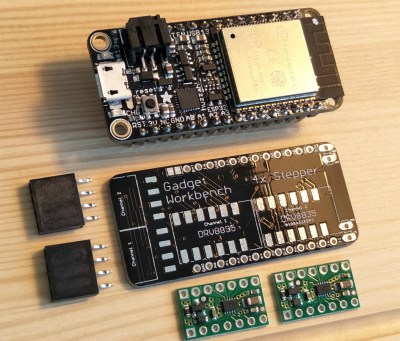
[Jason] chose the Feather ESP32 because of its small size, but you could get away with a generic board if you’re not trying to compress everything down into such a small footprint. Of course, if you go with another board you won’t be able to use the PCB he’s designed which attaches to the Feather and holds four Pololu DRV8835 motor drivers.

Easily the most broadly applicable element of this project is the work [Jason] has done designing adapter plates that let you use NEMA 8 motors with LEGO Technic parts. He’s put the adapters up on Thingiverse, for anyone looking for a drop-in solution to give their Technic creations a bit more oomph (technical term).

LEGO has a long history with hackers and makers. We’ve covered some absolutely incredible projects built with the famous construction set, and we don’t see any sign of it slowing down in the future.

Continue reading “Mini LEGO Technic Tank Patrols Your Desk Under ESP32 Control”

Bot Makes Etch A Sketch Art In One Continuous Line

Introduced in 1960 for the princely sum of $2.99 ($25.00 today), Etch A Sketch was to become a standard issue item for the Baby Boomers’ toy box. As enchanting as the toy seems, it’s hard to see why it had staying power: it was hard for young fingers to twirl the knobs, diagonal lines and smooth curves required a concert pianist’s fine motor control, and whatever drawings we managed to make were erased at the slightest jostle of the tablet.

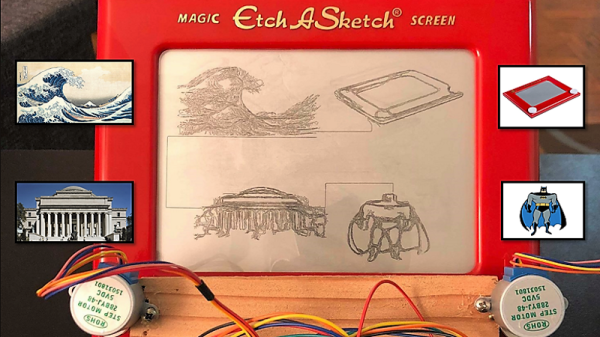
Intent on righting these wrongs, [Sunny Balasubramanian] not only motorized an Etch A Sketch, but he’s also given it a mind of its own in a way. For those unfamiliar with the toy, it’s basically a manual X-Y plotter that drags a stylus across the underside of a glass screen, scraping off a silver powder clinging to the glass to make dark lines. Replacing the knobs with steppers is straightforward, of course, but driving them is the trick. [Sunny] hooked his up to a Raspberry Pi and wrote some Python code to drive them. The Pi also accepts input image files and processes them for rendering through the plotter, first doing Canny edge detection in OpenCV, then plotting a single path through the largest collection of connected pixels in the image. From there it’s just a matter of spinning the motors to create surprisingly detailed images. Check out the short video below to see it in action.

It’s hardly the first automatic Etch A Sketch we’ve seen – here’s one that automates everything including the shake to erase the drawing. That one cheats a little though, in that it rasters across the screen like a CRT. We really like how this one just does a single path. Pretty clever.

Continue reading “Bot Makes Etch A Sketch Art In One Continuous Line”

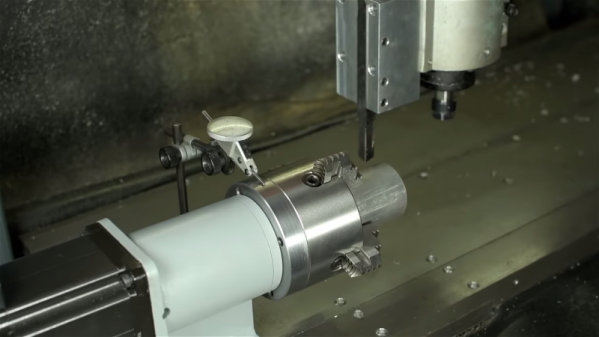
Automated Turntable For 3D Scanning

Those just starting out in 3D printing often believe that their next major purchase after the printer will be a 3D scanner. If you’re going to get something that can print a three dimensional model, why not get something that can create said models from real-world objects? But the reality is that only a small percentage ever follow through with buying the scanner; primarily because they are notoriously expensive, but also because the scanned models often require a lot of cleanup work to be usable anyway.

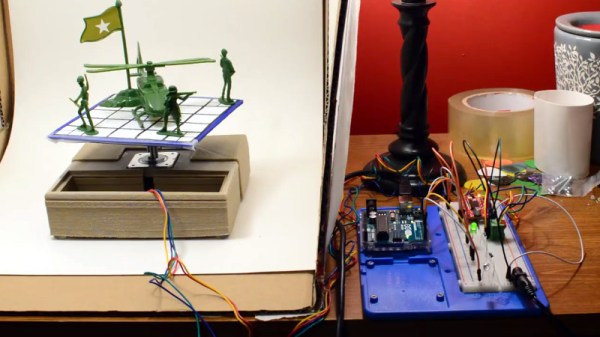
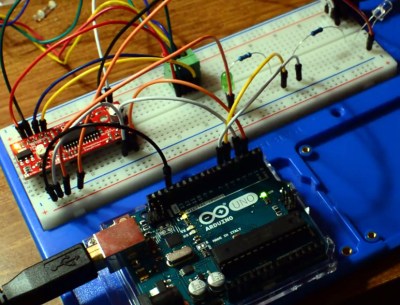
While this project by [Travis Antoniello] won’t make it any easier to utilize scanned 3D models, it definitely makes them cheaper to acquire. So at least that’s half the battle. Consisting primarily of a stepper motor, an Arduino, and a EasyDriver controller, this is a project you might be able to assemble from the parts bin. Assuming you’ve got a pretty decent camera in there, anyway…

The general idea is to place a platform on the stepper motor, and have the Arduino rotate it 10 degrees at a time in front of a camera on a tripod. The camera is triggered by an IR LED on one of the Arduino’s digital pins, so that it takes a picture each time the platform rotates. There are configurable values to give the object time to settle down after rotation, and a delay to give the camera time to take the picture and get ready for the next one.

Once all the pictures have been taken, they are loaded into special software to perform what’s known as photogrammetry. By compiling all of the images together, the software is able to generate a fairly accurate 3D image. It might not have the resolution to make a 1:1 copy of a broken part, but it can help shave some modeling time when working with complex objects.

We’ve previously covered the use of photogrammetry to design 3D printed accessories, as well as a slightly different take on an automated turntable a few years ago. The process is still not too common, but the barriers to giving it a try on your own are at least getting lower.

Continue reading “Automated Turntable For 3D Scanning”

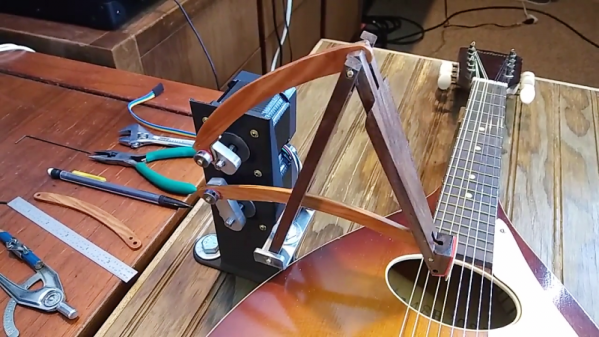
Custom Split-Flap Display Is A Unique Way To Show The Weather

There’s little doubt about the charms of a split-flap display. Watching a display build up a clear, legible message by flipping cards can be mesmerizing, whether on a retro clock radio from the 70s or as part of a big arrival and departure display at an airport or train station. But a weather station with a split-flap display? That’s something you don’t see often.

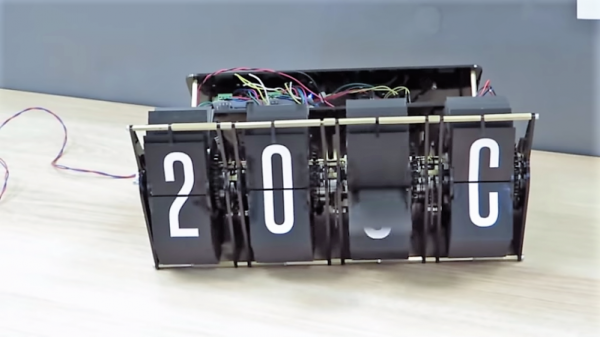
We usually see projects using split-flap units harvested from some kind of commercial display, but [gabbapeople] decided to go custom and build these displays from the ground up. The frame and mechanicals for each display are made from laser-cut acrylic, as are the flip-card halves. Each cell can display a full alphanumeric character set on 36 cards, with each display driven by its own stepper. An Arduino fetches current conditions from a weather API and translates the description of the weather into a four-character code. The codes shown in the video below seem a little cryptic, but the abbreviation list posted with the project makes things a bit clearer. Bonus points if you can figure out what “HMOO” is without looking at the list.

We like the look and feel of this, but we wonder if split-flap icons might be a neat way to display weather too. It seems like it would be easy enough to do with [gabbapeople]’s detailed instructions. Or you could always look at one of the many other custom split-flap displays we’ve featured for more inspiration.

Continue reading “Custom Split-Flap Display Is A Unique Way To Show The Weather”

Semi-automated Winder Spins Rotors For Motors

What’s your secret evil plan? Are you looking for world domination by building a machine that can truly replicate itself? Or are you just tired of winding motor rotors and other coils by hand? Either way, this automated coil winder is something you’re probably going to need.

We jest in part, but it’s true that closing the loop on self-replicating machines means being able to make things like motors. And for either brushed or brushless motors, that means turning spools of wire into coils of some sort. [Mr Innovative]’s winder uses a 3D-printed tube to spin magnet wire around a rotor core. A stepper motor turns the spinner arm a specified number of times, pausing at the end so the operator can move the wire to make room for the next loop. The rotor then spins to the next position on its own stepper motor, and the winding continues. That manual step needs attention to make this a fully automated system, and we think the tension of the wire needs to be addressed so the windings are a bit tighter. But it’s still a nice start, and it gives us some ideas for related coil-winding projects.

Of course, not every motor needs wound coils. After all, brushless PCB motors with etched coils are a thing.

Continue reading “Semi-automated Winder Spins Rotors For Motors”

Light Painting Animations Directly From Blender

Light painting: there’s something that never gets old about waving lights around in a long exposure photo. Whilst most light paintings are single shots, some artists painstakingly create frame-by-frame animations. This is pretty hard to do when moving a light around by hand: it’s mostly guesswork, as it’s difficult to see the results of your efforts until after the photo has been taken. But what if you could make the patterns really precise? What if you could model them in 3D?

[Josh Sheldon] has done just that, by creating a process which allows animations formed in Blender to be traced out in 3D as light paintings. An animation is created in Blender then each frame is automatically exported and traced out by an RGB LED on a 3D gantry. This project is the culmination of a lot of software, electronic and mechanical work, all coming together under tight tolerances, and [Josh]’s skill really shines.

The first step was to export the animations out of Blender. Thanks to its open source nature, Python Blender add-ons were written to create light paths and convert them into an efficient sequence that could be executed by the hardware. To accommodate smooth sliding camera movements during the animation, a motion controller add-on was also written.

The gantry which carried the main LED was hand-made. We’d have been tempted to buy a 3D printer and hack it for this purpose, but [Josh] did a fantastic job on the mechanical build, gaining a solidly constructed gantry with a large range. The driver electronics were also slickly executed, with custom rack-mount units created to integrate with the DragonFrame controller used for the animation.

The video ends on a call to action: due to moving out, [Josh] was unable to continue the project but has done much of the necessary legwork. We’d love to see this project continued, and it has been documented for anyone who wishes to do so. If you want to check out more of [Josh]’s work, we’ve previously written about that time he made an automatic hole puncher for music box spools.

Thanks for the tip, [Nick].

Continue reading “Light Painting Animations Directly From Blender”