Hacked DSP5005 unit showing amp-hours screen

Another DPS5005 Alternative Firmware

These cheap Chinese-built programmable power supplies are nothing new, we’ve been using them for years. They’re not particularly good power supplies, since current feedback is in software, but for some tasks they’re a great fit and you can’t argue with the price. Alternative firmware projects have also been a thing for a while too, but none we’ve seen have been quite as capable and polished as this latest DPS firmware project by [Profi-max.] We’ve not come across the source code yet, but at least the binary image is freely downloadable.Battery charge screen on hacked DPS5005

The firmware has some interesting features, such as programmable pre-sets intended for battery charging applications. In fact, there is a dedicated battery charge mode screen. We want to warn, however, that charging lithium ion batteries with this might not be at all wise, not in the least because of a lack of protection hardware in place. It would be very easy to destroy the unit or overheat a battery this way! However, if you must do this, there are a few features to help you out, such as a handy ‘counters’ screen showing approximate charge delivered.

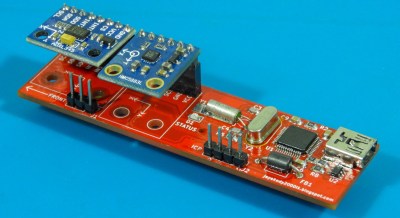
Remote programmability is, as usual, via the easily hacked in serial port, with firmware support for Bluetooth serial modules if wired USB serial doesn’t suit. For those who like to mount things differently, the screen can be rotated by holding a key on power-up, or if you hook up a MPU6050 accelerometer/gyro module it will even do it automatically!

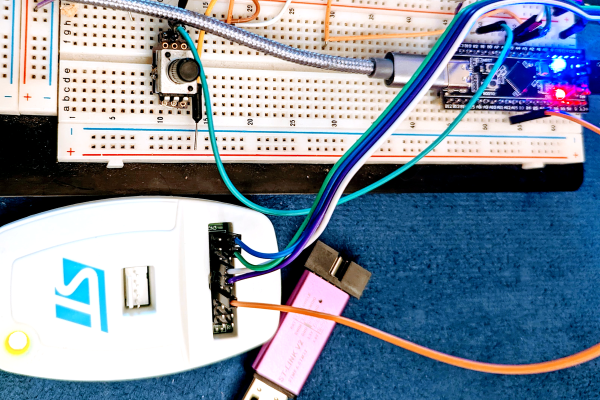
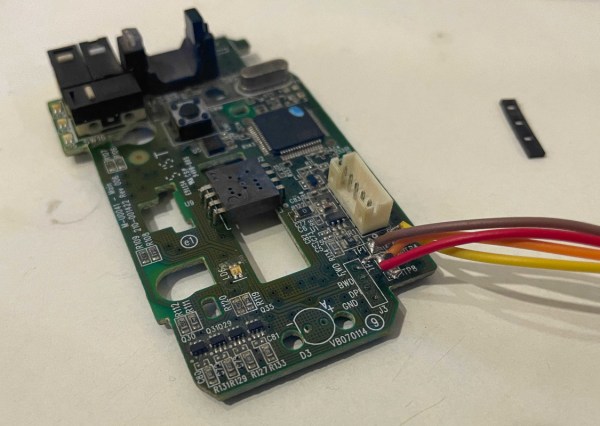
To update a stock DPS unit, the only requirements are access to an ST-Link compatible programmer dongle, to target the STM32 SWD programming interface, and the STM32CubeProgrammer utility. Open source alternatives to that are also available, stlink comes to mind as a good option. Once you have the module PCB popped out of its plastic casing, only three wires need tacking onto a handy set of pads to complete the connection to the programmer dongle. Pretty simple stuff.

If you’re looking for a similar project, with source immediately available, then checkout the OpenDPS project we covered a few years ago, and if you’re thinking of going crazy, building a DIY open source electronics lab, we got you covered.

Continue reading “Another DPS5005 Alternative Firmware”

Remoticon 2021: Unbinare Brings A Reverse-Engineering Toolkit Into Recycling

Unbinare is a small Belgian company at the forefront of hacking e-waste into something useful, collaborating with recycling and refurbishing companies. Reverse-engineering is a novel way to approach recycling, but it’s arguably one of the most promising ways that we are not trying at scale yet. At Hackaday Remoticon 2021, Maurits Fennis talked about Unbinare’s efforts in the field and presented us with a toolkit he has recently released as a part of his work, as well as described how his background as an artist has given him insights used to formulate foundational principles of Unbinare.

Image showing an Unbinare OISTER boardUnbinare’s tools are designed to work in harmony with each other, a requirement for any productive reverse-engineering effort. OI!STER is a general-purpose salvaged MCU research board, with sockets to adapt to different TQFP chip sizes. This board is Maurits’s experience in reverse-engineering condensed into a universal tool, including a myriad of connectors for different programming/debugging interfaces. We don’t know the board’s full scope, but the pictures show an STM32 chip inside the TQFP socket, abundant everywhere except your online retailer of choice. Apart from all the ways to break out the pins, OI!STER has sockets for power and clock glitching, letting you target these two omnipresent Achilles’ heels with a tool like ChipWhisperer.

Continue reading “Remoticon 2021: Unbinare Brings A Reverse-Engineering Toolkit Into Recycling”

Teaching A DC Servo Motor To Act Like A Stepper

[Frank Herrmann] had an interesting idea to turn a geared DC motor into a servo motor assembly, but with a stepper motor-like interface. By stacking some small PCBs behind the motor body, it was possible to squeeze a DRV8837 DC motor driver and a pair of hall effect sensors on the first PCB layer, with the magnetic encoder nestled tightly behind it. Pin headers at the edge of the PCB connect to a second PCB bearing the microcontroller, which is based on the cheap STM32L432. The second PCB also holds an associated LDO and debug LED. Together, this handful of parts provide all that is needed to read the encoder, control the motor rotation and listen on the ‘stepper motor driver’ interface pins hooked up to the motion controller upstream. The Arduino source for this can be found on the project GitHub.

Whilst [Frank] mentions that this assembly has a weight and torque advantage over a NEMA 17 sized stepper motor, but we see no hard data on accuracy and repeatability which would be important for precise operations like 3D printing.

This project is part of a larger goal to make a complete 3D printer based around these ‘DC motor stepper motors’ which we will watch with interest.

While we’re on the subject of closed-loop control of DC motors, here’s another attempt to do the same, without the integration. If these are too small for you, then you always repurpose some windscreen washer motors.

Continue reading “Teaching A DC Servo Motor To Act Like A Stepper”

Making Your Own Touchpad With PWM And Rust

The modern touchpads are incredible feats of engineering, with everything from complex signal processing for noise and tremendous economies of scale driving prices low. So [Kevin] decided to see if he could make his own touchpad. Partially out of curiosity of what makes one touchpad better than another, but also because he was curious if he could. Using an STM32 and a custom PCB, he was off to the races in an incredibly cost-effective way.

After writing some quick firmware in Rust, he was reporting the values read by the PWM channels. Using python, he could get a good idea of the raw values that were being written over USB and visualized. So rather than implement filtering in hardware or firmware, he elected to do the filtering and processing on the host computer side in Python. We suspect this gave him much shorter iteration cycles.

If you like the idea of making your own touchpad but perhaps are dreaming a little bigger, why not make a tablecloth-sized touchpad?

Interconnected CPU nodes forming a system-wide network

With Luos Rapid Embedded Deployment Is Simplified

Those of us tasked with developing firmware for embedded systems have a quite a few hurdles to jump through compared to those writing for the desktop or mobile platforms. Solved problems such as code reuse or portability are simply harder. It was with considerable interest that we learnt of another approach to hardware abstraction, called Luos, which describes itself as micro-services for embedded systems.

This open source project enables deployment of distributed architectures composed of collaborating micro-services. By containerizing applications and hardware drivers, interfaces to the various components are hidden behind a consistent API. It doesn’t even matter where a resource is located, multiple services may be running on the same microcontroller, or separate ones, yet they can communicate in the same way.

By following hardware and software design rules, it’s possible to create an architecture of cooperating computing units, that’s completely agnostic of the actual hardware. Microcontrollers talk at the hardware level with a pair of bidirectional signals, so the hardware cost is very low. It even integrates with ROS, so making robots is even easier.

Luos architecture

By integrating a special block referred to as a Gate, it is possible to connect to the architecture in real-time from a host computer via USB, WiFi, or serial port, and stream data out,  feed data in, or deploy new software. The host software stack is based around Python, running under Jupyter Notebook, which we absolutely love.

Current compatibility is with many STM32 and ATSAM21 micros, so chances are good you can use it with whatever you have lying around, but more platforms are promised for the future.

Now yes, we’re aware of CMSIS, and the idea of Hardware Abstraction Layers (HALs) used as part of the platform-specific software kits, this is nothing new. But, different platforms work quite differently, and porting code from one to another, just because you can no longer get your preferred microcontroller any more, is a real drag we could all do without, so why not go clone the GitHub and have a look for yourselves?

Continue reading “With Luos Rapid Embedded Deployment Is Simplified”

Optical Theremin Makes Eerie Audio With Few Parts

[Fearless Night]’s optical theremin project takes advantage of the kind of highly-integrated parts that are available to the modern hacker and hobbyist in all the right ways. The result is a compact instrument with software that can be modified using the Arduino IDE to take it places the original Theremin design could never go.

The design is based on a ‘Blue Pill’ STM32 MCU development board and two Avago APDS-9960 gesture sensor breakout boards, along with a few other supporting components. Where the original Theremin sensed hand proximity using two antenna-like capacitive sensors to control note frequency and volume, this design relies on two optical sensors to do the same job.

[Fearless Night] provides downloads for the schematic, code, parts list, and even 3D models for the enclosure. PCB files are also included for a convenient assembly, but since the component count is fairly low, a patient hacker should be able to get away with soldering it up by hand without much trouble.

This project creates the audio using the STM32’s Direct Digital Synthesis (DDS) capability and a simple low-pass filter, and has several ways to fine-tune the output. What’s DDS? Our own Elliot Williams explains it in terms of audio output for microcontrollers, and if you’d like a more comprehensive overview, Bil Herd will happily tell you all about it.

Teardown: Impassa SCW9057G-433 Alarm System

This series of monthly teardowns was started in early 2018 as an experiment, and since you fine folks keep reading them, I keep making them. But in truth, finding a new and interesting gadget every month can sometimes be a chore. Which is why I’m always so thankful when a reader actually sends something in that they’d like to see taken apart, as it absolves me from having to make the decision myself. Of course it also means I can’t be blamed if you don’t like it, so keep that in mind as well.

Coming our way from the tropical paradise of Eastern Pennsylvania, this month’s subject is an ADT branded Impassa SCW9057G-433 alarm system that was apparently pulled off the wall when our kind patron was moving house. As you might have guessed from the model number, this unit uses 433 MHz to communicate with various sensors and devices throughout the home, and also includes a 3G cellular connection that allows it to contact the alarm monitoring service even if the phone line has been cut.

Diagram of Impassa home security setup
The alarm can connect to a wide array of 433 MHz devices.

From how many of these are on eBay, and the research I’ve done on some home alarm system forums, it appears that you can actually pick one of these up on the second-hand market and spin your own whole-house alarm system without going through a monitoring company like ADT. The extensive documentation from Impassa covers how to wire and configure the device, and as long as the system isn’t locked when you get it, it seems like wiping the configuration and starting from scratch isn’t a problem.

If it’s possible to put together your own homebrew alarm system with one of these units at the core, then it seems the least we can do is take it apart and see what kind of potentially modifiable goodies are waiting under that shiny plastic exterior.

Continue reading “Teardown: Impassa SCW9057G-433 Alarm System”