Guitar Pickguard Adds MIDI Capabilities

For a standard that has been in use since the 1980s, MIDI is still one of the most dominant forces on the musical scene even today. It’s fast, flexible, and offers a standard recognized industry-wide over many different types of electronic instruments. Even things which aren’t instruments can be turned into musical devices like the infamous banana keyboard via the magic of MIDI, and it also allows augmentation of standard instruments with other capabilities like this guitar with a MIDI interface built into the pick guard.

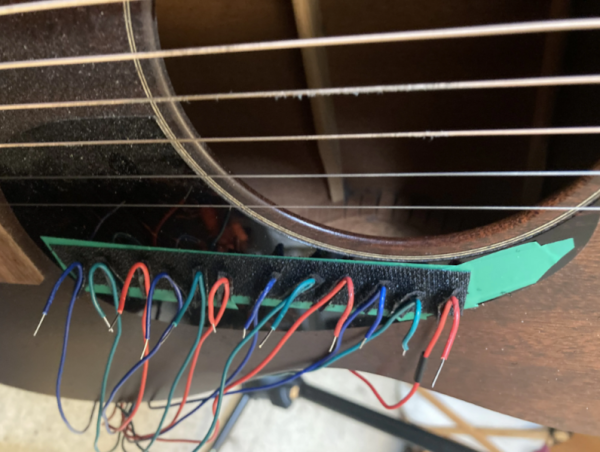
[Ezra] is the creator of this unique musical instrument which adds quite a few capabilities to his guitar. The setup is fairly straightforward: twelve wires run to the pick guard which are set up as capacitive sensors and correspond with a note on the chromatic scale. Instead of using touchpads, using wires allows him to bend away the “notes” that he doesn’t need for any particular piece of music. The wires are tied back to an Adafruit Feather 32u4 microcontroller behind the neck of the guitar which also has a few selectors for changing the way that the device creates tones. He can set the interface to emit single notes or continuously play notes, change the style, can change their octave, and plenty of other features as well.

One of the goals of this project was to increase a guitar player’s versatility when doing live performances, and we would have to agree that this gives a musician a much wider range of abilities without otherwise needing a lot of complex or expensive equipment on stage. We’ve seen a few other MIDI-based builds focused on live performances lately, too, like this one which allows a band to stay in sync with each other.

Continue reading “Guitar Pickguard Adds MIDI Capabilities”

Haptics Hack Chat With Nanoport Technology

Join us on Wednesday, April 7 at noon Pacific for the Haptics Hack Chat with Tim Szeto and Kyle Skippon!

Of all our senses, the sense of touch is perhaps the most underappreciated. We understand and accept the tragedy that attends loss of vision or hearing, and the impact on the quality of life resulting from olfactory and gustatory sensations can be severe. But for some reason, we don’t give a second thought to our sense of touch, which is indeed strange given that we are literally covered with touch sensors. That’s a bit of a shame, since touch can reveal so much about the world around us, and our emotional well-being is so tightly tied to the tactile senses that those deprived of it in infancy can be scarred for life.

Haptics is the technology of tactile feedback, which seeks to leverage the human need for tactile experiences to enrich the experience of dealing with the technological world. Haptic feedback devices are everywhere now, and have gone far beyond the simple off-balance motor used since the days when a pager was a status symbol. To help us sort out what’s new in the haptics world, Tim and Kyle from Nanoport Technology will stop by the Hack Chat. Nanoport is a company on the cutting edge of haptics, so they’ll have a wealth of details about what haptics are, where the field is going, and how you can start thinking about making touch a part of your projects.

join-hack-chatOur Hack Chats are live community events in the Hackaday.io Hack Chat group messaging. This week we’ll be sitting down on Wednesday, April 7 at 12:00 PM Pacific time. If time zones have you tied up, we have a handy time zone converter.

Click that speech bubble to the right, and you’ll be taken directly to the Hack Chat group on Hackaday.io. You don’t have to wait until Wednesday; join whenever you want and you can see what the community is talking about.
Continue reading “Haptics Hack Chat With Nanoport Technology”

Control A Motor With A Touchpad

There are a surprising wealth of parts inside of old laptops that can be easily scavenged, but often these proprietary tidbits of electronics will need a substantial amount of work to make them useful again. Obviously things such as hard drives and memory can easily be used again, but it’s also possible to get things like screens or batteries to work with other devices with some effort. Now, there’s also a way to reuse the trackpad as well.

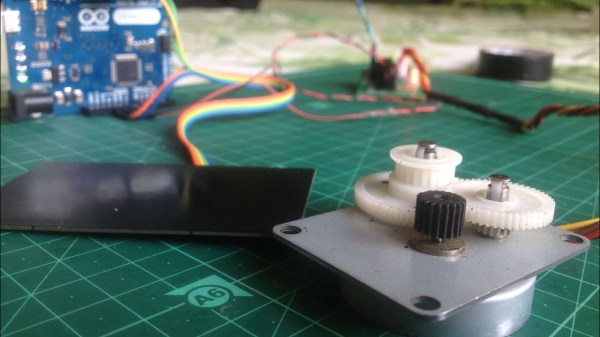
This build uses a PS/2 touchpad with a Synaptics chip in it, which integrates pretty smoothly with an Arduino after a few pins on the touchpad are soldered to. Most of the work is done on the touchpad’s built in chip, so once the Arduino receives the input from the touchpad it’s free to do virtually anything with it. In this case, [Kushagra] used it to operate a stepper motor in a few different implementations.

If you have this type of touchpad lying around, all of the code and schematics to make it useful again are available on the project page. An old laptop in the parts bin is sure to have a lot of uses even after you take the screen off, but don’t forget that your old beige PS/2 mouse from 1995 is sure to have some uses like this as well.

Continue reading “Control A Motor With A Touchpad”

DIY Piano: Look, Ma, No Moving Parts

[Michael Sobolak] has a penchant for pianos, concern for capacitive touch, and special sentiment for solid state. This alliterate recipe results in a DIY PCB piano that leaves out the levers and is barren of buttons unless you count the stock RESET button on the Teensy. A real stickler might point out that speakers have moving cones. Beyond these tangential parts, which have motionless options, it is an electronic instrument with no moving parts.

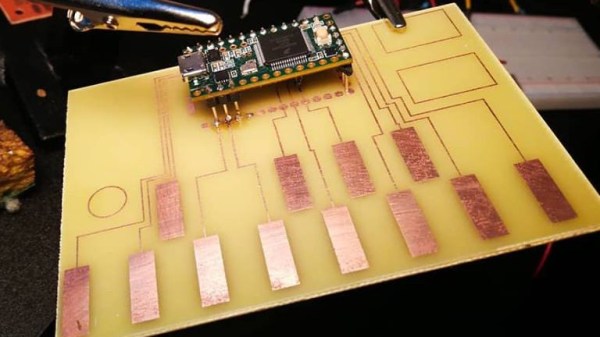
The heart of the project is a Teensy 3.2 which natively supports twelve capacitive touch sensors. The infamous demo board is mounted to a homemade PCB featuring twelve keys but is actually an incomplete octave plus another key one octave above the first. If you look sharp, you already noticed the missing and extra touchpads. PCB traces were made in Illustrator because if you have a familiar tool, you use what you know and you cannot argue that it works. The design was transferred to a copper board using the old magazine page trick that we love and reliable old ferric acid.

We couldn’t help but notice that the posts of the Teensy were soldered to the top of the board, rather than drilling through, IMT-style. Again, the results speak, even if there is room for improvement. Reportedly, there is a second version on the way which includes every expected key.

Continue reading “DIY Piano: Look, Ma, No Moving Parts”

You Are Your Own Tactile Feedback

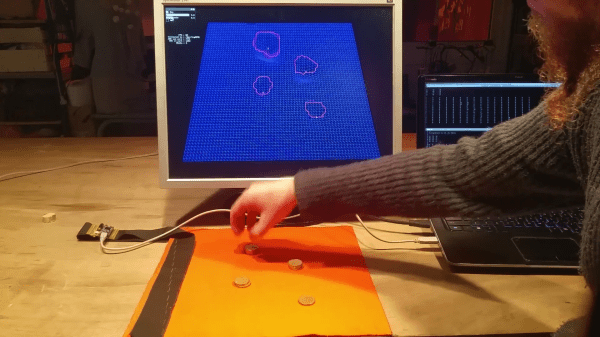
[Maurin Donneaud] has clearly put a lot of work into making a large flexible touch sensitive cloth, providing a clean and intuitive interface, and putting it out there for anyone to integrate into their own project.. This pressure sensing fabric is touted as an electronic musical interface, but if you only think about controlling music, you are limiting yourself. You could teach AI to land a ‘copter more evenly, detect sparring/larping strikes in armor, protect athletes by integrating it into padding, or measure tension points in your golf swing, just to name a few in sixty seconds’ writers brainstorming. This homemade e-textile measures three dimensions, and you can build it yourself with conductive thread, conductive fabric, and piezoresistive fabric. If you were intimidated by the idea before, there is no longer a reason to hold back.

The idea is not new and we have seen some neat iterations but this one conjures ideas a mile (kilometer) a minute. Watching the wireframe interface reminds us of black-hole simulations in space-time, but these ones are much more terrestrial and responding in real-time. Most importantly they show consistent results when stacks of coins are placed across the surface. Like most others out there, this is a sandwich where the slices of bread are ordinary fabric and piezoresistive material and the cold cuts are conductive strips arranged in a grid. [Maurin] designed a custom PCB which makes a handy adapter between a Teensy and houses a resistor network to know which grid line is getting pressed.

If you don’t need flexible touch surfaces, we can help you there too.

Continue reading “You Are Your Own Tactile Feedback”

Freeform Wire Frame Tulip Blooms To The Touch

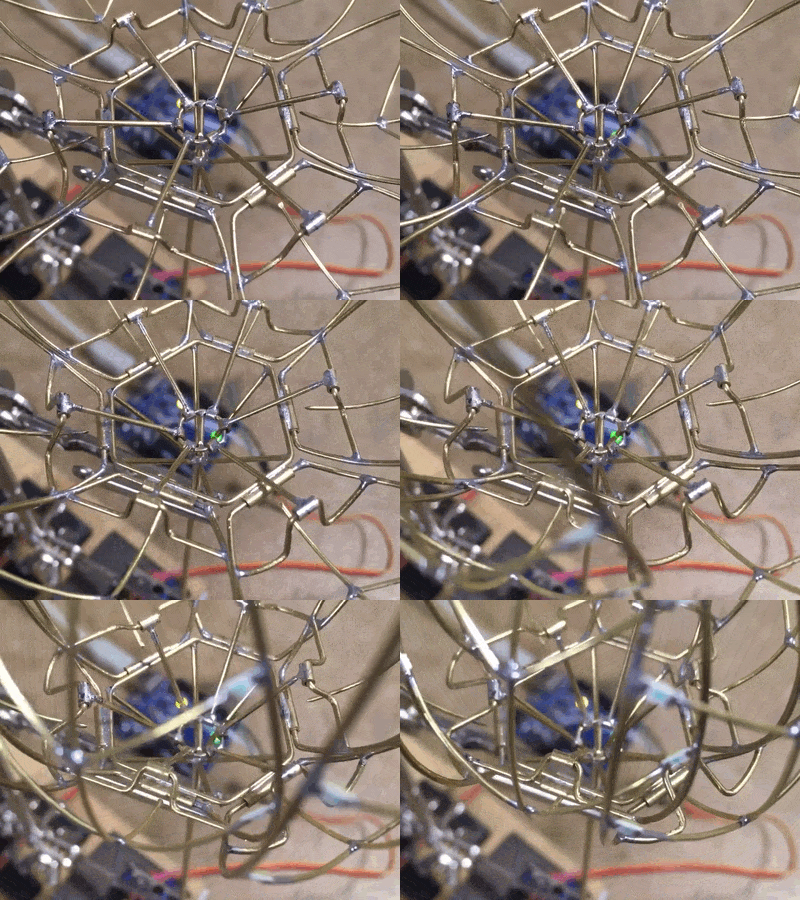
Holidays are always good for setting a deadline for finishing fun projects, and every Valentine’s Day we see projects delivering special one-of-a-kind gifts. Why buy a perishable bulk-grown biological commodity shipped with a large carbon footprint when we can build something special of our own? [Jiří Praus] certainly seemed to think so, his wife will receive a circuit sculpture tulip that blooms when she touches it.

via @jipraus

This project drew from [Jiří]’s experience with aesthetic LED projects. His Arduino-powered snowflake, with LEDs mounted on a custom PCB, is a product available on Tindie. For our recent circuit sculpture contest, his entry is a wire frame variant on his snowflake. This tulip has 7 Adafruit NeoPixel in the center and 30 white SMD LEDs in the petals, which look great. But with the addition of mechanical articulation, this project has raised the bar for all that follow.

We hope [Jiří] will add more details for this project to his Hackaday.io profile. In the meantime, look over his recent Tweets for more details on how this mechanical tulip works. We could see pictures and short videos of details like the wire-and-tube mechanism that allowed all the petals to be actuated by a single servo, and the components that are tidily packaged inside that wooden base.

Need more digital expressions of love? We have no shortage of hearts. Animated LED hearts, illuminated acrylic hearts, and talking hearts. We’re a little short on flower projects, but we do have X-ray of a rose among others to accompany [Jiří]’s tulip.

Continue reading “Freeform Wire Frame Tulip Blooms To The Touch”

Redesigning The Musical Keyboard With Light-Up Buttons

A piano’s keyboard doesn’t make sense. If you want to want to play an F major chord, just hit an F, an A, and a C — all white keys, all in a row. If you want to play a B major chord, you hit B, a D#, and an F#. One white key, then two black ones. The piano keyboard is not isomorphic, meaning chords of the same quality have different shapes. For their entry into the Hackaday Prize, [CSCircuits] and their crew are working on a keyboard that makes chords intuitive. It’s called the Kord Kontroller, and it’s a device that would also look good hooked up to Ableton.

The layout of the Kord Kontroller puts all the scale degrees arranged in the circle of fifths in the top of the keyboard. To play 90% of western music, you’ll hit one button for a I chord, move one button to the left for a IV chord, and two buttons to the right for a V chord. Chord quality is determined by the bottom of the keyboard, with buttons for flat thirds, fourths, ninths, elevenths and fourteenths replacing or augmenting notes in the chords you want to play. Since this is effectively a MIDI controller, there are buttons to change octaves and modes.

As far as hardware goes, this keyboard is constructed out of Adafruit Trellis modules that are a 4×4 grid of silicone buttons and LEDs that can be connected together and put on a single I2C bus. The enclosure wraps these buttons up into a single 3D printed grid of button holes, and with a bit of work and hot glue, everything looks as it should.

It’s an interesting musical device, and was named as a finalist in the Musical Instrument Challenge. You can check out a demo video with a jam sesh below.

Continue reading “Redesigning The Musical Keyboard With Light-Up Buttons”