At their best, laptops are a compromise design. Manufacturers go to great lengths to make the slimmest, lightest, whatever-est laptops possible, and the engineering that goes into doing so is truly amazing. But then they throw in the charger, which ends up being a huge brick with wire attached to it, and call it a day.
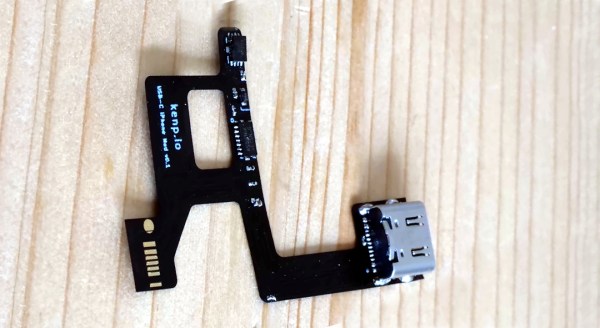
Does it have to be that way? Probably, but that doesn’t mean we can’t try to slim down the overall footprint of laptops at least a little. That’s what [Joe Gaz] did when he hacked his laptop to allow for USB-C charging. Tired of the charger anchoring down his HP X360, [Joe] realized that he could harvest the PCB from a USB-C charger adapter dongle and embed it inside his laptop. We’ve seen similar modifications made to Thinkpads in the past, and it’s good to see the process isn’t that far removed with other brands.
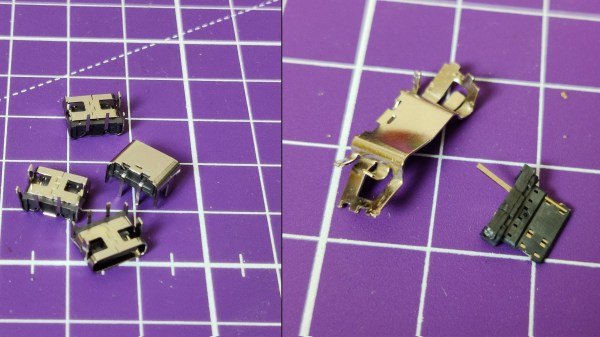
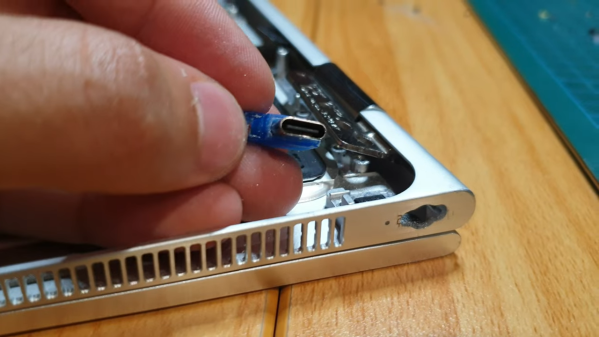
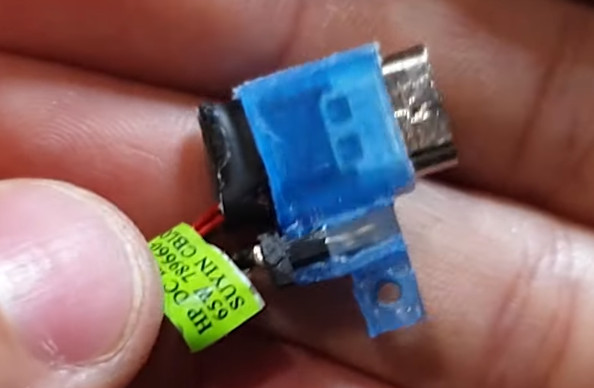 After popping open the laptop, which is always an adventure in reverse mechanical engineering, he found that removing the OEM charger jack left just enough room for the USB-C charger. Mounting the board required a 3D printed bracket, while enlarging the original hole in the side of the laptop case took some cringe-inducing work with a file. It looked like it was going to be pretty sloppy at first, but he ended up doing a pretty neat job in the end. The whole modification process is in the video below.
The end result is pretty slick — [Joe] can now carry a much more compact USB wall-wart-style charger, or eschew the charger altogether and rely on public USB charging stations. Either way, it sure beats lugging a brick around. If you’re interested in laptop hacking, or even if you just want to harvest the goodies from a defunct machine, check out this guide to laptop anatomy by our own [Arsenijs Picugins].
Continue reading “Laptop USB-C Charging Hack Lets You Leave The Brick At Home”