A small plastic object can be seen in front of the tip of a hypodermic needle. The object is made of clear, slightly purple-tinted plastic. It is roughly circular, with edges thicker than the center.

The Latest From RepRapMicron – Nail Gel, First Objects, And More

We’ve been following [Vik Olliver]’s progress on the μRepRap project with interest for some time now. The project’s goal is to build a 3D printer that can print feature sizes down to about 10 microns – the same feature size used in the Intel 4004 processor. At the recent Everything Open 2026 conference, [Vik] presented an overview of all the progress he’s made in the last year, including printer improvements, material woes, and the first multi-layer prints (presentation slides).

The motion stage has undergone some fundamental improvements recently. The original XY motion table was supported on four flexures which allowed movement in X and Y, but also introduced slight variations in Z – obviously a problem in a system that needs to be accurate down to the microns. The latest version now uses complementary flexures to maintain a constant Z height, and eliminates interference between the X and Y axes. The axis motion drivers were also redesigned with parallel-bar linear reducers inspired by a pantograph, increasing their usable range from two to eight millimeters.

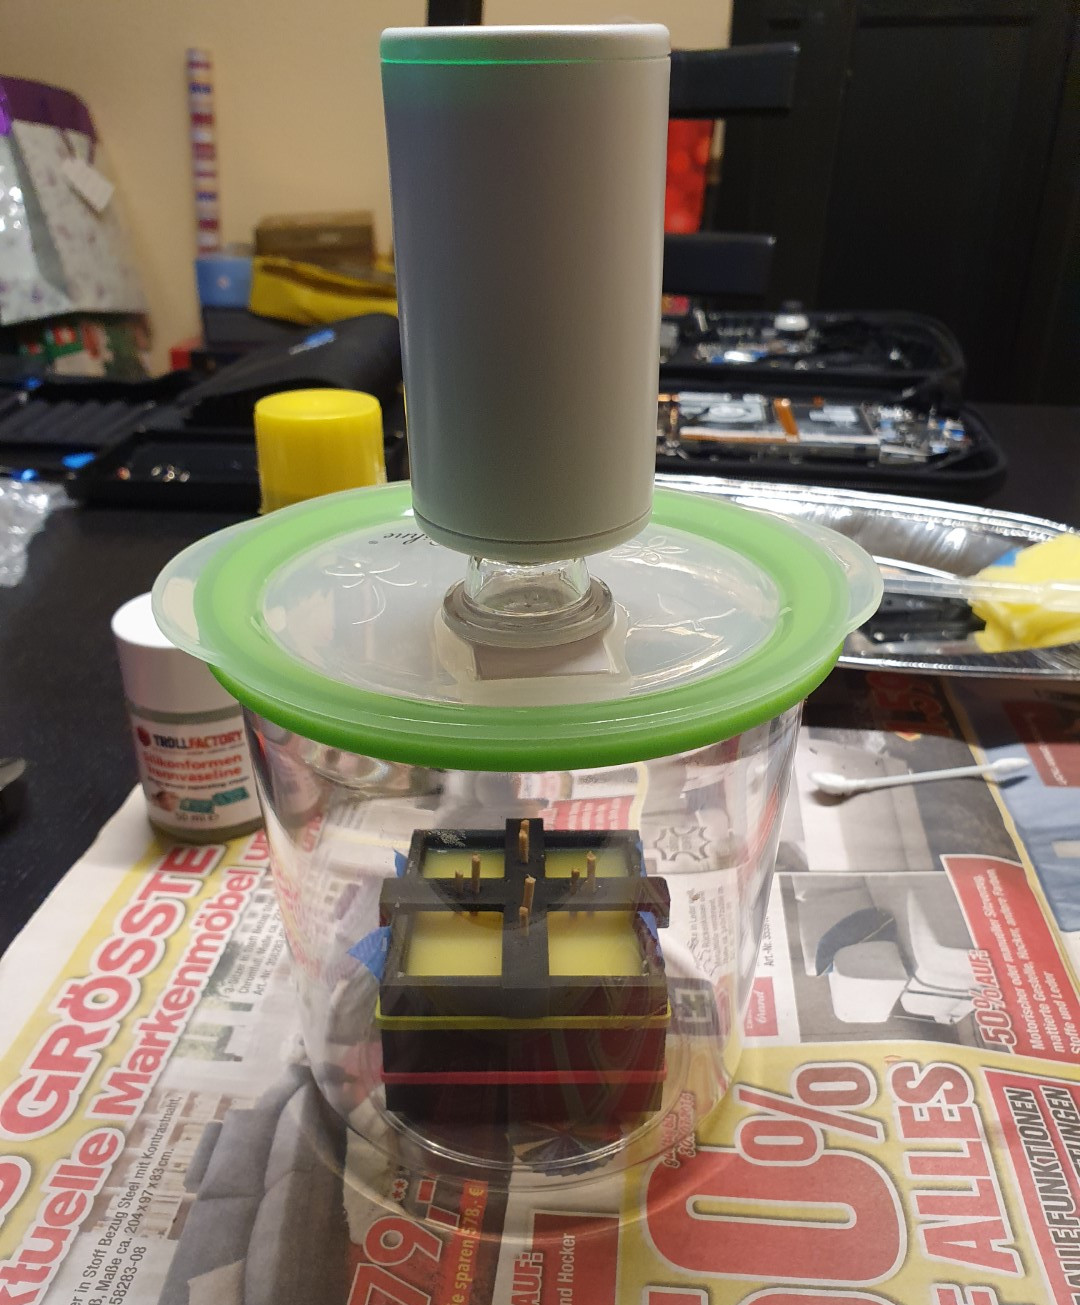
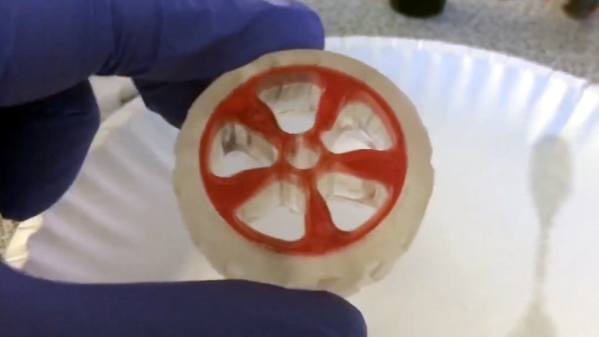
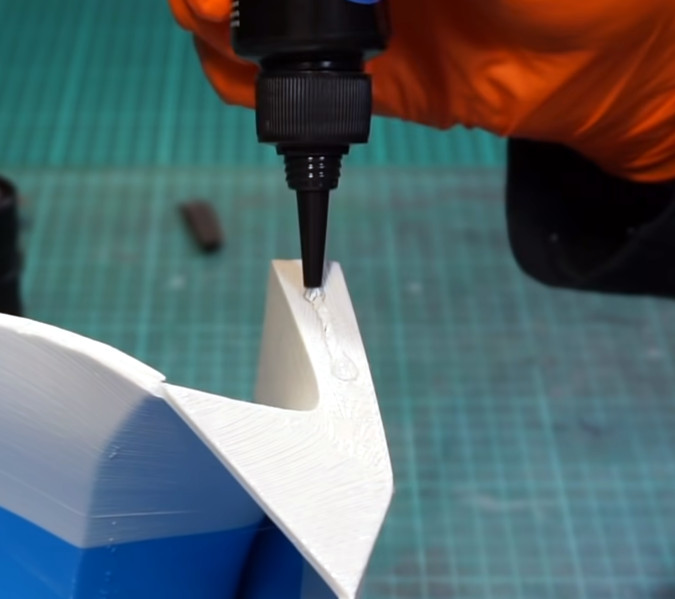
Rather than extruding material, the μRepRap uses an electrochemically-etched needle point to deposit UV-curable gel on the build surface. [Vik] found that a bit of nitric acid in the needle etching solution gave the edges of the probe a bit of a rough texture which let it hold more resin. He started his test prints using normal 3D printer resin, but it turns out that dissolved oxygen inhibits curing – quite a problem for small, air-exposed droplets. Fortuitously, UV nail gel does cure in air, and the next set of tests were printed in nail gel, including the first layered prints (one of which can be seen above, on top of a hypodermic needle). The μRepRap can’t yet print large numbers of layers, but [Vik] did print some hinged parts that could be folded into shape.

There’s much more in the presentation than can be covered here, including some interesting thoughts about the possibility of 3D printing electrochemical memory cells in ionic gel. Near the end of the presentation, [Vik] listed some pieces of related work, including necroprinting and this homemade micro-manipulator.


RepRapMicron Promises Micro-fabrication For Desktops With New Prototype

3D printing has transformed how hobbyists fabricate things, but what additional doors would open if we could go even smaller? The µRepRap (RepRapMicron) project aims to bring fabrication at the micron and sub-micron scale to hobbyists the same way RepRap strove to make 3D printing accessible. New developments by [Vik Olliver] show a promising way forward, and also highlight the many challenges of going so small.

New Maus prototype is modular, setting the stage for repeatable and reliable 3D printing at the micro scale.

How exactly would a 3D printer do micro-fabrication? Not by squirting plastic from a nozzle, but by using a vanishingly tiny needle-like effector (which can be made at any workbench via electrochemical erosion) to pick up a miniscule amount of resin one dab a time, curing it with UV after depositing it like a brush deposits a dot of ink.

By doing so repeatedly and in a structured way, one can 3D print at a micro scale one “pixel” (or voxel, more accurately) at a time. You can see how small they’re talking in the image in the header above. It shows a RepRapMicron tip (left) next to a 24 gauge hypodermic needle (right) which is just over half a millimeter in diameter.

Moving precisely and accurately at such a small scale also requires something new, and that is where flexures come in. Where other 3D printers use stepper motors and rails and belts, RepRapMicron leverages work done by the OpenFlexure project to achieve high-precision mechanical positioning without the need for fancy materials or mechanisms. We’ve actually seen this part in action, when [Vik Olliver] amazed us by scribing a 2D micron-scale Jolly Wrencher 1.5 mm x 1.5 mm in size, also visible in the header image above.

Using a tiny needle to deposit dabs of UV resin provides the platform with a way to 3D print, but there are still plenty of unique problems to be solved. How does one observe such a small process, or the finished print? How does one handle such a tiny object, or free it from the build platform without damaging it? The RepRapMicron project has solutions lined up for each of these and more, so there’s a lot of discovery waiting to be done. Got ideas of your own? The project welcomes collaboration. If you’d like to watch the latest developments as they happen, keep an eye on the Github repository and the blog.

Resin keycap made from dried flowers

How To Make A Beautiful Floral Keycap Using Resin

Here’s a fun build. Over on their YouTube channel our hacker [Atasoy] shows us how to make a custom floral keyboard keycap using resin.

We begin by using an existing keycap as a pattern to make a mold. We plug the keycap with all-purpose adhesive paste so that we can attach it to a small sheet of Plexiglas, which ensures the floor of our mold is flat. Then a side frame is fashioned from 100 micron thick acetate which is held together by sticky tape. Hot glue is used to secure the acetate side frame to the Plexiglas floor, keeping the keycap centered. RTV2 molding silicone is used to make the keycap mold. After 24 hours the silicone mold is ready.

Then we go through a similar process to make the mold for the back of the keycap. Modeling clay is pushed into the back of the keycap. Then silicone is carefully pushed into the keycap, and 24 hours later the back silicone mold is also ready.

Continue reading “How To Make A Beautiful Floral Keycap Using Resin”

Fiber Laser Gives DIY PCBs A Professional Finish

While low-cost professional PCB fabrication has largely supplanted making circuit boards at home, there’s still something to be said for being able to go from design to prototype in an afternoon. Luckily we aren’t limited to the old toner transfer trick for DIY boards these days, as CNC routers and powerful lasers can be used to etch boards quickly and accurately.

But there’s still a problem — those methods leave you with a board that has exposed traces. That might work in a pinch for a one-off, but such boards are prone to shorts, and frankly just don’t look very good. Which is why [Mikey Sklar] has been experimenting with applying both a soldermask and silkscreen to his homemade boards.

The process he describes starts after the board has already been etched. First he rolls on the soldermask, and then sandwiches the board between layers of transparency film and clear acrylic before curing it under a UV light. After two coats of the soldermask, the board goes into a fiber laser and the silkscreen and mask layers are loaded into the software and the machine is set to a relatively low power (here, 40%). The trick is that the mask layer is set to run four times versus the single run of the silkscreen, which ensures that the copper is fully exposed.

Since the board doesn’t need to be moved between operations, you don’t have to worry about the registration being off. The end result really does look quite nice, with the silkscreen especially popping visually a lot more than we would have assumed.

We’ve previously covered how [Mikey] uses his CNC router and fiber laser to cut out and etch the boards, so this latest installment brings the whole thing full circle. The equipment you’ll need to follow along at home isn’t cheap, but we can’t argue with the final results.

Continue reading “Fiber Laser Gives DIY PCBs A Professional Finish”

Casting Custom Resin Buttons For The Steam Deck

If you play games on multiple consoles, you’re probably familiar with the occasional bout of uncertainty that comes with each system’s unique button arrangement. They’re all more or less in the same physical location, but each system calls them something different. Depending on who’s controller you’re holding, the same button could be X, A, or B. We won’t even get started on colors.

Overhearing her partner wish the buttons on his Steam Deck matched the color scheme of the Xbox, [Gina Häußge] (of OctoPrint fame) decided to secretly create a set of bespoke buttons for the portable system. There was only one problem…she had no experience with the silicone molding process or epoxy resins which would be required for such an operation.

Toothpicks were used to make channels in the mold.

Luckily we have the Internet, and after researching similar projects that focused on other consoles, [Gina] felt confident enough to take apart Steam’s handheld and extract the original plastic buttons. These went into a clever 3D printed mold box, which was small enough to put into a food vacuum container for degassing purposes. The shape of the buttons necessitated a two-piece mold, into which [Gina] embedded two channels: one to inject the resin, and another that would let air escape.

The red, green, blue, and yellow resins were then loaded into four separate syringes and forced into the mold. It’s critically important to get the orientation right here, as each button has a slightly different shape. It sounds like [Gina] might have mixed up which color each button was supposed to be during an earlier attempt, so for the final run she made a little diagram to keep track. After 24 hours she was able to peel the mold apart and get a look at the perfectly-formed buttons, but it took 72 hours before they were really cured enough to move on to the next step.

[Gina] applied the legends with a sheet of rub-on lettering, which we imagine must have been quite tricky to get lined up perfectly. Since the letters would get worn off after a few intense gaming sessions without protection, she finally sealed the surface of each button by brushing on a thin layer of UV resin and curing it with a flashlight of the appropriate wavelength.

There are a fair number of steps involved, and a fair bit of up-front cost to get all the materials together, but there’s no denying the final result looks phenomenal. Especially for a first attempt. We wouldn’t be surprised if the next time somebody wants to head down this particular path, it’s [Gina]’s post that guides them on their way.

Make Multi-Material Resin Prints With A Syringe (And A Bit Of Patience)

Resin printing is a fantastic way to create parts, but multi-material printing isn’t really a possibility with resin. That is, unless you use [Cameron Coward]’s method for creating multi-material resin prints.

[Cameron]’s idea relies on the fact that handling and curing UV resin can easily be done outside of the printer itself. First, one prints what we’ll call the primary object. This object has empty spaces representing the secondary object. Once the primary object is printed and finished, these voids are carefully filled with a different resin, then cured with UV light. The end result is a single multi-material object that is, effectively, made from two different resins.

Continue reading “Make Multi-Material Resin Prints With A Syringe (And A Bit Of Patience)”

UV Resin Perfects 3D Print, But Not How You Think

At this point, everyone knows that the print quality you’ll get from even an entry level UV resin printer far exceeds what’s possible for filament-based fused deposition modeling (FDM) machines. But there’s a trade-off: for the money, you get way more build volume by going with FDM. So until the logistics of large-format resin printers gets worked out, folks looking to make things like replica prop helmets have no choice but to put considerable time into post-processing their prints to remove the obvious layer lines.

But thanks to this somewhat ironic trick demonstrated by [PropsNstuff], you can actually use UV resin to improve the finish quality of your FDM prints. The idea is to put a layer of resin over the layer lines and other imperfections of the 3D print, cure it with a handheld UV flashlight, and then sand it smooth. Essentially it’s like using resin in place of a body filler like Bondo, with the advantage here being that the resin cures in seconds.

The thick resin fills in tough spots quickly.

Now to be clear, this isn’t a new idea. Our very own [Donald Papp] investigated the process back in 2018, and [Thomas Sanladerer] covered the idea in a video of his own the following year. But the difference here is that [PropsNstuff] doesn’t just coat the whole print with resin, he takes a more methodical approach. Working in small sections, he targets areas that really need the high-build properties offered by this technique.

With the tough spots addressed, he then moves on to coating larger areas with resin. But this time, he mixes leftover resin from his SLA printer with talcum powder to make a mix that can be brushed on without running everywhere. It takes a few thin coats, but with this mix, he’s able to build up large swaths of the print without losing any surface detail.

Is it still a hassle? Absolutely. But the final result does look spectacular, so until we figure out how to build the replicators from Star Trek, it looks like we’ll have to make up for our technological shortcomings with the application of a little elbow grease.

Continue reading “UV Resin Perfects 3D Print, But Not How You Think”