You Can Put Toothpaste In The Tube (With Effort)

Old wives’ tales, folk knowledge, common sayings, and even cliches and idioms are often taken as givens since they form an often unnoticed part of our vocabulary and culture. There’s so many examples that it’s possible to fill a 17-season TV show busting potential myths like these, and even then there are some that slipped by. For example, the saying “you can’t put toothpaste back in the tube” which, as it turns out, is not as impossible as we might be led to believe.

This video is the product of [Tyler Bell] who has taken this idiom on as a challenge. To figure out if it was possible he first got to work building a vacuum chamber, which turned out to be a little easier than he thought it would be. After cutting a piece of polycarbonate tube and sanding it down, all that was needed were some rubber gaskets and fittings for the vacuum pump.

From there, the theory was to put an empty toothpaste tube into the vacuum chamber, pump all of the air out, and let atmospheric pressure “push” the toothpaste back into the tube. During [Tyler]’s first run he thought that it had worked successfully but it turned out that he had just inflated the empty toothpaste tube like a balloon. Further iterations were able to return some of the toothpaste to the tube, but each time some air would eventually work its way into the toothpaste which would immediately fill the remaining space in the tube with air rather than toothpaste.

While not completely successful, he was able to get some toothpaste back into the tube with a relatively small bill of materials. It’s not likely that this experiment will result in a change of this particular idiomatic expression, but it was interesting to put it to the test nonetheless. For other instances of toothpaste and its relationship to tubes, both inside and out, be sure to check out this recent piece on various methods of toothpaste storage.

Continue reading “You Can Put Toothpaste In The Tube (With Effort)”

Thin Coatings Require An Impressive Collection Of Equipment And Know-How

Let’s be honest — not too many of us have a need to deposit nanometer-thick films onto substrates in a controlled manner. But if you do find yourself in such a situation, you could do worse than following [Jeroen Vleggaar]’s lead as he builds out a physical vapor deposition apparatus to do just that.

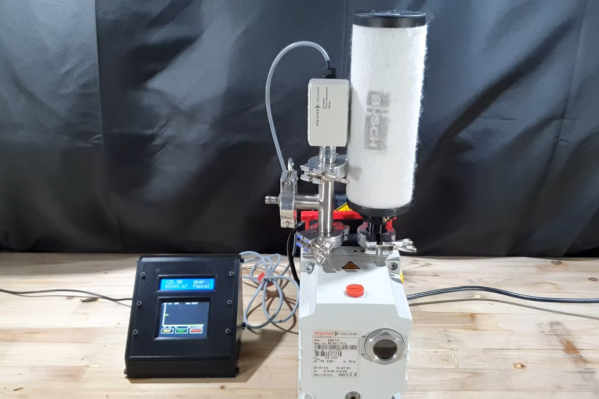
Thankfully, [Jeroen] has particular expertise in this area, and is willing to share it. PVD is used to apply an exceedingly thin layer of metal or organic material to a substrate — think lens coatings or mirror silvering, as well as semiconductor manufacturing. The method involves heating the coating material in a vacuum such that it vaporizes and accumulates on a substrate in a controlled fashion. Sounds simple, but the equipment and know-how needed to actually accomplish it are daunting. [Jeroen]’s shopping list included high-current power supplies to heat the coating material, turbomolecular pumps to evacuate the coating chamber, and instruments to monitor the conditions inside the chamber. Most of the chamber itself was homemade, a gutsy move for a novice TIG welder. Highlights from the build are in the video below, which also shows the PVD setup coating a glass disc with a thin layer of silver.

This build is chock full of nice details; we especially liked the technique of monitoring deposition progress by measuring the frequency change of an oscillator connected to a crystal inside the chamber as it accumulates costing material. We’re not sure where [Jeroen] is going with this, but we suspect it has something to do with some hints he dropped while talking about his experiments with optical logic gates. We’re looking forward to seeing if that’s true.

Continue reading “Thin Coatings Require An Impressive Collection Of Equipment And Know-How”

Reviving Old Recipe For Faraday Wax Keeps Vacuum Experiments Going

Science today seems to be dominated by big budgets and exotics supplies and materials, the likes of which the home gamer has trouble procuring. But back in the day, science was once done very much by the seats of the pants, using whatever was available for the job. And as it turns out, some of the materials the old-timers used are actually still pretty useful.

An example of this is a homemade version of “Faraday Wax”, which [ChristofferB] is using for his high vacuum experiments. As you can imagine, getting a tight seal on fittings is critical to maintaining a vacuum, a job that’s usually left to expensive synthetic epoxy compounds. Realizing that a lot of scientific progress was made well before these compounds were commercially available, [ChristofferB] trolled through old scientific literature to find out how it used to be done.

This led to a recipe for “Faraday Wax”, first described by the great scientist himself in 1827. The ingredients seem a little archaic, but are actually pretty easy to source. Beeswax is easy to come by; the primary ingredient, “colophony”, is really just rosin, pretty much the same kind used as solder flux; and “Venetian red” is a natural pigment made from clay and iron oxide that can be had from art suppliers. Melted and blended together, [ChristofferB] poured it out onto wax paper to make thin strips that are easily melted onto joints in vacuum systems, and reports are that the stuff works well, even down to 10-7 mbar.

We love this one — it’s the perfect example of the hacker credo, which has been driving progress for centuries. It also reminds us of some of the work by [Simplifier], who looks for similar old-time recipes to push his work in DIY semiconductors and backyard inductors forward.

[David Gustafik] dropped us the tip on this one. Thanks!

A Trip Down The Vacuum Clamping Rabbit Hole

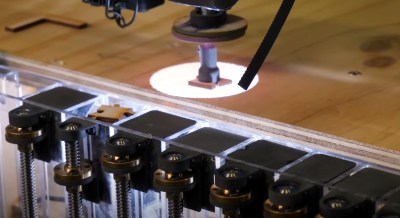
We all know how easy it is to fall down the rabbit hole,  something that turns a seemingly simple job into an accidental journey of experimentation and discovery. And perhaps nobody is more prone to rabbit-holing than [Matthias Wandel], at least judging by his recent foray into quantitating different techniques for vacuum clamping in the woodshop. (Video, embedded below.)

To understand where this all came from, you’ll have to dial back to [Matthias]’s first video, where he was just trying to make a simple corkboard. In an effort to get even pressure over the whole surface of the board, he came up with a shop-expedient vacuum clamp, made from a sheet of thick plastic, some scraps of wood and clamps, and a couple of vacuums. With the workpiece sandwiched between a smooth, flat table and the plastic sheet, he was able to suck the air out and apply a tremendous amount of force to the corkboard.

The comments to the first video led to the one linked below, wherein [Matthias] aimed to explore some of the criticisms of his approach. Using a quartet of BMP280 pressure sensor breakout boards and a Raspberry Pi, he was able to nicely chart the pressure inside his clamping jig. He found that not only did the sensors make it easy to find and fix leaks, they also proved that adding a porous layer between the workpiece and the vacuum bag wouldn’t likely improve clamping. He was also able to show which of his collection of vacuums worked best — unsurprisingly, the Miele sucked the hardest, although he found that it wasn’t suitable for continuous clamping duty.

We can see a lot of uses for a jig like this, and we really like it when trips down the rabbit hole yield such interesting results. Especially quantitative results; remember [Matthias]’s exploration of basement humidity?

Continue reading “A Trip Down The Vacuum Clamping Rabbit Hole”

Steam Engine Replica From LEGO

If engineering choices a hundred years ago had been only slightly different, we could have ended up in a world full of steam engines rather than internal combustion engines. For now, though, steam engines are limited to a few niche applications and, of course, models built by enthusiasts. This one for example is built entirely in LEGO as a scale replica of a steam engine originally produced in 1907.

The model is based on a 2500 horsepower triple-expansion four-cylinder engine that was actually in use during the first half of the 20th century. Since the model is built using nothing but LEGO (and a few rubber bands) it operates using a vacuum rather than with working steam, but the principle is essentially the same. It also includes Corliss valves, a technology from c.1850 that used rotating valves and improved steam engine efficiency dramatically for the time.

This build is an impressive recreation of the original machine, and can even run at extremely slow speeds thanks to a working valve on the top,  allowing its operation to be viewed in detail. Maximum speed is about 80 rpm, very close to the original machine’s 68 rpm operational speed. If you’d prefer your steam engines to have real-world applications, though, make sure to check out this steam-powered lawnmower.

Thanks to [Hari] for the tip!

Continue reading “Steam Engine Replica From LEGO”

Bad Idea For Desoldering Actually Might Be Pretty Smart

This video on building a DIY desoldering iron says it all right up front: this is stupid and dangerous, and you shouldn’t do it. But that doesn’t mean it doesn’t work, or that it doesn’t have potential to be turned into something else.

The story begins, as it often does these days, on the pages of Amazon as [AnotherMaker] shopped for a real desoldering setup. Despite a case of sticker shock, he took the plunge on a nice Hakko vacuum desolderer, but as is also often the case, it failed to arrive. Rather than accept defeat, [AnotherMaker] purchased a cheap-o soldering iron and a brass tee fitting for small-bore tubing that would chuck nicely into the spot where the stock tip once lived, giving him a way to both melt solder and move air.

Unfortunately, rather than applying a vacuum, he chose to blast 100 PSI compressed air through the tip, which certainly moves a lot of solder, perhaps at the cost of burns and eye injuries. The potential for accidental short circuits is pretty high too, but c’mon — it’s not like we all haven’t flicked or dropped a board to desolder something. Is this really much different?

As fraught with peril as this method may be, [AnotherMaker] is onto something here. Perhaps adding a 3D-printed venturi generator could turn that blast of air into a vacuum. Or maybe a vacuum pump for a manual pick-and-place would do the trick too.

Continue reading “Bad Idea For Desoldering Actually Might Be Pretty Smart”

Vacuum Dragster Uses Syringes For Propulsion

Atmospheric pressure is all around us, and capable of providing a great deal of force when used properly. As Otto Von Guericke demonstrated with his Magdeburg hemispheres over 350 years ago, simply removing air from a chamber to create a vacuum can have astounding results. More recently, [Tom Stanton] has used vacuum to power a small 3D-printed dragster.

In the dragster build, a typical plunger syringe is plugged at the end, and the plunger pulled back. Atmospheric pressure acts against the vacuum, wanting to push the plunger back towards its original position. To make use of this, a string is attached to the plunger, causing it to turn a gear as it moves forward, driving the rear wheels through a belt drive. With the correct gear ratio on the belt drive, the dragster is capable of spinning its tires and shooting forwards at a quick pace.

The work is a great follow on from [Tom]’s earlier vacuum experiments, using syringes as small rockets.  It reminds us of the classic CO2 dragsters from high school competitions, and would be a great project for any science class. Video after the break.

Continue reading “Vacuum Dragster Uses Syringes For Propulsion”