Two Joysticks Talk To FPGA Arcade Game Over A VGA Cable

We really love when hacks of previous hacks show up in the tip line. It shows how the hardware hacking community can be a feedback loop, where one hack begets the next, and so on until great things are everywhere. This hacked joystick port for an FPGA Pac Man game is a perfect example of that creative churn.

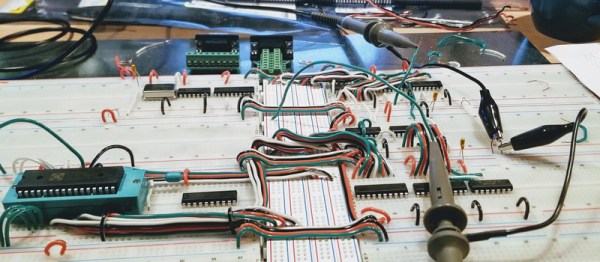
The story starts with Pano Man, a version of the venerable arcade game ported to a Pano Logic FPGA thin client by [Skip]. We covered that story when it first came out, and it caught the attention of [Tom Verbeure], particularly the bit in the GitHub readme file which suggested there might be a better way to handle the joystick connections. So [Tom] took up the challenge of using the Extended Display Identification Data (EDID) circuit in the VGA connector to support an Atari 2600 joystick. The EDID system is an I²C bus, so the job needed the right port expander. [Tom] chose the MCP23017, a 16-bit device that would have enough GPIO for dual joysticks and a few extra buttons. Having never designed a PCB before, [Tom] fell down that rabbit hole for a bit, but quickly came up with a working design, and then a better one, and then the final version. The video below shows it in action with Pano Man.

We think the creative loop between [Skip] and [Tom] was great here, and we can’t wait to see who escalates next. And it’s pretty amazing how much IO can be stuffed over two wires if you have the right tools. Check out this VGA sniffing effort to learn more about EDID and I²C.

Continue reading “Two Joysticks Talk To FPGA Arcade Game Over A VGA Cable”

Little FPV Bot Keeps It Simple With An ESP32

When it comes to robots, it seems the trend is to make them as complicated as possible – look at anything from Boston Dynamics if you’ve any doubt of that. But there’s plenty to be said for simple robots too, such as this adorable ESP32-driven live-streaming bot.

Now it’s true that [Max.K]’s creation is more remote controlled car than robot, and comparing it to one of the nightmare-fuelling creations of Boston Dynamics is perhaps unfair. But [Max.K]’s new project is itself a simplification and reimagining of his earlier, larger “ZeroBot“. As the name implies, ZeroBot was controlled by a Raspberry Pi Zero, an obvious choice for a mobile platform designed to stream FPV video. The ESP32 bot eschews the Pi platform in favor of, well, an ESP32. To save as much space as possible, [Max.K] did a custom PCB for the microcontroller and its supporting components. The 3D-printed case is nicely designed to hold the board along with two motors, a small VGA camera, and a battery pack. At 160×120 resolution, the video isn’t amazing, but the fact that it can be streamed from the ESP32 at a decent enough framerate to drive the bot using a simple web interface is impressive.

This was a fun project and a very clean, smooth build. We like the lines of this little bot, and wouldn’t mind building one as a quick weekend project ourselves.

Continue reading “Little FPV Bot Keeps It Simple With An ESP32”

Back To Video Basics With An ESP32 VGA Display

In a world where standards come and go with alarming speed, there’s something comforting about VGA. It’s the least common denominator of video standards, and seeing that chunky DB15 connector on the back of a computer means that no matter what, you’ll be able to get something from it, if you can just find a VGA cable in your junk bin.

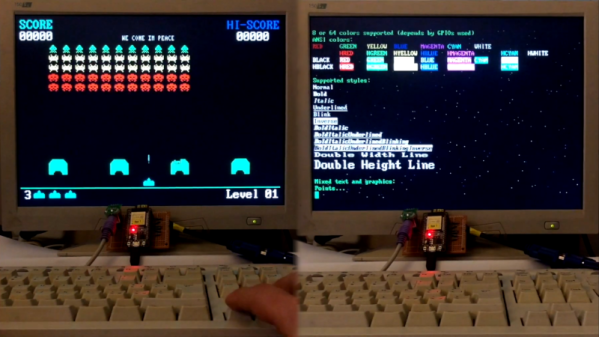
But that’s the PC world; what about microcontrollers? Can you coax VGA video from them? Yes, you can, with an ESP32, a handful of resistors, and a little bit of clever programming. At least that’s what [bitluni] has managed to do in his continuing quest to push the ESP32 to output all the signals. For this project, [bitluni] needed to generate three separate signals – red, green, and blue – but with only two DACs on board, he had to try something else. He built external DACs the old way using R/2R voltage divider networks and addressed them with the I2S bus in LCD mode. He needed to make some compromises to fit the three color signals and the horizontal and vertical sync pulses into the 24 available bits, and there were a few false starts, but the video below shows that he was able to produce a 320×240 signal, and eventually goosed that up to a non-native 460×480.

It’s a pretty impressive hack, and we learned a lot about both the ESP32 and the VGA standard by watching the video. He’s previously used the ESP32 to build an AM radio station and to output composite PAL video, and even turned his oscilloscope into a vector display with it. They’re all great learning projects too.

Continue reading “Back To Video Basics With An ESP32 VGA Display”

Do Other Things Besides Output Video

Small microcontrollers and tiny systems-on-chips are getting more and more popular these days as the price comes down and the ease of programming goes up. A Raspberry Pi is relatively inexpensive and can do pretty much everything you need, but not every chip out there can do something most of us take for granted like output video. For a lot of platforms, it’s next to impossible to do while saving any processor or memory for other tasks besides the video output itself.

[Dave] aka [Mubes] has been working on the Blue Pill platform which is a STM32F103C8 board. While they don’t natively output video, it’s a feature that provides a handy tool to have for debugging in order to see what’s going on in your code. However, if the video code takes up all of the processor power and memory there’s not much point. [Dave]’s video output program, on the other hand, takes up only 1200 bytes of RAM and 24% of the processor for a 50×18 text display over VGA, leaving a lot of room left for whatever else you need the tiny board to do.

Video output on a device this small and lightweight is an impressive feat, especially while saving room for other tasks. This brings it firmly out of the realm of novelty and into the space of useful tools to keep around. If you want to try the same thing on an ATtiny, though, you might have to come up with some more impressive tricks.

Continue reading “Do Other Things Besides Output Video”

Pac-Man Fever Comes To The Pano Logic FPGA

If you’ve been reading Hackaday for a while now, you might recall the tale of Pano Logic that we first covered all the way back in 2013. They were a company that put out some very interesting FPGA-based thin clients, but as occasionally happens in situations like this, the market wasn’t ready and the company went belly up. These thin clients, now without official support, invariably got dumped onto the second-hand market. Shame for Pano Logic and their staff, but good news for hackers like [Skip Hansen].

After seeing a few posts about the Pano Logic devices and general FPGA hacking, he decided to grab a few on eBay and dive in. Using open source tools and the wealth of information that’s available [Skip] was able to get a Pac-Man simulator up and running over his holiday break, and he tells us his life may never be the same again. FPGA hacking is a fascinating subject with a lot of activity right now, and since you can get these Pano Logic boxes on eBay for less than $10 USD in some cases, now is as good a time as ever to get your feet wet.

Like many open source projects, [Skip] says his code is built upon the existing work of a number of other programmers, which let him get up and running much faster than if he had to start from scratch. He describes his code as the “glue” that mashes these projects together, but we think he’s being somewhat modest there. It took more than copying and pasting some code into an IDE to get Blinky, Pinky, Inky and Clyde doing their thing on the Pano Logic.

The biggest challenge was the lack of I/O. The Pano Logic thin clients have USB ports, but it seems nobody has quite figured out how to get them working yet. To talk to the outside world, you’ve got to get a little more creative. Eventually [Skip] was able to track down four lines he could effectively use as GPIO: two which are used to drive the LEDs on the device, and two which are used for the VGA port’s Display Data Channel (DDC) pins. Soldering jumpers from the LEDs to the unused pins in the device’s VGA connector meant he was even able to get these four GPIO lines accessible from the outside of the Pano Logic without having to cut any holes in the case.

Anyone with a Pano Logic client that has a VGA port, an Atari 2600 joystick, and who doesn’t mind soldering a couple of wires can now play Pac-Man with the bitstream [Skip] has provided. But where do we go from here? How long until we see DOOM running on it? Perhaps one of you fine readers should pick one up and see what you can do to advance the state of Pano Logic hacking. Just be sure to let us know about it.

We’ve previously covered one of the projects used to get this Pac-Man simulator off the ground, a very cool ray tracing demo for the Pano Logic developed by [Tom Verbeure]. In fact, [Skip] says that project was what got him interested in FPGA hacking in the first place. If you’re thinking of following his lead, you might also want to check out our FPGA Boot Camp.

Atari Lynx 2600 Console Mod

Atari Lynx Becomes Modern 2600 Console Homage

With its introduction in 1989, the Atari Lynx was the first handheld videogame system to include a color LCD. The gigantic size and equally gigantic price tag did not win-over a massive audience, but that doesn’t mean the Lynx was without its fans. Over the past few months a modder named [Jared] has been toiling away with his project to transform an Atari Lynx into a home console.

Atari Lynx 2600 Console Mod Motherboard

The inspiration behind the mod was the original Atari console, the Atari 2600. [Jared’s] console mod, called the Atari Lynx 2600, utilizes a four-switch 2600 case as an enclosure. However, since the Atari 2600 joystick did not offer enough button real estate an NES controller was used instead. A male-male serial cable serves as the new controller cord, while all the buttons on the face of the Lynx are hardwired to a female DB9 port. As an added touch a custom 3D printed cartridge adapter was incorporated into the original 2600 cartridge slot.

Since the Lynx did not natively support video out, and intermediary device known as the McWill LCD mod kit was used. The McWill LCD mod is typically done in order to modernize the Atari Lynx’s screen with hardware from this decade, but [Jared] used the kit in order to get VGA video output from the Lynx. Not satisfied with just VGA [Jared] also included a VGA to HDMI scaler inside to ensure a wider compatibility with current displays. Fittingly the HDMI port was placed on the back of the 2600 enclosure where the RF video used to come from.

Bonus points should go to [Jared] for going the extra mile and creating a custom console box to accompany the console mod. The entirety of the project was detailed in a three-part video series, but you can watch the console in action in part 2 below:

Continue reading “Atari Lynx Becomes Modern 2600 Console Homage”

Spoofing Cell Networks With A USB To VGA Adapter

RTL-SDR brought cheap and ubiquitous Software Defined Radio (SDR) to the masses, opening up whole swaths of the RF spectrum which were simply unavailable to the average hacker previously. Because the RTL-SDR supported devices were designed as TV tuners, they had no capability to transmit. For the price they are still an absolutely fantastic deal, and deserve to be in any modern hacker’s toolkit, but sometimes you want to reach out and touch someone.

GSM network broadcast from a VGA adapter

Now you can. At OsmoDevCon [Steve Markgraf] released osmo-fl2k, a tool which allows transmit-only SDR through cheap USB 3.0 to VGA adapters based on the Fresco Logic FL2000 chip. Available through the usual overseas suppliers for as little has $5 USD, these devices can be used unmodified to transmit low-power FM, DAB, DVB-T, GSM, UMTS and GPS signals.

In a demonstration on the project page, one of these USB VGA adapters is used to broadcast a GSM cellular network which is picked up by the adjacent cell phones. Another example shows how it can be used to broadcast FM radio. A GitHub repository has been set up which includes more examples. The signals transmitted from the FL2000 chip are obviously quite weak, but the next step will logically be the hardware modifications necessary to boost transmission to more useful levels.

To say this is a big deal is something of an understatement. For a few bucks, you’ll be able to get a device to spoof cellular networks and GPS signals. This was possible before, of course, but took SDR hardware that was generally outside the budget of the casual experimenter. If you bought a HackRF or an Ettus Research rig, you were probably responsible enough not to get into trouble with it, but that’s not necessarily the case anymore. As exciting as this technology is, we would be wise to approach it with caution. In an increasingly automated world, GPS spoofing can have some pretty bad results.