Feeling The Heat Of High-Frequency Trading

It’s high summer here in North America, and for a lot of us, this one has been a scorcher. Media reports have been filled with coverage of heat wave after heat wave, with temperature records falling like dominoes.

But as they say, it’s not the heat, it’s the humidity, and that was painfully true in the first week of July as a slug of tropical air settled into the northeast United States. With dewpoints well into the 70s (25°C plus) and air temperatures pushing the century-mark (38°C), people suffered and systems from transportation to the electrical grid strained under the load. But as punishing as such soupy conditions are for people, there are other effects that are less well known but of critical importance to financial markets, where increased humidity can lead to billion-dollar losses for markets. Welcome to the weird world of high-frequency trading.

Continue reading “Feeling The Heat Of High-Frequency Trading”

Laser Draws Weather Report

Have you ever wished that a laser could tell you the weather? If you have, then [tuckershannon] has you covered. He’s created a machine that uses a laser and some UV sensitive paper to draw the temperature and a weather icon! And that’s not all! It’s connected to the internet, so it can also show the time and print out messages.

Building on [tuckershannon]’s previous work with glow-in-the-dark drawing, the brains inside this machine is a Raspberry Pi Zero. The laser itself is a 5mw, 405nm laser pointer with the button zip-tied down. Two 28BYJ-48 stepper motors are used to orient the laser, one for the rotation and another for the height angle. Each stepper motor is connected to a motor driver board and then wired directly to the Pi.

The base and arm that holds the laser were designed in SolidWorks and then 3d printed. The stepper motors are mounted perpendicular to one another and then the laser pointer mounted at the end. The batteries have been removed from the laser and the terminals are also wired directly to the raspberry pi. The Pi is then connected to Alexa via IFTTT so that it can be controlled by voice from anywhere.

The real beauty of [tucker]’s laser drawing machine is that is will draw out the temperature and weather icon, as well as drawing the time in either digital or analog forms! We’ve seen [tuckershannon]’s work before. The precursors to this project were his clock which uses a robotic arm with a UV LED on it to draw the time and another clock which uses similar robotic arm only with a laser attached. Let’s hope we get to see the rest of [tucker]’s progress!

Continue reading “Laser Draws Weather Report”

$6 Weather Station Goes Where You Do

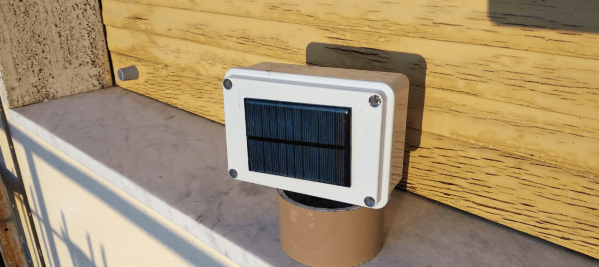
We admit, we see a lot of weather stations. What makes [Mike Diamond’s] take on this old favorite interesting is that it is tiny enough to carry with you, and uses your cell phone as a hotspot to deliver its data. Of course, that assumes you have a phone that can act as a hotspot.

The parts are straightforward, a power supply, an ESP8266, and a weather sensor board. It looks as though you could easily slip the whole affair into a tube or maybe a 3D printed enclosure. We were a little concerned about the bare wire used, but as [Mike] points out you can use insulated wire if you like, and we’d encourage you to do so.

Continue reading “$6 Weather Station Goes Where You Do”

The Solid State Weather Station

Building personal weather stations has become easier now than ever before, thanks to all the improvements in sensors, electronics, and prototyping techniques. The availability of cheap networking modules allows us to make sure these IoT devices can transmit their information to public databases, thereby providing local communities with relevant weather data about their immediate surroundings.

[Manolis Nikiforakis] is attempting to build the Weather Pyramid — a completely solid-state, maintenance free, energy and communications autonomous weather sensing device, designed for mass scale deployment. Typically, a weather station has sensors for measuring temperature, pressure, humidity, wind speed and rainfall. While most of these parameters can be measured using solid-state sensors, getting wind speed, wind direction and rainfall numbers usually require some form of electro-mechanical devices.

The construction of such sensors is tricky and non-trivial. When planning to deploy in large numbers, you also need to ensure they are low-cost, easy to install and don’t require frequent maintenance. Eliminating all of these problems could result in more reliable, low-cost weather stations to be built, which can then be installed in large numbers at remote locations.

[Manolis] has some ideas on how he can solve these problems. For wind speed and direction, he plans to obtain readings from the accelerometer, gyroscope, and compass in an inertial sensor (IMU), possibly the MPU-9150. The plan is to track the motion of the IMU sensor as it swings freely from a tether like a pendulum. He has done some paper-napkin calculations and he seems confident that it will provide the desired results when he tests his prototype. Rainfall measurement will be done via capacitive sensing, using either a dedicated sensor such as the MPR121 or the built-in touch capability in the ESP32. The design and arrangement of the electrode tracks will be important to measure the rainfall correctly by sensing the drops. The size, shape and weight distribution of the enclosure where the sensors will be installed is going to be critical too since it will impact the range, resolution, and accuracy of the instrument. [Manolis] is working on several design ideas that he intends to try out before deciding if the whole weather station will be inside the swinging enclosure, or just the sensors.

If you have any feedback to offer before he proceeds further, let him know via the comments below.

Checking The Weather Without A Window

Making a weather display is great because it’s a simple project that shows off some skills and has an obvious daily use. So [ACROBOTIC Industries] decided to make an easy kit for the Hackaday Prize to make weather displays even more accessible.

Calling it the ESPecter, [ACROBOTIC Industries] wanted to make this a simple project for anyone, regardless of skill with a soldering iron or Arduino toolkit. So they decided to base the guts on common components that can be put together easily, specifically a Wemos Mini D1 with an OLED shield as a bright display. They also designed a cool tiltable 3D-printed enclosure for this small device so that you can orient it to your eye level.

ESPecter breadboarded prototype.

While they already have a breadboarded prototype, and a 3D printed case, some software work remains to make the project really shine. They plan to add nice features like a web interface to configure location and network information, alerts, additional locations, and historical weather data. They also want to create a weather library to display well on a low-resolution screen and add battery operation.

We look forward to seeing the final version later in the Hackaday Prize!

This isn’t the first weather project we’ve seen around here. Other variants include mirror weather displays, an ESP8266-based weather monitoring station, a very low-power weather station, and this roundup of weather displays which might give you some inspiration.

Look Out Nest — Here Comes The WIoT-2

[Dave] is an avid hacker and no stranger to Hackaday. When he decided to give his IoT weather display an upgrade, he pulled out all the stops.

The WIoT-2 is less of a weather station and more of an info center for their house — conveniently located by their front door — for just about anything [Dave] or his partner need to know when entering or exiting their home. It displays indoor temperature and humidity, date, time, garbage collection schedule, currency exchange rates, whether the garage door is open or closed, the hot tub’s temperature, a check in for his kids, current weather data from a custom station [Dave] built outside his house, and the local forecast.

WIoT-2’s display is a Nextion TFT and the brains behind the operation is a NodeMCU 8266. He made extensive use of Blynk to handle monitoring of the various feeds, and will soon be integrating master control for all the networked outlets in the house into the system. He found setting up the hardware to be fairly clear-cut but notes that he cannot have the screen powered on when uploading sketches to the NodeMCU.  He circumvented the problem by adding a latching switch to the screen’s power line.

[Dave] curated a robust explanation of his build that includes tips, tricks, code — and a how-to to boot! If you’re not already starting your own build of this info suite, you may be tantalized by some of his other projects.

Continue reading “Look Out Nest — Here Comes The WIoT-2”

Weather matrix lamp

Pi Weather Lamp Puts Lava Lamps To Shame

Representing the weather on an LED lamp in a manner that’s easy to interpret can be difficult, but [Gosse Adema]’s weather/matrix lamp makes it not only obvious what the weather is but also offers a very attractive display. For rain, drops of light move downward, and for wind, sideways. The temperature is shown using a range of colors from red to blue, and since he is situated in the Netherlands he needed snow, which he shows as white. A rainy, windy day has lights moving both down and sideways with temperature information as the background.

Weather matrix lamp

To implement it he mounted LED strips inside a 3D printed cylinder with reflectors for each LED, all of which fitted into a glass cylinder taken from another lamp purchased online. The brains of it is a Raspberry Pi Zero W housed in the bottom along with a fan. Both the LEDs and the fan are controlled by the Pi. He took a lot of care with power management, first calculating the current that the LEDs would draw, and then writing Python code to limit that draw. However upon measurement, the current draw was much lower than expected and so he resized the power supply appropriately. He also took care to correctly size the wires and properly distribute the power with a specially made power distribution board. Overall, we really like the thorough job he’s done.

But then again, what’s not to like about [Gosse]’s projects. In the area of lighting, he’s dazzled us with WiFi controlled Christmas tree ornaments, but he’s also delighted us with a Prusa i3 based LEGO 3D printer on which he printed LEGO parts and then made a special extruder for printing chocolate.