The March Toward A DIY Metal 3D Printer

[Hyna] has spent seven years working with electron microscopes and five years with 3D printers. Now the goal is to combine expertise from both realms into a metal 3D printer based on electron-beam melting (EBM). The concept is something of an all-in-one device that combines traits of an electron beam welder, an FDM 3D printer, and an electron microscope. While under high vacuum, an electron beam will be used to fuse metal (either a wire or a powder) to build up objects layer by layer. That end goal is still in the future, but [Hyna] has made significant progress on the vacuum chamber and the high voltage system.

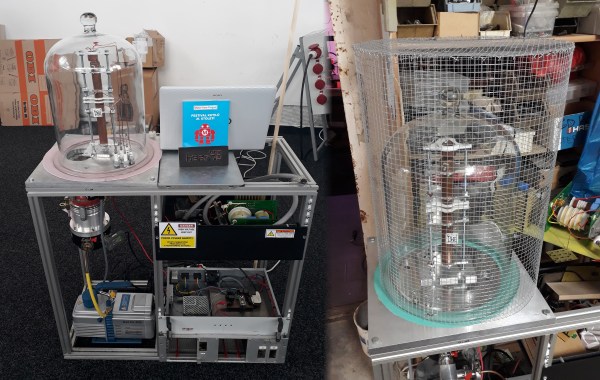
The device is built around a structure made of 80/20 extruded aluminum framing. The main platform showcases an electron gun, encased within a glass jar that is further encased within a metal mesh to prevent the glass from spreading too far in the event of an implosion.

The design of the home-brewed high-voltage power supply involves an isolation transformer (designed to 60kV), using a half-bridge topology to prevent high leakage inductance. The transformer is connected to a buck converter for filament heating and a step up. The mains of the system are also connected to a voltage converter, which can be current-fed or voltage-fed to operate as either an electron beam welder or scanning electron microscope (SEM). During operation, the power supply connects to a 24V input and delivers the beam through a Wehnelt cylinder, an electrode opposite an anode that focuses and controls the electron beam. The entire system is currently being driven by an FPGA and STM32.

The vacuum enclosure itself is quite far along. [Hyna] milled a board with two outputs for a solid state relay (SSR) to a 230V pre-vacuum pump and a 230V pre-vacuum pump valve, two outputs for vent valves, and inputs from a Piranni gauge and a Cold Cathode Gauge, as well as a port for a TMP controller. After demoing the project at Maker Faire Prague, [Hyna] went back and milled a mold for a silicone gasket, a better vacuum seal for the electron beam.

While we’ve heard a lot about different metal 3D printing methods, this is the first time we’ve seen an EBM project outside of industry. And this may be the first to attempt to combine three separate uses for an HV electron beam into the same build.

Welding Robot Takes On A Hot, Dirty, Dangerous Job

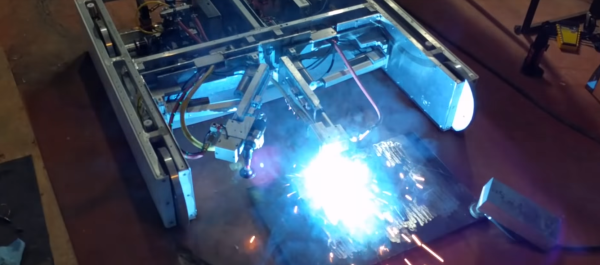
They used to say that robots would take over the jobs too dirty or dangerous for humans. That is exactly what [Joel Sullivan] had in mind when he created this welding robot. [Joel] designed the robot for the OSB industry. No, that’s not a new operating system, it’s short for Oriented Strand Board. An engineered lumber, OSB is made of strands (or chips) of wood. It’s similar to plywood but doesn’t require large thin sheets of lumber. To make a panel of OSB, a 5-inch thick matt of wood chips is mixed with glue and compressed down to 5/16″ at 7500 PSI and 400° F.

The presses used to make OSB are a massively parallel operation. 20 or more boards can be pressed at once. Thy press is also a prime area for damage. A nut or bolt hidden in the wood will dig into the press, causing a dent which will show up on every sheet which passes through that section. The only way to fix the press is to shut it down, partially dismantle it, and fill the void in with a welder. [Joel’s] robot eliminates most of the downtime by performing the welding on a still hot, still assembled press.

The robot looks like it was inspired by BattleBots, which is fitting as the environment it works in is more like a battleground. It’s a low, wide machine. In the front are two articulated arms, one with a welder, and one with a die grinder. The welder fills any voids in the press platen, and the die grinder grinds the fresh welds flat.  An intel NUC controls things, with plenty of motor drives, power supplies, and relays on board.

[Joel’s] bot is tethered, with umbilicals for argon, electricity and compressed air. Air travels through channels throughout the chassis and keeps the robot cool on the hot press. Everything is designed for high temperatures, even the wheels. [Joel] tried several types of rubber, but eventually settled on solid aluminum wheels. The ‘bot doesn’t move very fast, so there is plenty of traction. Some tiny stepper motors drive the wheels. When it’s time to weld, pneumatic outriggers lock the robot in place inside the narrow press.

Cameras with digital crosshairs allow the operator to control everything through a web interface. Once all the parameters are set up, the operator clicks go and sparks fly as the robot begins welding.

If you’re into seriously strong robots, check out trackbot, or this remote-controlled snow blower!

Continue reading “Welding Robot Takes On A Hot, Dirty, Dangerous Job”

The Un-Economy Of Building Your Own Spot Welder

If there’s one thing that brings hackers together, it’s the ability to build something for less money than it takes to buy it. It’s an exercise [Great Scott Gadgets] put to the test because he was playing around with some 18650 lithium cells, and had a huge need to put some tabs on batteries. This can be done by soldering, but to do it right you should really use a spot welder. Here’s the rub: you can buy a spot welder for about $250, and you can build one for a little less. So, the question: should [Great Scott] build or buy a spot welder? This wouldn’t be worth reading if he started off with an eBay order.

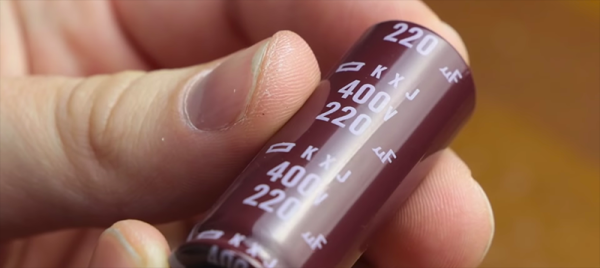
[Great Scott] designed this spot welder around a half-dozen supercaps, all securely held together with Kapton tape. This goes through a set of MOSFETs, and everything is controlled through an Arduino, a rotary encoder, and a dirt-cheap OLED display. It’s a simple enough circuit but a bit too much for perfboard, so [Great Scott] laid out a PCB and got a few boards for under $40. A bit of solder and some debugging later, and theoretically a spot welder was created.

After all that work, how did the spot welder work? Well, it didn’t. A slight misstep in the schematic meant this board didn’t have reference ground on the MOSFETs, so all this work was for naught. Of course, the only thing required to fix this board was a second board spin, as [Great Scott] probably bought more parts than necessary because that’s what smart people do. Still, he decided to cut his losses and shelve the project.

Continue reading “The Un-Economy Of Building Your Own Spot Welder”

Can You 3D Print An Axe?

3D printers hit the scene in a big way in the last decade, and thanks to the constant improvements that we’ve seen since then you can now get a decent one, assembled or as a kit, for a reasonable price. The one major drawback is that almost all of these printers are limited to printing in plastic, which has its obvious limitations. Printing in metal seems like the next logical step, and a group from Michigan Tech has created something that is accessible to most of us. Spoiler: they used plastic and metal printing to print a functioning axe.

Untill now, most metal printers have used a process like laser sintering to achieve the desired effect. This group uses a much more common tool: a MIG welder. MIG welders work by passing a wire through the welding handle, which would normally used as the filler material for the weld. If you use the wire for laying down material rather than for welding specifically, you can build up material on a surface in essentially the same way that a printer that prints plastic would.

From there, all that’s needed is to attach the MIG welder to a CNC machine and get to printing. The team has produced some great results so far, including some metal braces and farm implements, so hopefully their work leads to another revolution in 3D printing for the masses. We think it’s high time.

Welding Batteries With Batteries

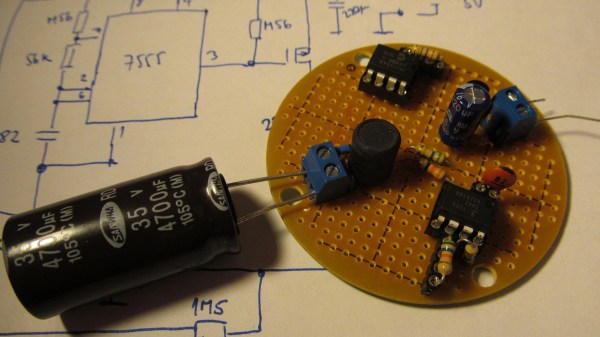
Welding equipment is always expensive and bulky, right? Heavens no! [Jaromir Sukuba] is making a welder for battery tabs which can fit in a pocket and gets its power from a coin cell. It may be expensive to power compared to a mains welder, but for the sake of portability this is quite the hack. Not only that, but it uses 555 timers in the charging circuit.

His entry for the 2017 Coin Cell Challenge saps every bit of power from a coin cell and stores it up in a 100F supercapacitor bank. All that stored energy takes a long time to get into the supercapacitors but it comes out in a flash. In fact, it can take 12 hours to fully charge. For the convenience of size, we have to trade the convenience of speed. This should be a strong contestant for the Supernova and Heavy Lifting categories.

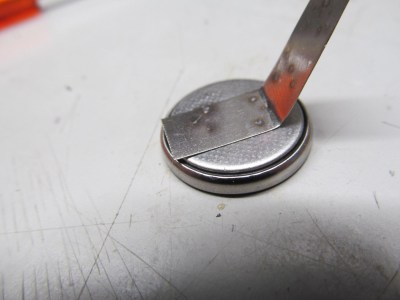
We see a quick demonstration of a successfully welded tab which shows that using coin cells to weld metal to coin cells is equally ironic and apropos. Other welders on Hackaday feature a quicker way to control your battery tab welding, safety-rich spot welding, or just go off the rails completely and use an arc welder to make a coil gun.

3D Printed Gear Serves Seven Months Hard Labor

Even the staunchest 3D printing supporter would have to concede that in general, the greatest strength of 3D printing is not in the production of final parts, but in prototyping. Sure you can make functional prints, as the pages of this site will attest; but few would argue that you wouldn’t be better off getting your design cut out of metal or injection molded if you planned on putting the part into service over the long term. Especially if the part was to be subjected to rough service in an industrial setting.

While that’s valid advice, it certainly isn’t the definitive word on the issue. Just because a part is printed in plastic on a desktop 3D printer doesn’t necessarily mean it can’t be put into real service, at least for as long as it takes to get proper replacement parts. A recent success story from [bloomautomatic] serves as a perfect example, when one of the gears in his MIG welder split, he decided to try and print up a replacement in PLA while he waited for the nylon gear to get shipped out to him. Fast forward seven months and approximately 80,000 welds later, and [bloomautomatic] reports it’s finally time to install those replacement gears he ordered.

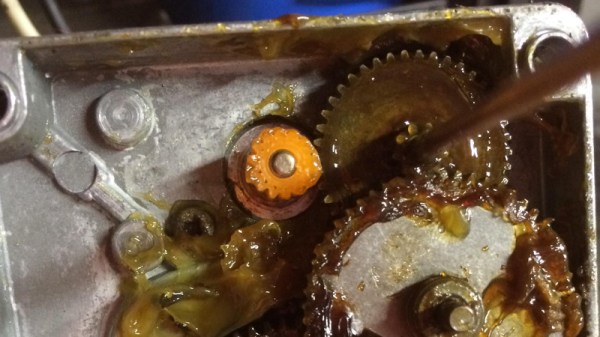
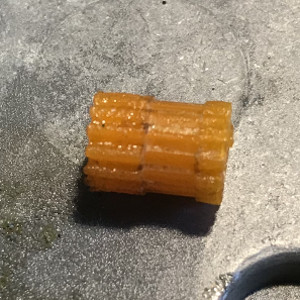
In the pictures [bloomautomatic] posted you can see the printed gear finally wore down to the point the teeth were essentially gone where they meshed with their metal counterparts. To those wondering why the gear was plastic to begin with, [bloomautomatic] explains that it’s intended to be a sacrificial gear that will give way instead of destroying the entire gearbox in the event of a jam. According to the original post he made when he installed the replacement gear, the part was printed in Folgertech PLA on a Monoprice Select Mini. There’s no mention of infill percentage, but with such a small part most slicers would likely have made it essentially solid to begin with.

While surviving seven tortuous months inside of the welder is no small feat, we wonder if hardier PLA formulationstreatment of the part post-printing, or even casting it in a different material couldn’t have turned this temporary part into a permanent replacement.

A Battery-Tab Welder With Real Control Issues

Spot welding should easier than it looks. After all, it’s just a lot of current in a short time through a small space. But it’s the control that can make the difference between consistently high-quality welds and poor performance, or maybe even a fire.

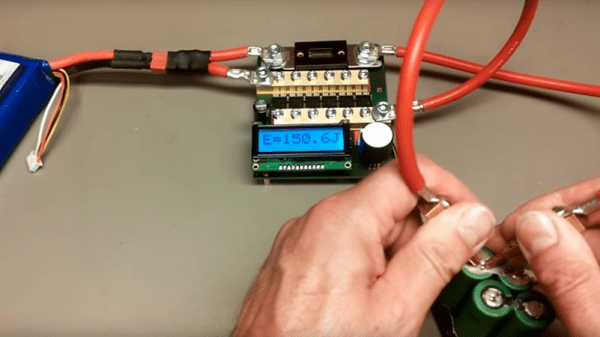
Control is where [WeAreTheWatt]’s next-level battery tab spot welder shines. The fact that there’s not a microwave oven transformer to be seen is a benefit to anyone sheepish about the usual mains-powered spot welders we usually see, even those designed with safety in mind. [WeAreTheWatt] chose to power his spot welder from a high-capacity RC battery pack, but we’d bet just about any high-current source would do. The controller itself is a very sturdy looking PCB with wide traces and nicely machined brass buss bars backing up an array of MOSFETs. A microcontroller performs quite a few functions; aside from timing the pulse, it can control the energy delivered, read the resistance of the 8AWG leads for calibration purposes, and even detect bad welds. The welder normally runs off a foot switch, but it can also detect when the leads are shorted and automatically apply a pulse — perfect for high-volume production. See it in action below.

There may be bigger welders, and ones with a little more fit and finish, but this one looks like a nicely engineered solution.

Continue reading “A Battery-Tab Welder With Real Control Issues”