ESP8266 Monitor Keeps An Eye On OctoPrint

At this point, you’ve almost certainly heard of OctoPrint. The web-based control interface for 3D printers is especially popular for those who’s primary computers run on an operating system that has a penchant for occasionally imploding. Even if you aren’t laboring under that common software handicap, OctoPrint offers a wide away of compelling features. Perhaps chief among them the ability to monitor your printer over the network, and if you insist, over the Internet. But while OctoPrint provides the server side for getting your printer on the net, you’re on your own for the client.

Rather than using a web browser like some kind of peon, [David Payne] has come up with a very slick desktop OctoPrint monitor using the WeMos D1 Mini ESP8266 board. With an exceptionally low part count and housed in a (what else) 3D printed enclosure, this is a cheap and easy OctoPrint accessory that we suspect will be decorating many a hacker’s desk before too long.

The electronics are simple to the extreme, just hook the 4 wires of an 128×64 OLED I2C display to the appropriate pins of the ESP8266 board, and you’re ready to upload the Arduino code [David] has come up with.

His code is very polished, from using WiFiManager for initial network setup to providing its own web-based configuration menus to get the device linked up to your OctoPrint instance, [David] clearly wanted this to be as smooth an experience as possible for the end user. When the 3D printer isn’t working on a job, the monitor will even switch over to showing you the time and weather. We’ve seen commercial products that weren’t this user-friendly.

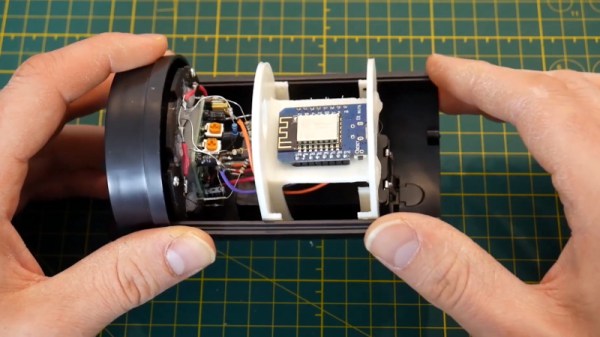
We also love the case design on this little gadget. While the aesthetics are perhaps debatable (sort of reminds us of the little fellows from Darwinia), we appreciate any functional print that doesn’t require supports. You’ll need to provide a couple of little screws to keep the back panel on, but other than that everything snaps into place.

Of course, you could always just use your smartphone to keep an eye on OctoPrint, and even if the remote management capabilities don’t grab your interest, there’s plenty of interesting plugins to keep you occupied.

Continue reading “ESP8266 Monitor Keeps An Eye On OctoPrint”

The Linux Throwie: Powering A Linux Server With A 0.3W Solar Panel

Have you ever had one of those moments, when you’re rummaging through your spare parts heap, and have a rather bizarre project idea that you can’t quite get out of your head? You know, the ones that have no clear use, but simply demand to be born, of glass and steel and silicon?

This time, the stubborn idea in question was sort of like a solar-rechargeable LED throwie, but instead of a blinking light, it has a fully cloud-accessible embedded Linux server in the form of a Raspberry Pi 3 Model B+. Your choice of embedded Linux board should work — I just happen to have a lot of these due to a shipping error.

There were two main challenges here: First, it would have to combine the smallest practical combination of solar panel, power supply, and Li-ion cell that could run the Raspberry Pi. Second, we’ll need to remotely activate and access the Pi regardless of where it is, as well as be able to connect it to WiFi without direct physical access. In this article we’ll be dealing with the first set of problems — stay tuned for the rest.

Continue reading “The Linux Throwie: Powering A Linux Server With A 0.3W Solar Panel”

Code Review Lamp Subtly Reminds You To Help Your Fellow Developer

[Dimitris Platis] works in an environment with a peer review process for accepting code changes. Code reviews generally are a good thing. One downside though, is that a lack of responsiveness from other developers can result in a big hit to team’s development speed. It isn’t that other developers are unwilling to do the reviews, it’s more that individuals are often absorbed in their own work and notification emails are easily missed. There is also a bit of a “tragedy of the commons” vibe to the situation, where it’s easy to feel that someone else will surely attend to the situation, but often no one does. To combat this, [Dimitris] built this Code Review Lamp, a subtle notification that aims to prod reviewers into action.

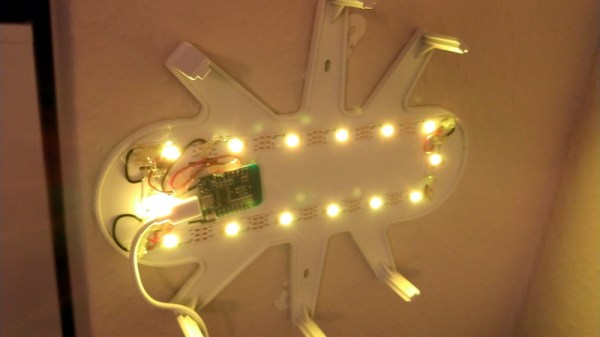
The lamp is based on a ring of RGB LEDs and a Wemos D1 Mini board. The Wemos utilizes the popular ESP8266, so it’s easy to develop for. The LED ring and Wemos are tied together with a slick custom PCB. Mounting the LED ring on the top of the PCB and the Wemos on the bottom allows for easy powering via a USB cable while directing light upward.  The assembly is placed in a translucent 3D printed enclosure creating a pleasant diffuse light source.

Every developer gets a Code Review Lamp. The lamps automatically log in to the change management system to check whether anything is awaiting review. If a review is ready, the Lamp glows in a color specific to the individual developer. All this serves as a gentle but persistent reminder that someone’s work is being held up until a review is completed.

We love the way that the device has a clear purpose: it does its job without any unnecessary features or parts. It’s similar to this ESP8266 IoT Motion Sensor in that it has a single job to do, and focuses on it well.

Continue reading “Code Review Lamp Subtly Reminds You To Help Your Fellow Developer”

Drill Jig Helps Mount WeMos D1 Mini

As far as ESP8266 boards go, the WeMos D1 Mini is a great choice if you’re looking to get started with hackerdom’s microcontroller du jour. It’s small, well supported, and can be had ridiculously cheap. Often going for as little as $3 USD each, we buy the things in bulk just to have spares on hand. But that’s not to say it’s a perfect board. For one, it lacks the customary mounting holes which would allow you to better integrate it into finished products.

This minor annoyance was enough to spring [Martin Raynsford] into action. He noticed there was some open area on the D1 Mini’s PCB where it seemed he could drill through to add his own mount points, but of course popping holes in a modern PCB can be risky business. There’s not a lot of wiggle room between success and heartbreak, and it’s not like the diminutive D1 Mini is that easy to hold down to begin with. So he designed a laser-cut jig to allow him to rapidly add mounting holes to his D1 Mini’s assembly line style.

For those who might be skeptical, [Martin] reports he’s seen no adverse effects from drilling through the board, though does admit it’s possible the close proximity of the metal screw heads to the ESP8266’s antenna may have a detrimental effect. That said, he’s tested them in his projects out to 25 m (82 feet) with no obvious problems. He’s using a 2 mm drill bit to make his hole, and M2 x 6 mm machine screws to hold the boards down.

The jig design is released as a SVG and DXF for anyone with a laser cutter to replicate, but it shouldn’t be too difficult to extrude those designs in the Z dimension for hackers who haven’t yet jumped on the subtractive manufacturing bandwagon.

When a project makes the leap from prototype to in-house production, designing and building jigs become an essential skill. From flashing firmware to doing final checkout, the time and effort spent building a jig early on will pay for itself quickly in production.

Create Your Own ESP8266 Shields

The ESP8266 has become incredibly popular in a relatively short time, and it’s no wonder. Cheap as dirt, impressively powerful, Arduino-compatible, and best of all, includes Wi-Fi right out of the box. But for all its capability and popularity, it’s still lagging behind the Arduino in at least one respect. Namely, the vast collection of add-on “Shields” which plug into the Arduino to add everything from breadboards to GPS receivers.

Until such time as the free market decides to pick up the pace and start making standardized shields for the various ESP8266 development boards, it looks as if hackers are going to have to pick up the slack. [Rui Santos] has put together a very detailed step-by-step guide on the creation of a simple shield for the popular Wemos D1 Mini board, which should give you plenty of inspiration for spinning up your own custom add-on modules.

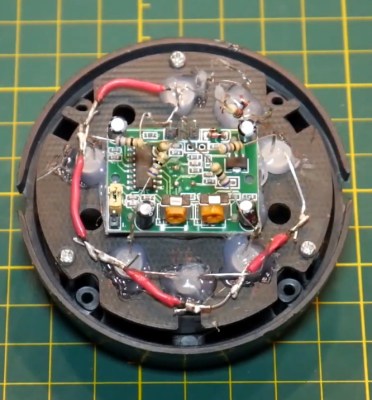
Presented as a written tutorial as well as a two part video, this guide covers everything from developing and testing your circuit on a breadboard to designing your PCB in KiCad and sending it off for fabrication. The end result is a professional looking PCB that matches the footprint of the stock D1 Mini and adds a DS18B20 temperature sensor, PIR motion detector, photoresistor, and some screw down terminals.

[Rui] goes on to show how you can utilize the new sensors shield via a web interface hosted on the ESP8266, and even wraps the whole thing up in a 3D printed enclosure. All worthwhile skills to check out if you’re looking to produce more cohesive finished products.

If you’re looking for a similar project for the ESP32, [Rui] has you covered there as well. You may also be interested in the series of ESP8266 tutorials we recently highlighted.

Continue reading “Create Your Own ESP8266 Shields”

Fail Of The Week: How Not To Make A 3D Scanner

Sometimes the best you can say about a project is, “Nice start.” That’s the case for this as-yet awful DIY 3D scanner, which can serve both as a launching point for further development and a lesson in what not to do.

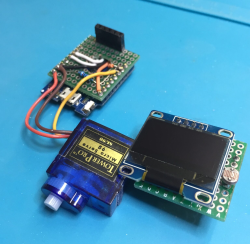
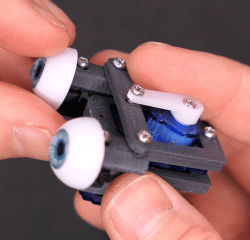
Don’t get us wrong, we have plenty of respect for [bitluni] and for the fact that he posts his failures as well as his successes, like composite video and AM radio signals from an ESP32. He used an ESP8266 in this project, which actually uses two different sensors: an ultrasonic transducer, and a small time-of-flight laser chip. Each was mounted to a two-axis scanner built from hobby servos and 3D-printed parts. The pitch and yaw axes move the sensors through a hemisphere gathering data, but unfortunately, the Wemos D1 Mini lacks the RAM to render the complete point cloud from the raw points. That’s farmed out to a WebGL page. Initial results with the ultrasonic sensor were not great, and the TOF sensor left everything to be desired too. But [bitluni] stuck with it, and got a few results that at least make it look like he’s heading in the right direction.

We expect he’ll get this sorted out and come back with some better results, but in the meantime, we applaud his willingness to post this so that we can all benefit from his pain. He might want to check out the results from this polished and pricey LIDAR scanner for inspiration.

Continue reading “Fail Of The Week: How Not To Make A 3D Scanner”

A Super Simple ESP8266 IOT Motion Sensor

It’s really hard to overstate how awesome ESP8266 development boards like the Wemos D1 Mini really are. For literally a couple of dollars you can get a decently powerful Wi-Fi enabled microcontroller that has enough free digital pins to do some useful work. Like the Arduino and Raspberry Pi before it, the ESP8266 is a device that’s opening up whole new areas of hacking and development that simply weren’t as practical or cost-effective as previously.

As a perfect example, take a look at this stupendously simple Internet-connected motion detector that [Eric William] has come up with. With just a Wemos D1 Mini, a standard PIR sensor, and some open source code, you can create a practical self-contained motion sensor module that can be placed anywhere you want to keep an eye on. When the sensor picks up something moving, it will trigger an IFTTT event.

It only takes three wires to get the electronics connected, but [Eric] has still gone ahead and provided a wiring diagram so there’s no confusion for young players. Add a 3D printed enclosure from Thingiverse and the hardware component of this project is done.

Using the Arduino Sketch [Eric] has written, you can easily plug in your Wi-Fi information and IFTTT key and trigger. All that’s left to do is put this IoT motion sensor to work by mounting it in the area to be monitored. Once the PIR sensor sees something moving, the ESP8266 will trigger IFTTT; what happens after that is up to you and your imagination. In the video after the break, you can see an example usage that pops up a notification on your mobile device to let you know something is afoot.

With its low cost and connectivity options, the ESP8266 is really the perfect platform for remote sensing applications. Though to give credit where credit’s due, this still isn’t the simplest motion sensor build we’ve seen.

Continue reading “A Super Simple ESP8266 IOT Motion Sensor”