The digital camera revolution swept through the world in the early 2000s, and aside from some unique situations and a handful of artists still using film, almost everyone has switched over to digital since then. Unfortunately that means that there’s a lot of high quality film cameras in the world that are gathering dust, but with a few pieces of equipment it’s possible to convert them to digital and get some more use out of them.
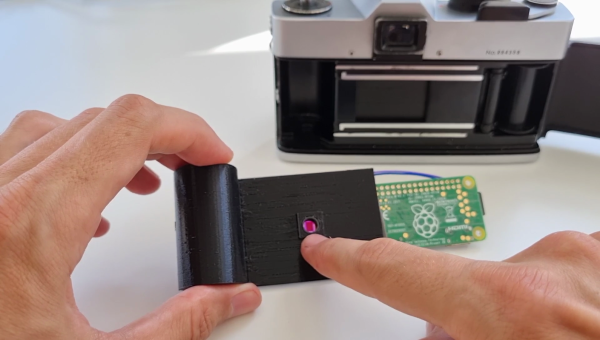
[befinitiv]’s latest project handles this conversion by swapping in a Raspberry Pi Zero where the film cartridge would otherwise be inserted into the camera. The Pi is attached to a 3D-printed case which mimics the shape of the film, and also houses a Pi camera right in front of the location where the film would be exposed. By removing the Pi camera’s lens, this new setup is able to take advantage of the analog camera’s optics instead and is able to capture images of relatively decent quality.
There are some perks of using this setup as well, namely that video can be broadcast to this phone over a wireless connection to a computer via the Raspberry Pi. It’s a pretty interesting build with excellent results for a remarkably low price tag, and it would be pretty straightforward to interface the camera’s shutter and other control dials into the Raspberry Pi to further replicate the action of an old film camera. And, if you enjoy [befinitiv]’s projects of bringing old tech into the modern world, be sure to check out his 80s-era DOS laptop which is able to run a modern Linux installation.