NVIDIA 1060 with Udoo Single Board Computer

Single Board Computer Plays Nice With NVIDIA GPU

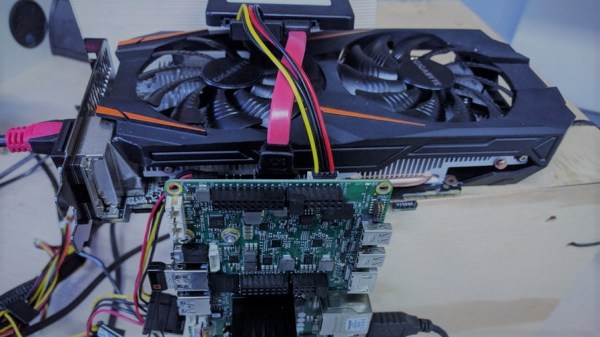
It’s about convenience when it comes to single board computers. The trade-off of raw compute power for size means the bulk of them end up being ARM based, but there are a few exceptions like the x86 based Udoo Ultra. The embedded Intel 405 GPU on the Udoo Ultra is better than most in the category, but that won’t begin to play much of anything outside of a browser window. Not satisfied with “standard” [Matteo] put together his build combining an Udoo x86 Ultra with a NVIDIA 1060 GPU. It seems ridiculous to have an expansion card almost three times longer than the entire computer its attached to, but since when did being ridiculous stop anyone in the pursuit of a few more polygons?

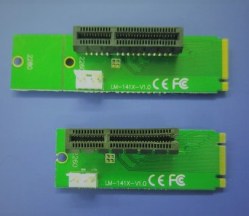
M.2 adapter board trim comparison
M.2 to PCIe adapter board (Top) Trimmed adapter board (Bottom)

Since the Udoo Ultra doesn’t feature a PCIe slot [Matteo] slotted in a M.2 to PCIe adapter board. There are two PCIe lines accessible by the Udoo Ultra’s M.2 port although trimming the adapter board was required in order to fit. The PCIe female slot was cut open to allow the 1060 GPU to slide in. All of the throughput of the 1060 GPU wouldn’t be utilized given the Udoo Ultra’s limitations anyway.

Windows 10 was the OS chosen for the machine so that all those NVIDIA drivers could be installed, and there’s also the added benefit of being able to sneak in a little Trackmania Turbo too. So to accompany the build, [Matteo] created a graphics comparison video to show the remarkable improvement over the embedded graphics chip. You can see the Time Spy benchmark results in the video below.

Continue reading “Single Board Computer Plays Nice With NVIDIA GPU”

Learn ARM Assembly With The Raspberry Pi

We live in a time when you don’t have to know assembly language to successfully work with embedded computers. The typical processor these days has resources that would shame early PCs and some of the larger ones are getting close to what was a powerful desktop machine only a few years ago. Even so, there are some cases where you really want to use assembly language. Maybe you need more speed. Or maybe you need very precise control over timing. Maybe you just like the challenge. [Robert G. Plantz] from Sonoma State University has an excellent book online titled “Introduction to Computer Organization: ARM Assembly Langauge Using the Raspberry Pi.” If you are interested in serious ARM assembly language, you really need to check out this book.

If you are more interested in x86-64 assembly and Linux [Plantz] has you covered there, too. Both books are free to read on the Internet, and you can pick up a printed version of the Linux book for a small payment if you want.

Continue reading “Learn ARM Assembly With The Raspberry Pi”

Calm Down: It’s Only Assembly Language

Based on [Ben Jojo’s] title — x86 Assembly Doesn’t have to be Scary — we assume that normal programmers fear assembly. Most hackers don’t mind it, but we also don’t often have an excuse to program assembly for desktop computers.

In fact, the post is really well suited for the typical hacker because it focuses the on real mode of an x86 processor after it boots. What makes this tutorial a little more interesting than the usual lecture is that it has interactive areas, where a VM runs your code in the browser after assembling with NASM.

Continue reading “Calm Down: It’s Only Assembly Language”

x86 emulation running DOS on ESP8266

PC-XT Emulator On ESP8266

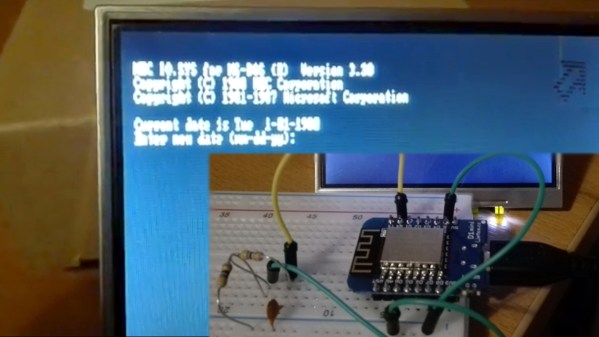
Do you remember the simpler times when you had a DOS command line, a handful of commands, and you talked to the hardware through a few BIOS and DOS interrupts? Okay, maybe it was a little limited, but nostalgia doesn’t care. Now [mcuhacker] is working on bringing some of those memories back by getting a PC-XT emulator running on an ESP8266.

For the x86 CPU emulator, he ported Fake86 which is written in C, and created an Arduino IDE environment for it. The MS-DOS 3.3 bootdisk image is stored in flash and is accessed as the A: drive. There’s no keyboard yet but he has 640×200 CGA working with 80×25 characters on a 3.5″ TFT display with the help of a low pass filter circuit. In the video below he shows it booting to the point where it asks for the date.

Continue reading “PC-XT Emulator On ESP8266”

Learn To Reverse Engineer X86_64 Binaries

Opening up things, see how they work, and make them do what you want are just the basic needs of the average hacker. In some cases, a screwdriver and multimeter will do the job, but in other cases a binary blob of random software is all we have to work with. Trying to understand an unknown binary executable is an exciting way to discover a system’s internal functionality.

While the basic principles of software reverse engineering are universal across most platforms, the details can naturally vary for different architectures. In the case of the x86 architecture, [Leonora Tindall] felt that most tutorials on the subject focus mostly on 32-bit and not so much on the 64-bit specifics. Determined to change that, she ended up with an extensive introduction tutorial for reverse engineering x86_64 binaries starting at the very basics, then gradually moving forward using crackme examples. Covering simple string analysis and digging through disassembled binaries to circumvent fictional security, the tutorial later introduces the Radare2 framework.

All example source code is provided in the accompanying GitHub repository, although it is advised to avoid looking at them to keep it more interesting and challenging. And in case you are looking for more challenges later on, or generally prefer a closer connection to the hardware, these MSP430 based capture the flag online challenges might be worth to look at next.

386 Too Much Horsepower? Try A 186, In An FPGA!

Typically when we hear the term “System-on-Chip” bandied around, our mind jumps straight to modern ARM-based processors that drive smartphones and embedded devices around us. Coming a little bit more out of left field is [Jamie]’s 80186 core, that runs on Intel FPGAs.

[Jamie] ran the core through a few vintage PC benchmarks.
[Jamie] has implemented the entire set of 80186 instructions in Verilog, and included some of the undocumented instructions too. This sort of attention to detail is important – real world parts don’t always meet the original specifications on paper, and programmers can come to rely on this. The key to compatibility is understanding how things perform in the real world, not just on the spec sheet.

Not content to simply simulate a CPU, all the necessary peripherals for a complete working system have been worked into the design as well. There’s RAM, a UART, as well as CGA graphics and a PS/2 controller that is necessary if you’d like to actually use any sort of human input device.

[Jamie] has released the code under a GPL licence, and it’s available at GitHub. It’s a good basis if you want to play around with what was once a commercial CPU at a logic level. The development guide is also available if you need to really drill down into the details. It’s a cool project, and makes a great contrast to [Jamie]’s previous work – the Oldland 32-bit core.


Write Your Own X86 Bootloader

What if you want to make a very lean machine and do without any operating system? Or maybe you want to try to write your own OS, even just for the challenge or fun? Maybe you were reading up on a cool OS architecture and thought to yourself, “I can write that!”. Well, before diving into your code, you’d first have to write something called a bootloader.

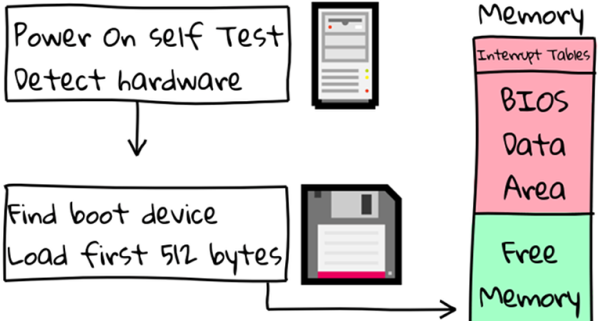
A bootloader is code that runs early on in a PC’s, Mac’s, Raspberry Pi’s or microcontroller’s boot sequence, before anything like an operating system is up. Often its job is to set up minimal hardware, such as RAM, and then load the OS or your embedded code.

[Alex Parker] has written a three-part series of clear blog posts that make writing the bootloader part easy, at least for x86 machines. And the nice thing is that you don’t need an x86 to get started. He does it on a Mac using the QEMU processor emulator, though he also talks about doing it under Windows and Linux.

In the first part of the series, the bootloader leaves you in the x86’s real mode, with 16-bit instructions and access to one megabyte of memory — think pre-80286 days, or 1982 for those of us who were computing back then. To prove it works, he uses BIOS calls to display “Hello world!”. This also shows that through the BIOS, you have a set of peripherals you can work with.

In the second part, he shows how to set up 32-bit protected mode and a Global Descriptor Table, making access to a large amount of memory easier.

In the first two parts, the code is written in assembly, so in the third part he finishes the series by showing how to load C++ code into memory and execute it. That C++ code would of course be your application, which we’ll leave to your imagination.

It’s reasonably rare to write bootloader code for a desktop computer — much less so for microcontrollers. For instance, [Dmitry Grinberg] wrote his own bootloader so that he could have encrypted ROM images for his AVR on USB. And we’ve talked about [Lady Ada]’s guide to burning Arduino bootloaders. But if you want to get down to the bare metal on your x86, the bootloader is the place to start. And it’s not so bad.