What did you do for Pi Day? Play with your Raspberry Pi 400? Eat some pizza or other typically round objects and recite all nine digits you’ve got memorized? That’s about where we were at this year. But not [bornach], no. [bornach] went all out and built a spigot that spews digits of Pi well past the first nine decimal places.
This clever spigot sculpture implements the spigot algorithm for generating digits of Pi one-by-one in a stream on to a chain of 8×8 matrices, and does so using a Raspberry Pi (of course). The point of the spigot algorithm is to store as few numbers as possible at any given time by reusing variables. We love the way the digits materialize on the matrix, almost as if they are ink being activated by water. Be sure to check out the build and demo video after the break.
That 10k pot on the top really does control the spigot — since the Pi has no ADC, [bornach] is using the potentiometer to charge a capacitor and using the time it takes to reach the threshold to decide whether the faucet is open or closed. There are a couple of hacks at play here, including the Popsicle-stick LED matrix bracing and the HAT [bornach] fashioned so the daisy-chained 8×8 LED modules could interface with the Pi.
We love Raspberry Pis of all eras around here, especially the darling new Pico. Diminutive as it may be, the Pico can be sliced even smaller with a hacksaw if you don’t mind losing a few GPIO pins.
Continue reading “Raspberry Pi Spigot Puts Digits Of Pi On Tap”

 Each Pixie module is designed to host two gorgeous little
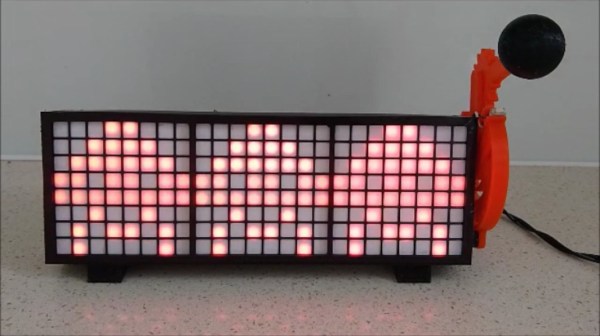
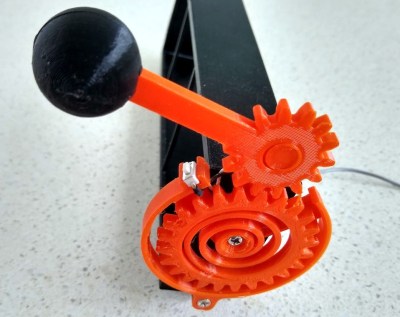 In this case, you’ll be losing all of your nickels to an Arduino Pro Mini. The handle is an upgrade to an earlier slot machine project that uses three 8×8 matrices and a custom driver board. When the spring-loaded handle is pulled, it strikes a micro switch to spins the reels and then snaps back into place. Between each pull, the current score is displayed across the matrix. There’s even a piezo buzzer for victory squawks. We only wish the button under the handle were of the clickier variety, just for the feels. Check out the short demo video after the break.