LMN-3: Putting The ‘OP’ In Open Source Synthesizers

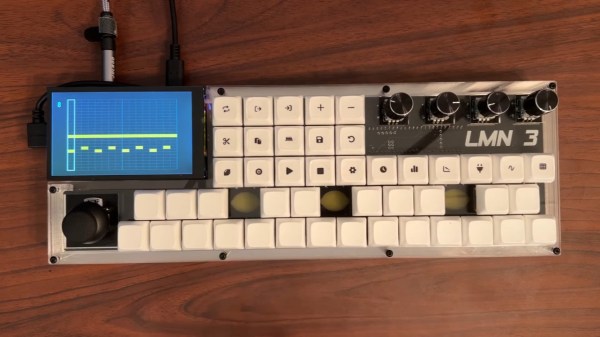
Some projects you come across simply leave you in awe when you look at the thought and the resulting amount of work that went into it, not only for the actual implementation, but everything around it. Even more so when it’s a single-developer open source project. [Stone Preston]’s synth / sampler / sequencer / DAW-in-a-box LMN-3 absolutely fits the description here, and it seems like he has set his heart on making sure everyone can built one for themselves, by providing all the design files from case down to the keycaps.

The LMN-3 (LMN as in “lemon”, not “comes before the OP“) is intended as a standalone, portable digital audio workstation, and is built around a Raspberry Pi 4 with a HyperPixel display for the user interface. The UI itself, and with it the core part of the software, was created using the Tracktion Engine, which itself uses the JUCE framework and combines your typical synthesizer, sequencer, and sampler features with the DAW part to handle recording, editing, and mixing. The remaining hardware is a custom-designed PCB with a set of function and keyboard buttons, along with a pitch bend joystick and four rotary encoders with push buttons that serve as main input handlers. Oh yes, and a Teensy board.

The UI is actually entirely controlled via MIDI commands, and custom firmware on the Teensy is translating the input events from buttons, encoders, and joystick accordingly. This essentially decouples the hardware from the software, and using a cross-platform framework underneath, you can also run the UI standalone on your computer and use any 3rd-party MIDI controller you like. Or then, as [Stone] thought really about everything, use a hardware emulator he created in addition. You could even leave out the Raspberry Pi and software altogether and turn this into a pure MIDI controller. If that sounds tempting, but you’re looking for something with more knobs and sliders instead of buttons, check out the Traktorino. And if you actually prefer a mouse as input device, there’s always something running in a browser.

Continue reading “LMN-3: Putting The ‘OP’ In Open Source Synthesizers”

picture of finished mp3 player that uses a cartridge to select songs

An MP3 Player That Gives Off Nintendo Vibez

We’re definitely pretty fond of the DIY MP3 players here at Hackaday, but we don’t think we’ve seen one like CartridgeMP3 from [jpet26] before.

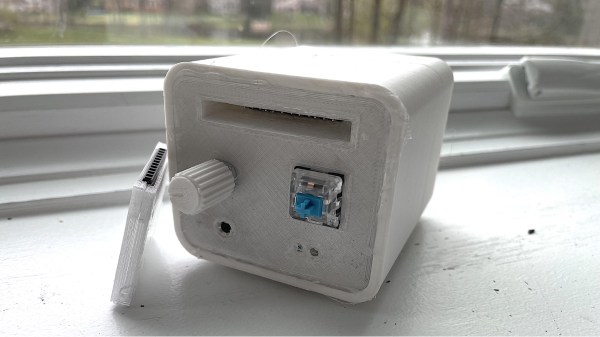
All the electrical components are what we’ve come to expect. [jpet26] uses the popular VS1053 decoder to read MP3 files stored on an SD card. He also includes a potentiometer for adjusting volume, a USB C port for power and programming, a headphone jack for the audio output, a general-purpose status LED, and an on/off switch.

But what really caught our attention is the form factor [jpet26] selected for his MP3 player. Though the MP3 files are stored on an SD card, he uses a cartridge interface, similar to that of a Nintendo 64 or Game Boy of yesteryear, to choose which MP3 to play from the SD card. The cartridge interface is tied to a few GPIO pins and by reading the status of each pin, the device determines which MP3 to select.

You could say that the cartridge is a little unnecessary, and we wouldn’t argue with you. The cartridge doesn’t actually store the MP3 files, the SD card does. It might make a bit more sense if the cartridge housed the SD card itself with a few select MP3s stored on the card. That would be a quirky way of sharing your favorite playlists with your friends. So, yeah some clumsy handshaking there, but who isn’t guilty of that from time to time? We like it and thought you might appreciate it as well.

Cool MP3 player, [jpet26]! May we suggest a speaker for V2? And maybe some flex cables.

Continue reading “An MP3 Player That Gives Off Nintendo Vibez”

Mini MIDI Synth Uses Minimum Number Of Parts

The 80s were the golden age of synthesizers in pop music. Hugely complicated setups that spared no expense were the norm, with synths capable of recreating anything from pianos and guitars to percussion, strings, and brass. These types of setups aren’t strictly necessary if you’re looking to make music, though, especially in the modern age of accessible microcontrollers. This synthesizer from [Folkert] with MIDI capabilities, for example, creates catchy tunes with only a handful of parts.

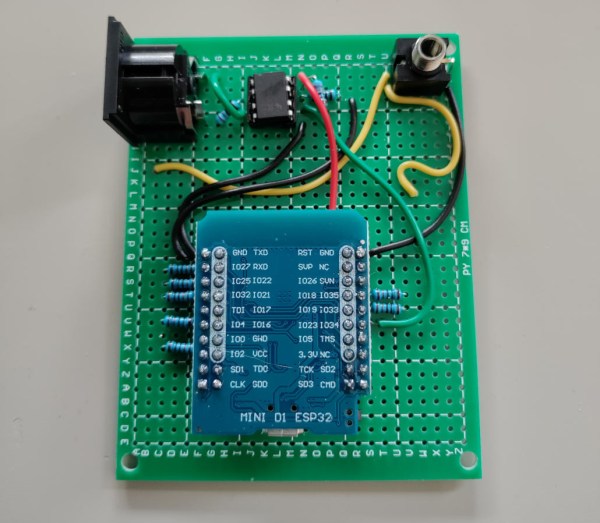
This tiny synth is built around an ESP32 and works by generating PWM signals normally meant for LEDs. In this case, the PWM signals are sent through a rudimentary amplifier and then on to an audio output device.  That could be a small speaker, an audio jack to another amplifier, or a capture device.

The synth’s eight channels use up most of the ESP32’s I/O and provide a sound that’s reminiscent of the eight-bit video game era. The total parts count for this build is shockingly small with only a handful of resistors, the ESP, an optocoupler, and a few jacks.

For those wishing to experiment with synthesizers, a build like this is attractive because it’s likely that all the parts needed are already sitting around in a drawer somewhere with possibly the exception of the 5 pin DIN jacks needed for MIDI capabilities. Either way, [Folkert] has made all of the schematics available on the project page along with some sample mp3 files. For those looking to use parts from old video game systems sitting in their parts drawer, though, take a look at this synthesizer built out of a Sega Genesis.

Learn To Play Guitar, Digitally

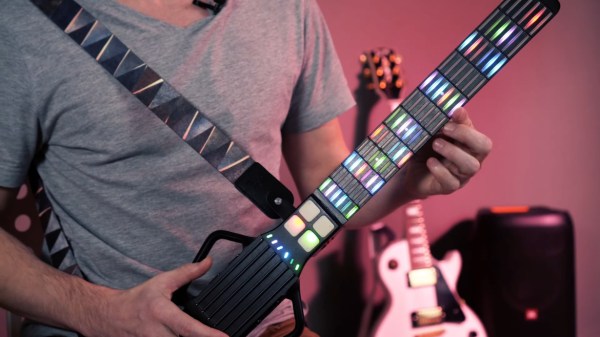
Learning to play a musical instrument takes a major time commitment. If you happened to be stuck inside your home at any point in the last two years, though, you may have had the opportunity that [Dmitriy] had to pick up a guitar and learn to play. Rather than stick with a traditional guitar, though, [Dmitriy] opted to build his own digital guitar which is packed with all kinds of features you won’t find in any Fender or Gibson.

The physical body of this unique instrument is entirely designed by [Dmitriy] out of 3D printed parts, and uses capacitive touch sensors for each of the notes on what would have been the guitar’s fretboard. The strings are also replaced with a set of six switches that can be strummed like a regular guitar, and are used to register when to play a note. After a few prototypes, everything was wired onto a custom PCB. The software side of this project is impressive as well; it involved creating custom firmware to register all of the button presses and transmit the information to a MIDI controller so that the guitar can communicate digitally with anything that supports MIDI.

To finish off the project, [Dmitriy] also added a wireless device as well as some other bonus features like an accelerometer, which can be used to augment the sound of the guitar in any way he can think of to program them. It’s one of the most innovative guitars we’ve seen since the prototype Noli smart guitar was unveiled last year, and this one is also on its way from prototype to market right now.

Continue reading “Learn To Play Guitar, Digitally”

Sound And Light Play Off Acrylic And Wire In This Engaging Circuit Sculpture

It’s no secret that we really like circuit sculptures around here, and we never tire of seeing what creative ways people come up with to celebrate the components used to make a project, rather than locking them away in an enclosure. And a circuit sculpture that incorporates sound and light in its design is always a real treat to discover.

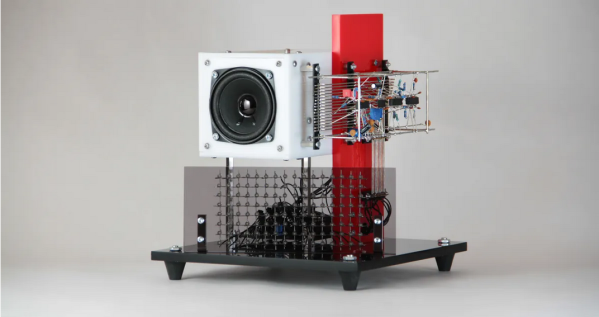
Called “cwymriad” by its designer, [Eirik Brandal], this sound sculpture incorporates all kinds of beautiful elements. The framework is made from thick pieces of acrylic, set at interesting angles to each other and in contrasting colors. The sound-generating circuit, which uses square wave outputs from an ESP32 to provide carrier and modulation signals for a dual ring modulator, is built on a framework of tinned wires. The sounds the sculpture makes have a lovely resonance to them, like random bells and chimes that fade and mix together. There’s also a matrix of white LEDs that form a sort of digital oscilloscope that displays shifting waveforms in time with the music.

While we like the way this looks and sounds, the real bonus here is the details of construction in the video below. [Eirik]’s careful craftsmanship working with multiple materials is evident throughout; we were especially impressed by the work needed to drill holes for the LED matrix, any one of which slightly out of place would have been painfully obvious in the finished product.

This is far from [Eirik]’s first appearance on these pages. His vacuum tube and silicon “ioalieia” was featured just a few weeks back, and “ddrysfeöd” used the acrylic parts as light pipes in a lovely way.

Continue reading “Sound And Light Play Off Acrylic And Wire In This Engaging Circuit Sculpture”

Custom Piano Tickles The Ivories

The core ethos of “hacking” is usually interpreted as modifying something for a use that it wasn’t originally built for. Plenty of builds are modifications or improvements on existing technology, but sometimes that just isn’t enough. Sometimes we have to go all the way down and build something completely from scratch, and [Balthasar]’s recent piano-like musical instrument fits squarely into this category.

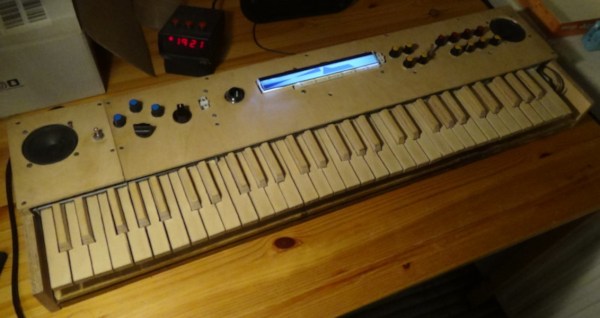
This electronic keyboard is completely designed and built from scratch, including the structure of the instrument and the keys themselves. [Balthasar] made each one by hand out of wood and then built an action mechanism for them to register presses. While they don’t detect velocity or pressure, the instrument is capable of defining the waveform and envelope for any note, is able to play multiple notes per key, and is able to change individual octaves. This is thanks to a custom 6×12 matrix connected to a STM32 microcontroller. Part of the reason [Balthasar] chose this microcontroller is that it can do some of the calculations needed to produce music in a single clock cycle, which is an impressive and under-reported feature for the platform.

With everything built and wired together, the keyboard is shockingly versatile. With the custom matrix it is easy to switch individual octaves on the piano to any range programmable, making the 61-key piano capable of sounding like a full 88-key piano. Any sound can be programmed in as well, further increasing its versatility, which is all the more impressive for being built from the ground up. While this build focuses more on the electronics of a keyboard, we have seen other builds which replicate the physical action of a traditional acoustic piano as well.

Continue reading “Custom Piano Tickles The Ivories”

Ken Shirriff Breaks Open The Yamaha DX7

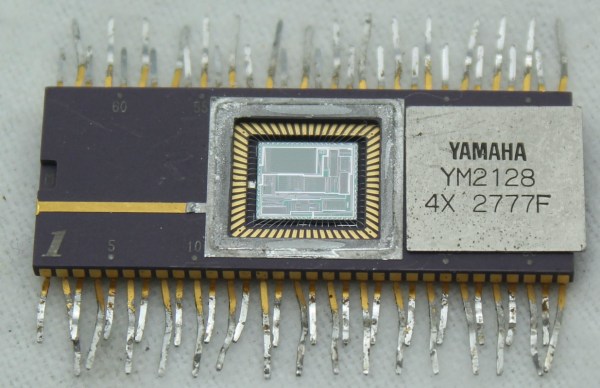
For better or worse, this synthesizer was king in the 1980s music scene. Sure, there had been synthesizers before, but none acheived the sudden popularity of Yamaha’s DX7. “Take on Me?” “Highway to the Dangerzone”?  That harmonica solo in “What’s Love Got to Do With It?”  All DX7. This synth was everywhere in pop music at the time, and now we can all get some insight from taking a look at this de-capped chip from [Ken Shirriff].

To be clear, by “look” that’s exactly what we mean in this case, as [Ken] is reverse-engineering the YM21280 — the waveform generator of the DX7 — from photos. He took around 100 photos of the de-capped chip with a microscope, composited them, and then analyzed them painstakingly. The detail in his report is remarkable as he is able to show individual logic gates thanks to his powerful microscope. From there he can show exactly how the chip works down to each individual adder and array of memory.

[Ken]’s hope is that this work improves the understanding of the Yamaha DX7 chips enough to build more accurate emulators. Yamaha stopped producing the synthesizer in 1989 but its ubiquity makes it a popular, if niche, platform for music even today. Of course you don’t need a synthesizer to make excellent music. The next pop culture trend, grunge, essentially was a rebellion to the 80s explosion of synths and neon colors and we’ve seen some unique ways of exploring this era of music as well.

Thanks to [Folkert] for the tip!