Energy Harvesting Wristwatch Uses A Versatile Photodiode

There’s some interesting technology bundled into this energy harvesting wristwatch. While energy harvesting timepieces (called automatic watches) have been around for nearly 240 years, [bobricius] has used parts and methods that are more easily transferable to other projects.

Unlike early mechanical systems, this design uses the versatile BPW34 PIN photodiode (PDF warning). PIN photodiodes differ from ordinary PN diodes in that there’s a layer of undoped ‘intrinsic’ silicon separating the P and N doped layers. This reduces the utility of the diode as a rectifier, while allowing for higher quantum efficiency and switching speed.

They are typically used in the telecommunications industry, but have a number of interesting ‘off label’ applications. For example, the BPW34 can be used as a solid-state particle detector (although for detecting alpha particles you’re better off with something in a TO-5 package such as the Hamamatsu S1223-01). The fast response speed means you can send data with lasers or ambient light at high frequencies – a fun use for an LED lighting system or scrap DVD-RW laser.

Some common solar panels are essentially large PIN photodiodes. These are the brownish panels that you’ll find in a solar-powered calculator, or one of those eternally waving golden plastic neko shrines. They specifically offer excellent low-light performance, which is the basis of the energy harvesting used in this project.

Continue reading “Energy Harvesting Wristwatch Uses A Versatile Photodiode”

Hackaday Prize Entry: LiFePO4wered/Pi+

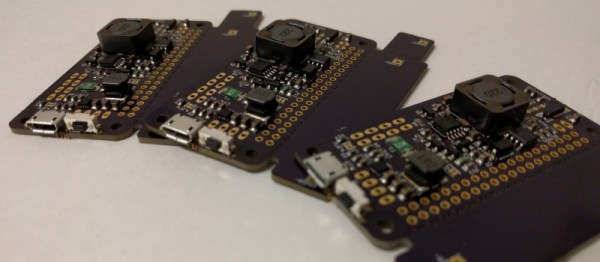
For some of you the title might seem familiar, as [Patrick Van Oosterwijck] LiFePO4wered/Pi project is a quite successful Hackaday.io project. Now he’s designing from scratch the plus version to fill in some gaps and solve some of the challenges that affected the initial project. So what exactly is LiFePO4wered/Pi+ and what can it do?

In a nutshell, it’s a smart UPS for the Raspberry Pi. The standard version allows a Model A+ and Pi Zero to run on battery for over 2 hours, and the B+, B2 and B3 to run for at least an hour (it maybe less, depending on the system load, of course). It implements two-way communications between the power system and the Raspberry Pi (running the open-source daemon) over the I2C bus. This allows for continuous measurement of the battery voltage and load voltage, with user programmable thresholds for boot, clean shutdown and hard power down. There’s a touch pad that provides clean boot/shutdown capability even in a headless setup, a wake timer allowing the Raspberry Pi to be off for low duty cycle applications and an auto-boot feature to maximize uptime by making the Raspberry Pi run whenever there is sufficient battery power.

That’s the standard version, which we covered last year… what else could the plus version have?

Well, to start, it brings more current to run complete systems with LCD screen and hard drives, the previous version was limited when it came to current. It will provide the option for a wider range of input power sources, such as solar panels, which is pretty nice. The on/off button and the power led will no longer be soldered on the main board so they can ‘relocated’ elsewhere, for example, when making a custom enclosure. Detection of input power to trigger automatic boot and shutdown will be added and last, but not least, a real-time clock with absolute time wake up.

So there it is, the new LiFePO4wered/Pi+ version, with all bells and whistles for the Raspberry Pi enthusiast.

The Tri Rotor Drone: Why Has It Been Overlooked?

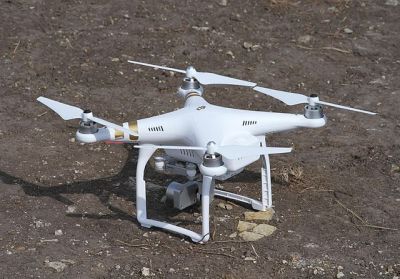
A DJI Phantom 3. Zimin.V.G. [CC BY-SA 4.0]
If you are a watcher of the world of drones, or multirotors, you may have a fixed idea of what one of these aircraft looks like in your mind. There will be a central pod containing batteries and avionics, with a set of arms radiating from it, each of which will have a motor and a propeller on its end. You are almost certainly picturing a four-rotor design, such as the extremely popular DJI Phantom series of craft.

Of course, four-rotor designs are just one of many possible configurations of a multirotor. You will commonly see octocopters, but sometimes we’ve brought you craft that really put the “multi” in “multirotor”. If the computer can physically control a given even number of motors, within reason, it can be flown.

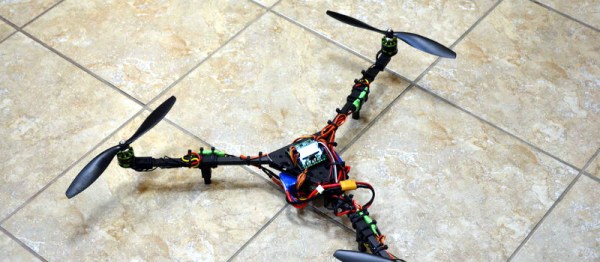
There is one type of multirotor you don’t see very often though, the trirotor. Three propellers on a drone is a rare sight, and it’s something we find surprising because it’s a configuration that can have some surprising benefits. To think about why, it’s worth taking a look at some of the characteristics of a three-rotor machine’s flight.

Continue reading “The Tri Rotor Drone: Why Has It Been Overlooked?”

Nintoaster: The Next Generation

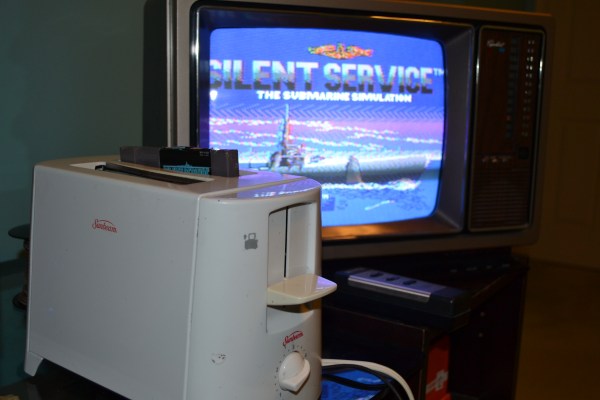
The original Nintendo Entertainment System is affectionately called “the toaster” due to the way the cartridge is inserted. [MrBananaHump] decided to take things a bit literally and installed a NES inside an actual toaster. This isn’t [MrBananaHump’s] design, the Nintoaster comes to us from [vomitsaw], who also built the SuperNintoaster. Since [vomitsaw] was kind enough to document his original build, [MrBananaHump] was able to build upon it.

The target toaster for this build was a plastic Sunbeam model found at a thrift store for $5. [MrBananaHump] gutted the toaster and cleaned out years of toast crumbs. The Nintendo mainboard would fit perfectly inside a toaster, except for two things – the RF Modulator and the expansion port. The expansion port was never used in the US version of the NES so it can be desoldered and removed. The RF also needs to be desoldered and relocated.

By far the biggest job in this casemod is hand-wiring each of the 72 pins for the cartridge port. It’s a tedious job, and it probably won’t look pretty. Keep your wires short, and things will probably work thanks to the relatively low clock speed of the NES.

The cartridge goes in one toast slot. [MrBananaHump] mounted his controller ports, power and reset buttons in the second slot. A bit of expanded metal grid completes the slot. Sure, it’s not exactly pretty inside, but with the case on, this becomes a rather nice looking build.

We’ve seen numerous Nintendo casemods over the years, just one other example is this N64 in an N64 controller.

Embed With Elliot: LIN Is For Hackers

A car is a rolling pile of hundreds of microcontrollers these days — just ask any greybeard mechanic and he’ll start his “carburetor” rant. All of these systems and sub-systems need to talk to each other in an electrically hostile environment, and it’s not an exaggeration to say that miscommunication, or even delayed communication, can have serious consequences. In-car networking is serious business. Mass production of cars makes many of the relevant transceiver ICs cheap for the non-automotive hardware hacker. So why don’t we see more hacker projects that leverage this tremendous resource base?

The backbone of a car’s network is the Controller Area Network (CAN). Hackaday’s own [Eric Evenchick] is a car-hacker extraordinaire, and wrote up most everything you’d want to know about the CAN bus in a multipart series that you’ll definitely want to bookmark for reading later. The engine, brakes, doors, and all instrumentation data goes over (differential) CAN. It’s fast and high reliability. It’s also complicated and a bit expensive to implement.

In the late 1990, many manufacturers had their own proprietary bus protocols running alongside CAN for the non-critical parts of the automotive network: how a door-mounted console speaks to the door-lock driver and window motors, for instance. It isn’t worth cluttering up the main CAN bus with non-critical and local communications like that, so sub-networks were spun off the main CAN. These didn’t need the speed or reliability guarantees of the main network, and for cost reasons they had to be simple to implement. The smallest microcontroller should suffice to roll a window up and down, right?

In the early 2000s, the Local Interconnect Network (LIN) specification standardized one approach to these sub-networks, focusing on low cost of implementation, medium speed, reconfigurability, and predictable behavior for communication between one master microcontroller and a small number of slaves in a cluster. Cheap, simple, implementable on small microcontrollers, and just right for medium-scale projects? A hacker’s dream! Why are you not using LIN in your multiple-micro projects? Let’s dig in and you can see if any of this is useful for you. Continue reading “Embed With Elliot: LIN Is For Hackers”

Intel’s Vision For Single Board Computers Is To Have Better Vision

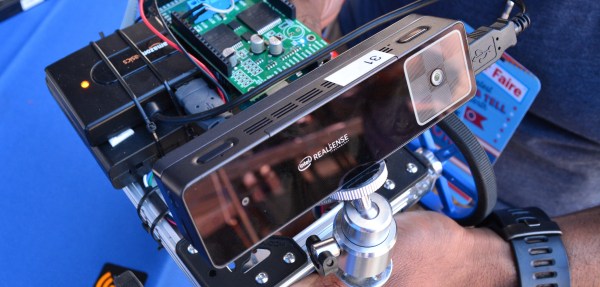
At the Bay Area Maker Faire last weekend, Intel was showing off a couple of sexy newcomers in the Single Board Computer (SBC) market. It’s easy to get trapped into thinking that SBCs are all about simple boards with a double-digit price tag like the Raspberry Pi. How can you compete with a $35 computer that has a huge market share and a gigantic community? You compete by appealing to a crowd not satisfied with these entry-level SBCs, and for that Intel appears to be targeting a much higher-end audience that needs computer vision along with the speed and horsepower to do something meaningful with it.

I caught up with Intel’s “Maker Czar”, Jay Melican, at Maker Faire Bay Area last weekend. A year ago, it was a Nintendo Power Glove controlled quadcopter that caught my eye. This year I only had eyes for the two new computing modules on offer, the Joule and the Euclid. They both focus on connecting powerful processors to high-resolution cameras and using a full-blown Linux operating system for the image processing. But it feels like the Joule is meant more for your average hardware hacker, and the Euclid for software engineers who are pointing their skills at robots but don’t want to get bogged down in first-principles of hardware. Before you rage about this in the comments, let me explain.

Continue reading “Intel’s Vision For Single Board Computers Is To Have Better Vision”

Making An Inexpensive DRO

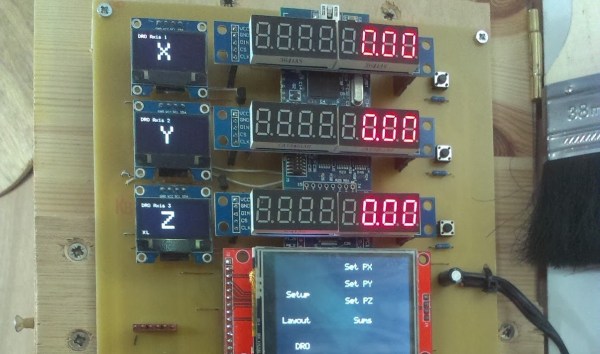
[Andrew] wanted a digital readout (DRO) for his mini lathe and mini mill, but found that buying even one DRO cost as much as either of his machines. The solution? You guessed it, he built his own for cheap, using inexpensive digital calipers purchased off eBay.

The DRO he created features a touch screen with a menu system running on an LPCXpresso, while smaller OLED screens serve as labels for the 7-segment displays to the right. The DRO switches back and forth between the lathe and mill, and while the software isn’t done, [Andrew] hopes to be able to transfer measurements from one machine to the other.

In a very sweet touch, [Andrew] hacked cheap digital calipers to provide measurements for each axis, where they provide a resolution of 0.01mm. There are six daughter boards, one for each caliper, and each has a PIC that converts from serial to I2C, freeing the main firmware from dealing with six separate data streams.

The DRO doesn’t have a case, [Andrew] has it positioned out of chip-range from either machine.

A previous DRO we featured in 2012 used an Android tablet as its display.