Sunday was our Breakfast at Hackaday meetup and a swarm of folks showed up, take a look at the hardware they brought with them! Vegas can be a tough place to set up a meetup — especially if you don’t want to rent a room. We filtered into a Starbucks across the street from Caesar’s and ended up packing the high-top table areas. It turns out you get a really funny look from the baristas when you go through the coffee line and ask for four dozen pastries and a few buckets of coffee.

About 30 minutes before official start

Too busy talking hardware to look
The size of the space made it hard to get a picture of the entire crowd. I did manage to get a posed photo with the people who showed up about a half hour early. Once it filled up all I got for crowd shots were people with their back to me and heads down comparing hardware projects — that might actually be more appropriate for DEF CON where people generally don’t want to be photographed (case in point our bandanna wearing friend).

Swag, pastries, and RF hacking

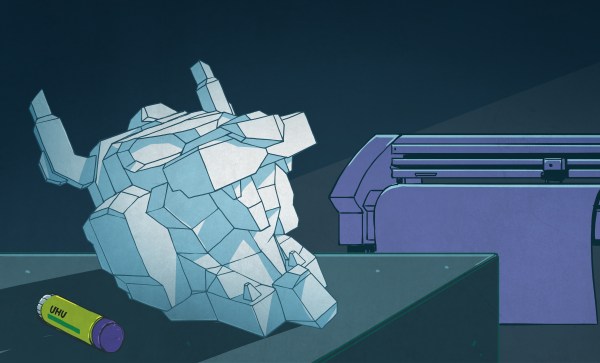
print your Storm Trooper helmet

custom headgear
There was a ton of different hardware on hand. If you look at a picture of the swag and pastries tables, look closely at the high-top behind that. There were a couple of people hacking on RTL-SDRs before we arrive (which means they were at least 45 minutes early).
I’m a fan of wearing your hardware projects at events and this year was really great for that. First, a Captain Phasma helmet from The Force Awakens. It’s 3D printed in ABS, using an acetone/ABS slurry to glue (actually to weld) the parts before sanding and painting to finish the job.

Dragonfly badge (proper name: Sympetrum)

AND!XOR badges within BT range
Most of the hacks on hand were unofficial hardware badges built specifically for DEF CON. I was at the Badge Build’s meetup and have a megapost on everything I saw there coming out a bit later. But here we get a look at the dragonfly badge which [Kerry] brought along with him as well as the rectangular PCB that was the prototype. The AND!XOR crew was in the house and I decided to bug [Hyr0n] about the password hashes I was trying to crack from their badge’s firmware. He pulled up the app and it wasn’t surprising to see so many of the Bender on a bender badges in the area. Their botnet was a huge hit this year!
At some point, I was handed this book-like box which had been laser cut and etched out of plywood. It’s a beautiful piece and I had no idea what I would find inside. Turns out it’s a complete quadcopter-badge fun kit. I must have been so enthralled with the electronics when we covered this badge a few weeks back that I completely missed the beautiful box they built for it.
Inside the box, you’ll find two versions of the badge (one that flies, the other that blinks and has a red PCB handkerchief), a separate PCB that is the controller, and a goodie bag with extra batteries and charging hardware. We didn’t fire this up at the meetup, but we’ll have it at the Hackaday Superconference for you to play with. It was really great to get a group picture with so many of the people who worked on making this badge happen.
There was one high-top over in the corner that had been mobbed with people all morning and I only got a look at it when the crowd started to clear out around noon. [Brian McEvoy] built a custom controller for OpenSCAD and did a great job of bringing along a demo. A tablet is running the software, with the controller connected via USB. There are 3 knobs on the right that allow you to adjust height, width, and depth. The fourth knob is for adjusting precision. That precision is displayed in a very clever way. You can see the LED strip with has a red dot on the right (the decimal point) and three colored pixels to the left of it. These are the tens, hundreds, and thousands, but just turn the crank until the red dot is at the other end of the strip and you’ll be setting precision to tenths, hundreths, etc. [Brian] even added a button you can hold down to 10x the precision without making a permanent adjustment. The project is driven by a Teensy LC board.
Is wonderful to see the Hackaday Community turn out for a meetup like this even though so much other stuff is going on at DEF CON. Thank you to all of you for coming to say hi, share your stories, and show off your handy work!