Dispensing Solder Paste Automatically

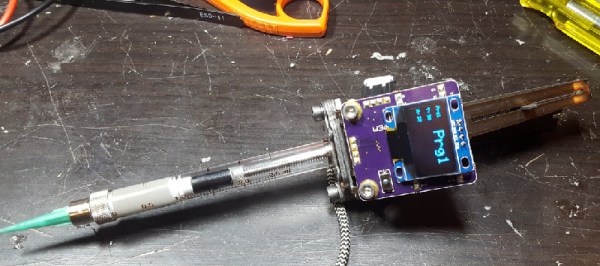
Through-hole chips are slowly falling by the wayside, and if you want to build something with new parts you will be using surface mount components. This means spreading paste and throwing it in the toaster oven. Of course, if you don’t want to take the time to get a stencil for your solder paste, you can always lay it down by hand. For that, [owhite] has created a tiny, handheld, robotic solder paste dispenser. It’s a robotic pen that dispenses just the right amount of solder paste on your pads.

The design of this solder paste dispenser is basically a syringe filled with paste and a stepper motor to push the plunger down. Devices like this already exist, and the i-extruder can be had for somewhere around two hundred bucks. Why buy when you can build, so [owhite] set out to create his own.

The key to a successful solder paste pen, it seems, is driving the plunger with a small NEMA 8 stepper motor, using a very fine pitch on the threads of the gears pushing the plunger down, and surprisingly finding a small-diameter syringe. [owhite] found the last bit in the form of a gas-tight syringe with a nylon gasket. The electronics consist of just a Teensy 3.2, DRV8825 stepper driver, footswitch, and an OLED for a UI.

With just a few parts, [owhite] managed to create a solder paste pen that’s better than the commercial i-extruder, and with a bit of practice can be used to place paste on some SMD pads.

Keeping Streets Ice-Free With The Raspberry Pi

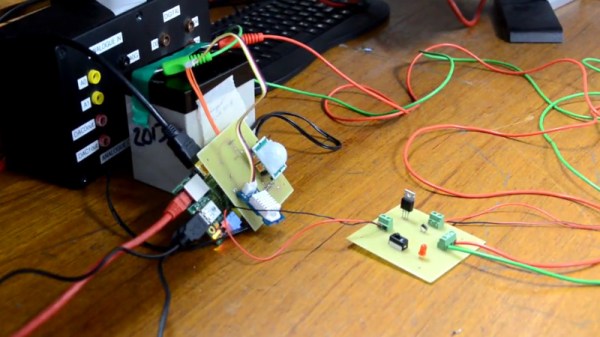
[Revanth Kailashnath] writes in to tell us about an interesting project he and his team have been working on for their “Real Time Embedded Programming” class at the University of Glasgow. Intended to combat the harsh and dangerous winters in Glasgow, their system uses a Raspberry Pi and a suite of sensors to automatically deploy a brine solution to streets and sidewalks. While the project is still only a proof of concept and hasn’t been deployed, the work the team has done so far runs the gamut from developing their own PCBs to creating a web-based user interface.

The core idea is simple. If the conditions are right for ice to form, spray salt water. Using salt water is a cheap and safe way of clearing and preventing ice as it simply drops the temperature at which water freezes. The end result is that the ice won’t form until it gets down to 10F (-12C) or so. Not a perfect solution, but it can definitely help. Of course, you don’t want to spray people with salt water as they pass by, so there’s a bit more to it than that.

Using the venerable DHT22 sensor the team can get the current temperature and humidity, which allows them to determine when it’s time to start spraying. But to prevent any wet and angry pedestrians, a HC-SR501 PIR motion sensor is used. If the system sees motion it will stop for a while to let the activity quiet down.

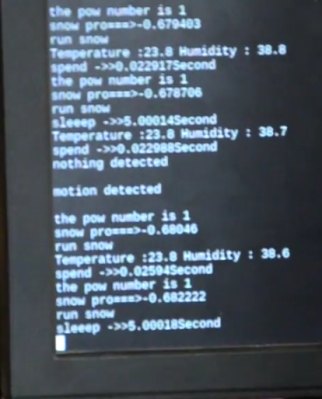
Monitoring the sensors and controlling the pump is done by a daemon written in C++, which also logs data to an SQL database, which in turn feeds their PHP web interface. In the video after the break, [Revanth] demonstrates how the system is constantly making decisions based on the input of the various sensors. Environmental data and motion is analysed every few seconds to provide a real-time solution.

We’ve covered a few projects aimed at melting ice and snow by heating concrete, but it’s interesting to see a “smart” approach to this common winter annoyance.

Continue reading “Keeping Streets Ice-Free With The Raspberry Pi”

DIY Magnetic Actuator, Illustrated And Demonstrated

Electromagnetic actuators exert small amounts of force, but are simple and definitely have their niche. [SeanHodgins] took a design that’s common in flip-dot displays as well as the lightweight RC aircraft world and decided to make his own version. He does a good job of explaining and demonstrating the basic principles behind how one of these actuators works, although the “robotic” application claimed is less clear.

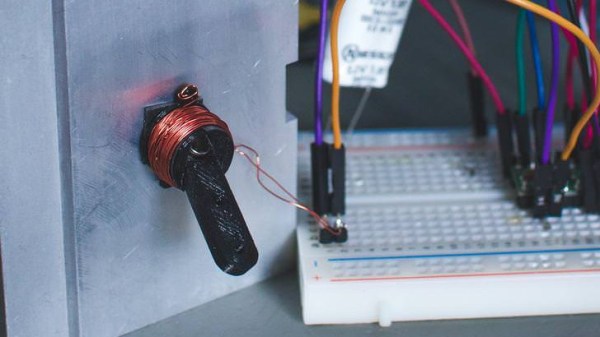
It’s a small, 3D printed lever with an embedded magnet that flips one way or another depending on the direction of current flowing through a nearby coil. Actuators of this design are capable of fast response and have no moving parts beyond the lever itself, meaning that they can be made very small. He has details on an imgur gallery as well as a video, embedded below.

Continue reading “DIY Magnetic Actuator, Illustrated And Demonstrated”

Why Won’t This Darn Thing Charge?

What is more fun than plugging in your phone and coming back to find your battery on empty? Stepping on a LEGO block with bare feet or arriving hungry at a restaurant after closing probably qualify. [Alex Sidorenko] won’t clean your floors or order you a pizza, but he can help you understand why cheap chargers won’t always power expensive devices. He also shows how to build an adapter to make them work despite themselves.

The cheapest smart device chargers take electricity from your home or car and convert it to five volts of direct current. That voltage sits on the power rails of a USB socket until you plug in a cable. If you’re fortunate, you might get a measly fuse.

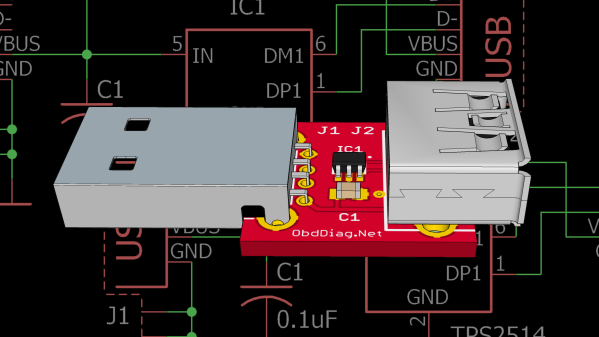
Smart device manufacturers don’t make money when you buy an off-brand charger, and they can’t speak to the current protection of them, so they started to add features on their own chargers to protect their components and profit margins. In the case of dedicated chargers, a simple resistor across the data lines tells your phone it is acceptable power. Other devices are more finicky, but [Alex Sidorenko] shows how they work and provides Eagle files to build whatever flavor you want. Just be positive that your power supply is worthy of the reliability these boards promise to the device.

Now you know why connecting a homemade benchtop power supply to a USB cable seems good on paper but doesn’t always get the job done. Always be safe when you make your own power supplies.

DIY Drill-Powered Water Pump

Whether you need to pump water out of your basement this spring, or just want to have fun shooting water around in the yard this summer, here’s a way to build a pump instead of buying one. This is a simple but ingenious build, and [NavinK30] did everything shy of machining his own hardware and making his own tools. Well, it looks as if he might have made that drill.

As you’ll see in his how-to after the break, this centrifugal pump is mostly acrylic, PVC, and fasteners. [Navin] cut two sides and a base for the paddles from acrylic, and joined them with a heat-formed sidewall made of PVC. We love that he cut and bent his own paddles from sheet metal. These are bolted to a round piece of acrylic that attaches to the outside with a long hex bolt. A ball bearing mounted on the drill side allows the pump to churn freely as long as the bolt is chucked into the drill, and the hose clamp is tight enough to hold down the trigger.

Have an extra drill, but don’t need to pump water? Add a camping stove and use it to power a small-batch coffee roaster.

Continue reading “DIY Drill-Powered Water Pump”

Automating The Design Of Word Clocks

Word clocks, or a matrix of light-up letters that spell out the time, are a standard build for all enterprising electronics enthusiasts. The trouble is finding the right way to drive a matrix of LEDs and the significant amount of brainpower that goes into creating a matrix of letters that will spell out the time without making it look like it’s supposed to spell out the time.

For his Hackaday Prize entry this year, [Stephen Legge] is creating a standard toolkit that makes word clocks easier to build. It’s a hardware and software project, allowing for LED matrices of any reasonable size, and the software to make a grid of letters that only spells out the words you want and not the four-letter ones you don’t.

The hardware for this project is built around the IS31FL3733 LED driver from ISSI. This is an interesting chip that takes I2C in and spits out a LED matrix with very few additional support components. This chip provides [Stephen] with a 12×16 single-color LED matrix, which is more than enough for a word clock.

Where this build gets slightly more interesting is the creation of a custom matrix of letters that will still spell out ‘quarter to noon’ when lit in the appropriate way. This is a big challenge in creating a customized word clock; you could always borrow the layout of the letters from another word clock, but if you want customized phrases, you’ll either have to sit down with a pencil and graph paper, or write some software to do it automatically.

It’s a great project, and since all of [Stephen]’s work is being released under Open Source licenses, it’s a great entry to the first portion of the Hackaday Prize where we’re challenging hardware creators to build Open Hardware.

Beatrice Tinsley And The Evolution Of Galaxies

It seems almost absurd now, but cosmologists once assumed that galaxies of a given type were all the same and didn’t change. Because of this assumption, galaxies were used as a redshift or light-based yardstick to measure distances in the universe. But what if some galaxies were intrinsically redder than others? Little to no thought was given to their origins, compositions, or evolution until Beatrice Tinsley came along.

Beatrice saw galaxies as changing bodies of stars. She believed that they grew, evolved, and died because they’re made of stars, and that’s what their star populations did. To lump all galaxies together and use them as a standard candle was an oversimplification. Beatrice created the first computer model of a galaxy to prove her point and in doing so, she founded the field of galaxy evolution.

If you’ve never heard of Beatrice, don’t feel bad. Just as her career was really beginning to take off, she developed cancer and died shortly after her 40th birthday. Though her life was short, her influence on cosmology is long-reaching. Continue reading “Beatrice Tinsley And The Evolution Of Galaxies”