Ask Hackaday: Drone Swarms Replace Fireworks; Where Are The Hackers?

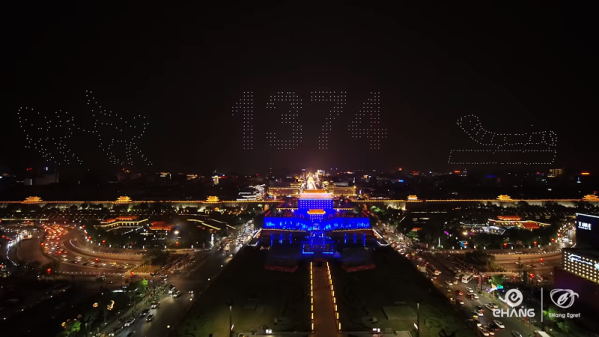
Your mom always warned you that those fireworks could put an eye out. However, the hottest new thing in fireworks displays is not pyrotechnic at all. Instead, a swarm of coordinated drones take to the sky with different lighting effects. This makes some pretty amazing shows possible, granting full control of direction, color, and luminosity of each light source in a mid-air display. It also has the side benefit of being safer — could this be the beginning of the end for fireworks accident videos blazing their way across social media platforms?

For an idea of what’s possible with drone swarm displays, check out the amazing pictures found on this site (machine translation) that show off the 3D effects quite well. Note that although it appears the camera is moving during many of these, the swam itself could be rotated relative to a stationary viewer for a similar effect.

What I couldn’t find was much going on here in the hobby space. Granted, in the United States, restrictive drone laws might hamper your ability to do things like this. But it seems that in a purely technical terms this wouldn’t be super hard to do — at least for simple designs. Besides, there must be some way to do this in US airspace since drone performances have been at the Super Bowl, Los Angeles, New York, Miami, and Folsom, CA.

So if the regulations were sorted, what would it take to build a swarm of your own performing drones?

Continue reading “Ask Hackaday: Drone Swarms Replace Fireworks; Where Are The Hackers?”

Open-Source Analytical Balance Pits Gravity Against Electromagnetism

As the open-source movement has brought its influence to more and more fields, we’ve seen an astonishing variety of things once only available at significant expense become accessible to anyone with access to the tools required to create them. One such arena is that of scientific instrumentation, and though we have seen many interesting developments there has been one which has so far evaded us. An analytical balance, a very specialised weighing machine designed to measure the tiniest of masses, remains available only as a new unit costing a fortune, or as a second-hand one with uncertain history and possible contamination. Fortunately, friend of Hackaday [Zach Fredin] is on the case, and as part of one of his MIT courses he chose to create an open-source analytical balance.

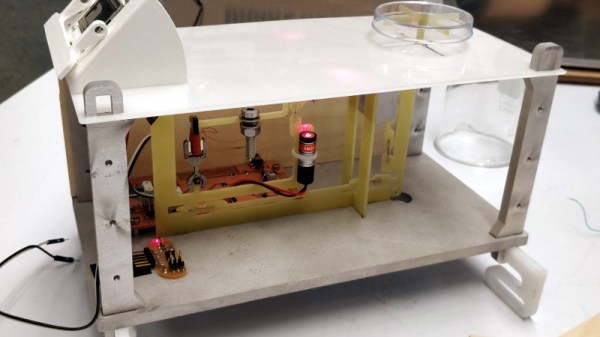
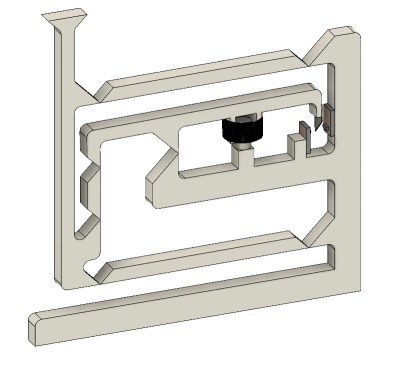
The write-up is interspersed with his course notes as he learns a series of fabrication techniques, but in addition to the milled Delrin finished model he treats us to his prototype and gives us an explanation of how these instruments work. It’s a technique that’s rather different to a traditional weighing machine: instead of measuring deformation of a spring in some way it produces a force from an electromagnet to oppose that exerted by gravity on the mass to be measured, and quantifies how much electrical energy is required to do that. The mechanism incorporates feedback through a vane and an optical sensor, which he admits he’s not yet had time to set up properly.

It’s an interesting project not least because it exposes some of the inner workings of an analytical balance, and we look forward to his completing it. If this whet your appetite for the topic it’s worth also looking at [Ben Krasnow’s] video of a balance made using a moving coil meter for an explanation of the technique.

New Part Day: Sonoff USB Smart Adaptor Taps A New WiFi Chip

For decades, we dreamt of a future where all of our electronics used a standardized power connector. Most of us probably didn’t expect that USB would ultimately fill that role, but we’ll take what we can get if it means a future without getting a new wall wart for every piece of tech we buy. From soldering irons to laptops, the number of things you can power with a lowly USB cable these days is pretty incredible.

Which makes it all the more surprising it took so long for somebody to come up with a way to toggle USB devices off and on over the network. The Sonoff “USB Smart Adaptor”, which the company says will start shipping before the end of the year, is the logical evolution of their exceptionally popular mains voltage smart switches. The Smart Adapter is designed to go between the device and its existing power supply, allowing the user to drag any USB powered device kicking and screaming into their existing smart home setup. All for the princely sum of $6.50 USD.

In the video after the break, Sonoff gives a few potential uses of the Smart Adapter: from controlling a string of LEDs to limiting how long a smartphone is allowed to charge for. But really, there’s a nearly limitless number of devices which could be easily and cheaply integrated into your home automation routines thanks to this gadget.

On the other end of the spectrum, those who are looking to keep a tighter control on the ears and eyes that are active in their home could use the Smart Adapter to make sure their Google and Amazon listening devices assistants are only powered up during certain hours of the day.

Unfortunately, there’s a catch. Sonoff smart switches are best known, at least among the type of folks who read Hackaday, for the fact that they’re based on the eminently hackable ESP8266 microcontroller. Given the size of this product and its intended use, it would seem logical enough to assume this device also utilizes the insanely popular chip. But according to a Sonoff representative, the USB Smart Adapter won’t be using an ESP at all; leaving its hackability an open question until people can actually get their hands on them and start poking around.

Continue reading “New Part Day: Sonoff USB Smart Adaptor Taps A New WiFi Chip”

Custom Control Panels With Photogrammetry

One of the best applications for desktop 3D printing is the creation of one-off bespoke components. Most of the time a halfway decent pair of calipers and some patience is all it takes to model up whatever part you’re after, but occasionally things get complex enough that you might need a little help. If you ever find yourself in such a situation, salvation might be just a few marker scribbles away.

As [Mangy_Dog] explains in a recent video, he wanted to model a control panel for a laser cutter he’s been working on, but thought the shapes involved were a bit more than he wanted to figure out manually. So he decided to give photogrammetry a try. For the uninitiated, this process involves taking as many high-resolution images as possible of a given object from multiple angles, and letting the computer stitch that into a three dimensional model. He reasoned that if he had a 3D model of the laser’s existing front panel, it would be easy enough to 3D print some replacement parts for it.

That would be a neat enough trick on its own, but what we especially liked about this video was the tip that [Mangy_Dog] passed along about increasing visual complexity to improve the final results. Basically, the software is looking for identifiable surface details to piece together, so you can make things a bit easier for it by taking a few different colored markers and drawing all over the surface like a toddler. It might look crazy, but all those lines give the software some anchor points that help it sort out the nuances of the shape.

Unfortunately the markers ended up being a little more permanent than [Mangy_Dog] had hoped, and he eventually had to use acetone to get the stains off. Certainly something to keep in mind. But in the end, the 3D model generated was accurate enough that (after a bit of scaling) he was able to design a new panel that pops right on as if it was a factory component.

Hackaday readers may recall that when we last heard from [Mangy_Dog] he was putting the finishing touches on his incredible “Playdog Blackbone” handheld gaming system, which itself is a triumph of mating 3D printed components with existing hardware.

Continue reading “Custom Control Panels With Photogrammetry”

Adding USB-C To The TS100, But Not How You Think

USB-C has its special Power Delivery standard, and is capable of delivering plenty of juice to attached hardware. This has led many to modify their TS-100 soldering irons to accept the connector. [Jana Marie] is the latest, though she’s taken rather a different tack than you might expect.

[Jana] didn’t want to modify the original hardware or hack in an adapter. Instead, she struck out on her own, developing an entire replacement PCB for the TS-100 iron. The firmware is rough and ready, and minimal work has been done on the GUI and temperature regulation. However, reports are that functionality is good, and [Jana]’s demonstration shows it handling a proper desoldering task with ease.

Files are on Github for those that wish to spin their own. The PCB is designed to snap neatly inside the original case for a nice fit and finish. Power is plentiful too, as the hardware supports USB Power Delivery 2.0, which is capable of running at up to 100 W. On the other hand, the stock TS-80 iron, which natively supports USB-C, only works with Quick Charge 3.0, and thus is limited to a comparatively meager 36 W.

We’ve seen plenty of TS-100 hacks over 2019. Some have removed the standard barrel jack and replaced it with a USB-PD board. Meanwhile, others have created adapters that plug in to the back of the iron. However, [Jana] is dictating her own terms by recreating the entire PCB. Sometimes it pays to go your own way!

[Thanks to elad for the tip!]

Circuit Sculpture Teaches Binary, Plays PONG

We sure wish we’d had a teacher like [Danko Bertović]. He built this beautiful circuit sculpture to teach his students how to count in binary and convert it to decimal and hexadecimal. If you don’t already know binary, you get to learn it on DIP switches and a dead-bugged ATMega328 in his latest Volos Projects video after the break. Lucky you!

Once the students have the hang of entering binary input on the switches, they can practice it on the four-banger calculator. This educational sculpture can also take text input and scroll it, but it takes a bit of work. You have to look up the ASCII value of each character, convert the decimal to binary, and program it in with the switches. There’s one more function on the menu — a one-player PONG game to help the students relax after a long day of flipping switches.

Funny enough, this project came to be after [Danko] came upon the DIP switch in his parts box and wasn’t quite sure what it was called. How great is it that he learned something about this part, and then used that knowledge to build this machine that uses the part to teach others? It’s surely the best fate that parts bin curiosities can hope for.

Don’t have the patience for circuit sculpture? You can make a pretty nice binary calculator with a bit of paper and a lot of compressed air.

Continue reading “Circuit Sculpture Teaches Binary, Plays PONG”

DIY Scalar Network Analyzer

[Steven Merrifield] built his own Scalar Network Analyzer and it’s a beauty! [Steve]’s SNA has a digital pinout matching a Raspberry Pi, but any GPIO could be used to operate the device and retrieve the data from the ADC. The design is based around a few tried and true chips from Analog Devices. He’s taken some care to design it to be nice and accurate which is why he’s limited it to 1kHz to 30Mhz. We think it’s quite a fetching board once the shielding is in place.

We’ve covered network analyzers and their usefulness before. If you want to know how, for example, a mystery capacitor from your junk bin will respond to certain frequencies, a network analyzer could tell you. We’ve even taken a stab at hacking together our own.

There is more documentation on his website as well as some additional example curves. The board is easily ordered from OSHpark and the source code is available for review.