Toy O-Scope Is Dope

Not many of our childhood doll and action figure’s accessories revolved around lab equipment except maybe an Erlenmeyer flask if they were a “scientist.” No, they tended to be toasters, vehicles, and guns. When we were young, our heroes made food, drove sexy automobiles, and fought bad guys. Now that we’re older, some of our heroes wield soldering irons, keyboards, and oscilloscopes. [Adrian Herbez] made a scale model oscilloscope that outshines the beakers and test tube racks of yesteryear. Video also shown below. Continue reading “Toy O-Scope Is Dope”

Adding Luxury Charging Features To An Entry-Level EV

The Nissan Leaf is the best-selling electric car of all time so far, thanks largely to it being one of the first mass produced all-electric EVs. While getting into the market early was great for Nissan, they haven’t made a lot of upgrades that other EV manufacturers have made and are starting to lose customers as a result. One of those upgrades is charge limiting, which allows different charging rates to be set from within the car. With some CAN bus tinkering, though, this feature can be added to the Leaf.

Limiting the charging rate is useful when charging at unfamiliar or old power outlets which might not handle the default charge rate. In Europe, which has a 240V electrical distribution system, Leafs will draw around 3 kW from a wall outlet which is quite a bit of power. If the outlet looks like it won’t support that much power flow, it’s handy (and more safe) to be able to reduce that charge rate even if it might take longer to fully charge the vehicle. [Daniel Öster]’s modification requires the user to set the charge rate by manipulating the climate control, since the Leaf doesn’t have a comprehensive user interface.

The core of this project is performed over the CAN bus, which is a common communications scheme that is often used in vehicles and is well-documented and easy to take advantage of. Luckily, [Daniel] has made the code available on his GitHub page, so if you’re thinking about trading in a Leaf for something else because of its lack of features it may be time to reconsider.

Continue reading “Adding Luxury Charging Features To An Entry-Level EV”

A Bit Of DIY Helps Cut Straight And Happy Threads

A cheap and effective ratcheting tap.

Need to cut threads into a hole? A tool called a tap is what you need, and a hand-operated one like the one shown here to the side is both economical and effective. A tap’s cutting bit works by going into a pre-drilled hole, and it’s important to keep the tool straight as it does so. It’s one thing to tap a few holes with steady hands and a finely calibrated eyeball, but when a large number of holes need to be tapped it can be worth getting a little help.

The usual tool to help keep a tap straight and pressed gently downwards is called a tap follower, but [Tony] had a lot of M4 holes to tap and no time to order one and wait for it to arrive. Instead, he converted a cheap tap into a tool that could be held in the chuck of his mill, with the freedom to slide up and down as needed. The result? A tap that’s hand-operated but certain to be orthogonal to the work piece, making the job of cutting a lot of threads much more pleasant.

Tapping isn’t just for metal, either. Cutting threads into wood is also done, and be sure to check out this simple method for making your own surprisingly effective wood taps in the shop with a threaded rod, or a lag screw. Of course, the need to tap a hole can be sidestepped by using threaded inserts in the right material, instead.

The Egg-laying Wool-Milk Pig

Last week, I wrote about two recent projects of mine that serve as cautionary tales in keeping projects simple — you probably can’t simplify everything, so it’s worth the time to find out which simplifications have the most bang for the buck. This week, I’d like to share a tale of lack of design focus.

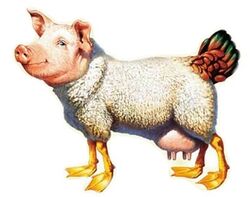
German has the eierlegende Wollmilchsau: a mystical animal that lays eggs, while producing wool, milk, and meat to boot. It’s a little bit like the English “jack of all trades, master of none” except that the eierlegende Wollmilchsau doesn’t do each job badly, it plainly can’t exist. This is obviously a bad way to start a design.

The first surfboard that I made by myself was supposed to be an eierlegende Wollmilchsau. It was going to be a longboard, because we had months with smaller waves that just weren’t all that suitable for shortboarding, but it was also going to turn sharply off the rails like a shortboard. To help it turn, it was going to have tons of camber (bend like a banana), and small fins. And along the way, I thought I’d make it thin to cut through the water.

Of course what I ended up with, not helped by my heavy fiberglassing hand, was a plow that dug into the water, would turn unexpectedly when you managed to get it onto the rails, and couldn’t pick up a small wave to save its life due to the camber and aforementioned plowing. I surfed it anyway, as a matter of pride, but I had no illusions of it being anything but the the worst board I owned. And that’s comparing it to the $30 used rasta-graphic plank that had been taking on water for at least five years, unrepaired, and was rotting out from the inside. At least it had design focus.

My surfboard didn’t suffer from feature creep, where you start piling on features until the project crumbles from overload, but rather from wanting to have my cake and eat it too. Or from failing to realize that certain design goals were necessarily tradeoffs. The “raily” behavior that I wanted when it was in bigger waves was necessarily “diggy” in small waves. Good boards trade off these features, and getting the balance between them is the art of shaping a board.

So when you start up a new project, think about which facets of your design are jointly achievable, and which are necessarily tradeoffs. Ignoring tradeoffs is a recipe for disaster, designing an eierlegende Wollmilchsau. But viewed constructively, it’s exactly these nuanced decisions that separates the simply possible from the truly marvelous. May you identify your trades, and make them well!

PLA-F Blends PLA And ABS

In the early days of 3D printing, most people used ABS plastic. It is durable and sticks well to simple surfaces. However, it smells and emits fumes that may be dangerous. It also tends to warp as it cools which causes problems when printing. PLA smells nicer and since it is made from corn is supposed to be less noxious. However, PLA isn’t as temperature resistant and while it will stick better to beds without heat, it also requires more airflow to set the plastic as it prints. [Kerry Stevenson] recently reviewed PLA-F which is a blend of the two plastics. Is it the best of both worlds? Or the worst?

[Kerry]  did several tests with interesting results. He did a temperature test tower and found the material printed well between 190 and 240 °C. He did note some stringing problems, though.

Continue reading “PLA-F Blends PLA And ABS”

3D POV Display Has The Shakes

Persistence of vision projects are a dime a dozen, but by adding a third dimension [Madaeon] succesfully created one to stand out from the crowd. Instead of waving around a single line of LEDs, he is moving a 2D grid of them vertically to create a volumetric POV display.

The display consists of oscillating 3D printed piston, powered by a small geared motor, on top of which sits a 8 x 8 RGB LED grid and diffusing film. The motor drives a cylindrical cam, which moves a piston that sits over it, while an optical end stop detects the bottom of the piston’s travel to keep the timing correct. [Madaeon] has not added his code to the project page, but the 3D files for the mechanics are available. The current version creates a lot of vibration, but he plans to improve it by borrowing one of  [Karl Bugeja]’s ideas, and using flexible PCBs and magnets.

He also links another very cool volumetric display that he constructed a few years ago. It works by projecting images from a small DLP projector onto an oscillating piece of fabric, to created some surprisingly high definition images.

POV displays are good projects for learning, so if you want to build your own, take a look a simple POV business card, or this well-documented POV spinning top.

Infinity Mirror At Warp Speed

Inventing often combines more than one old ideas into a new one. Even when the fused things are similar, the result can be more valuable than the sum of its parts. Unlike those analog watches with a digital clock below the face, when [Mojoptix] combined the re-reflecting properties of an infinity mirror with the image twisting qualities of a funhouse mirror, we get more than just a pair of mirrors. The resulting images look like a lot of fun. Warping one surface of two parallel mirrors doesn’t just alter the result a bit, because the planes feed off each other’s view, the final product is an exponentially skewed show.

Our host mounts a 3D printed ring with an hubward-facing strip of LEDs to an ordinary glass mirror. Over that, he designs four mated plates that hold semi-reflective film sheets in different shapes. The first is a hyperbolic paraboloid, but it’s probably easier to think of it as shaped like a Pringles chip (crisp). Once the light is applied, it looks like a bowtie made by a deranged god or the start of an infinite rabbit hole of light and reflection. To further the madness, he hits us with four shapes at once, so we hope you’ll take a moment to enjoy the video below.

This guy is no stranger to optics, and we’ve reported on a couple of other cool inventions that teach a concept through demonstration. His precision calipers demonstrate the Moiré effect, and his digital sundial capitalizes on parallel light beams.

Continue reading “Infinity Mirror At Warp Speed”