An Open Source Ebike

In the ebike world, there are two paths. The first is a homemade kit bike with motors and controllers from China. The second is a prebuilt bike from a manufacturer like Giant, with motors and controllers from China, which will be half as fast and cost three times as much. The choice is obvious, and there are other benefits to taking the first path as well, such as using this equipment which now has an open source firmware option.

The Tong Sheng TSDZ2 drive is popular in the ebike world because it’s an affordable kit motor which has a pedal-assist mode using torque sensors, resulting in a more polished experience. In contrast, other popular kit motors tend to rely on less expensive cadence sensors which are not as smooth or intuitive. This new open source firmware for the TSDZ2 further improves on the ride by improving the motor responsiveness, improving battery efficiency, and opening up the ability to use any of a number of color displays. (More information is available on a separate Wiki.)

If you have a TSDZ2-based ebike it might be time to break out the laptop and get to work installing this firmware. If you’re behind the times and still haven’t figured out that ebikes are one of the best ways to travel, here is the proof you need.

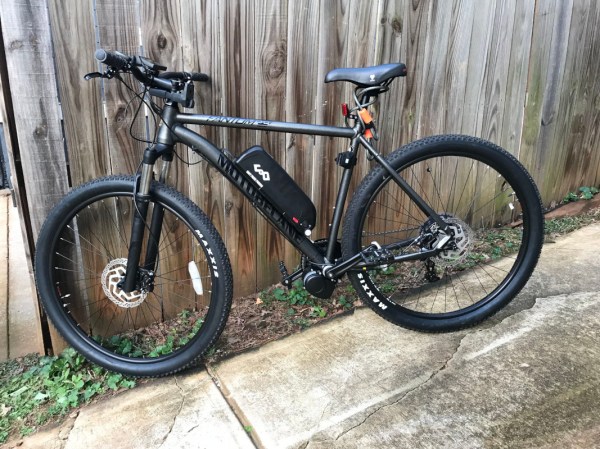
Thanks to [coaxial] for the tip! Photo via Reddit user [PippyLongSausage].

The Smallest Cell Phone Picture

Mobile phones are the photography tool for most of us, but they are a blunt tool. If you love astrophotography, you buy a DSLR and a lens adapter. Infrared photography needs camera surgery or a special unit. If you want to look closer to home, you may have a microscope with a CCD. Your pocket computer is not manufactured for microscopy, but that does not mean it cannot be convinced. Most of us have held our lens up to the eyepiece of some binoculars or a microscope, and it sort of works, but it is far from perfect. [Benedict Diederich] and a team are proving that we can get darn beautiful images with a microscope, a phone holder, and some purpose-built software on an Android phone with their cellSTORM.

The trick to getting useful images is to compare a series of pictures and figure out which pixels matter and which ones are noisy. Imagine someone shows you grainy nighttime footage from an outdoor security camera. When you pause, it looks like hot garbage, and you can’t tell the difference between a patio chair and a shrubbery. As it plays, the noisy pixels bounce around, and you figure out you’re looking at a spruce bush, and that is roughly how the software parses out a crisp image. At the cost of frame rate, you get clarity, which is why you need a phone holder. Some of their tests took minutes, so astrophotography might not fare as well.

We love high-resolution pictures of tiny things and that isn’t going to change anytime soon.

Thank you [Dr. Nicolás De Francesco] for the tip.

Raspberry Pi Slips Out New PCB Version With USB C Power Fix

When the Raspberry Pi people release a fresh model in their line of fruity single board computers, it’s always an event of great interest. The Raspberry Pi 4 brought some significant changes to the formula: they moved to mini micro HDMI and USB-C power sockets, for instance. The early adopters who scored one of those Pi 4s were in for a shock though, if they had all but the most basic USB C power cables the device wouldn’t power up. Now the Register has news that they have slipped out with little fanfare an updated version of the board containing a fix for this problem.

Our colleague Maya Posch delved deeply into the USB C specification and delivered a pithy analysis at the time which demonstrated that the fault lay with the configuration of the sense resistors used by intelligent USB C power sources to determine what power to supply. For the addition of a single surface mount resistor the problem need never have existed, and we’re guessing that’s how they fixed it.

There’s no need to despair should you have one of the older boards, though. They will still work as they always have done with the so-called “dumb” power supplies and cables, and meanwhile we’re sure that future Pi boards will have had a lot of attention paid to their USB power circuitry.

3D Printed Breadboard Helper Makes Wiring Neater And Easier

Breadboards make it simple to prototype and test circuits. If you use flexible wires with pins to make connections, it usually results in a rat’s nest. For many of us, using solid wire makes a rat’s nest, too. However, the very neat among us will cut solid wire to just the right length and strip just the right amount of wire and lay the wires very flat and neat along the board. [Moononournation] did a 3D print that makes the latter method much easier. You can find his Breadboard Wire Helper on Thingiverse and see a video, below.

The idea is simple: start with a piece of wire stripped on one side, then count out the number of holes it needs to traverse and push the stripped end through the hole. Trim the wire to fit. To complete the other side, lay the wire flat along the tool to the edge. Now you can see where to strip that side of the wire. After you remove the insulation, you can bend the wire down and cut the wire to fit. Now you have a perfect size and shape wire to place in the actual breadboard.

Granted, this isn’t that hard to do with the existing breadboard if it isn’t too packed. You could even use a spare breadboard. But it is a little easier to trim the wire to the right size with this jig. If you don’t want to 3D print it, you could probably pull the tape off the back of a cheap board and remove the springs to get a similar effect.

So while this little tool probably won’t change your life, it might make it a little easier. What other tools do you use when breadboarding? Let everyone know in the comments.

Continue reading “3D Printed Breadboard Helper Makes Wiring Neater And Easier”

Make A Vintage-Looking Clock In A Flash

Now that everyone has a phone with a camera, we would bet that fewer people than ever are in the market for a nice vintage flash unit such as the one [lonesoulsurfer] chose for this cool clock build. But here’s something that never goes out of style — a clock that doubles as a conversation piece.

At the heart of this build is a dirt cheap clock unit meant for cars. It also displays the ambient temperature and has a voltage testing mode(!), which could come in handy someday. Although [lonesoulsurfer] didn’t connect a pair of probes, he did cut a wee hole for the temperature sensor to stick out of. He also cut off the SMD buttons and wired new momentaries to the outside of the case.

Although we really like the look of the textured plastic lens over the 7-segments, our favorite part might be the stand and the way [lonesoulsurfer] implemented it. He made a threaded rod by pounding a hex nut into the end of a piece of aluminium tubing, and then dropped a bolt through the bottom of the flash body before closing it up, so it screws on like a camera to a tripod. Take a second and check out the build video after the break.

We love a good clock so much that we just had a contest to find the coolest ways to tell time. In case you missed it, here are the best of the best.

Continue reading “Make A Vintage-Looking Clock In A Flash”

Gesture Control The Easy Way

Gesture control is a technology that has floated around for quite a while, but never quite reached mainstream acceptance. Wii Bowling was fun for a while, but we’re not regularly using gestures to open doors or order pizza just yet. Doing it yourself can be quite easy, however, as [RC Lover san] found with a barebones, hacky build.

Typically, when we think of gesture control, we envisage object tracking cameras or MEMS accelerometers. Instead, this build uses simple tilt switches, as you might find in a pinball machine from days of yore. Four of these are placed on a wrist-mounted device, allowing the user to tilt their arm to move an RC car in different directions. The tilt switches are easy to hack into the controller for a toy RC car, as they simply replace the existing buttons on the PCB.

It’s a project that goes to show that not everything has to be done with advanced sensors and complex algorithms. Sometimes, it can all be done with a handful of cheap switches and some ingenuity. Plus, using arm movements to scoot BB-8 around on the floor looks like great fun. We’ve seen other attempts to build simple gesture controls with pots, too. Video after the break.

Continue reading “Gesture Control The Easy Way”

3D Printable Nameplates From Your Web Browser

It’s an unwritten rule that all proper pieces of shop equipment need a nameplate. Otherwise, how are you going to know what name to use when you curse it under your breath? In the old days these would have been made out of something fancy such as brass, but for the modern hacker that doesn’t stand on tradition, you can now easily outfit all your gear with custom 3D printed nameplates using this online tool.

Granted, it wouldn’t be very difficult to throw one of these together in whatever CAD package you happen to have access to. But with the tool [Tobias Weber] has developed, you don’t have to. Simply pick the font, the shape of the border, and fill in a few variables to fine tune things such as padding and base thickness.

Finally, enter your text and marvel at the real-time 3D preview that’s rendered thanks to the magic of modern web technologies. In seconds, you’ll have an STL file that’s ready for the warm liquid goo phase.

The huge collection of fonts are a particularly nice touch, ranging from delicate scripts to military style stencils. Depending on your CAD software, getting arbitrary fonts imported and extruded into a three dimensional shape can be tricky for new players. If we do have one complaint though, it’s that there doesn’t seem to be a clear indicator of how big the nameplate is going to be when exported. First time around, it spit out an STL that would have been 300 mm long if we hadn’t scaled it down in the slicer.

This project is very reminiscent of another web-based tool we featured recently. That one allowed you to make 3D printed QR codes which would whatever entomb in plastic whatever data your cold hacker heart desired.

Continue reading “3D Printable Nameplates From Your Web Browser”