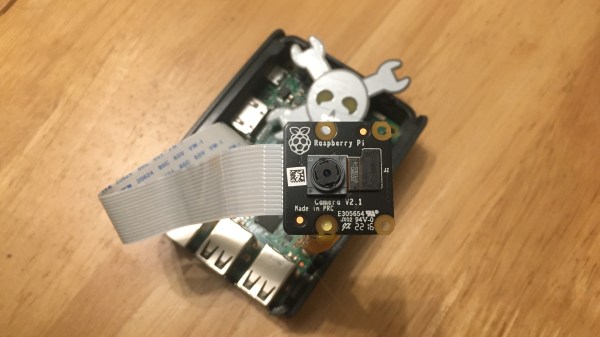
A Raspberry Pi 3 with a black Raspberry Pi Camera PCB on top of it, looking at the camera taking this picture. There's a Jolly Wrencher in the background.

Make Your Pi Moonlight As A Security Camera

A decade ago, I was learning Linux through building projects for my own needs. One of the projects was a DIY CCTV system based on a Linux box – specifically, a user-friendly all-in-one package for someone willing to pay for it. I stumbled upon Zoneminder, and those in the know, already can tell what happened – I’ll put it this way, I spent days trying to make it work, and my Linux skills at the time were not nearly enough. Cool software like Motion was available back then, but I wasn’t up to the task of rolling an entire system around it. That said, it wouldn’t be impossible, now, would it?
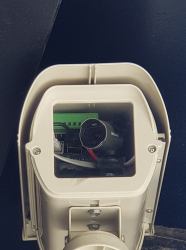
Five years later, I joined a hackerspace, and eventually found out that its CCTV cameras, while being quite visually prominent, stopped functioning a long time ago. At that point, I was in a position to do something about it, and I built an entire CCTV network around a software package called MotionEye. There’s a lot of value in having working CCTV cameras at a hackerspace – not only does a functioning system solve the “who made the mess that nobody admits to” problem, over the years it also helped us with things like locating safety interlock keys to a lasercutter that were removed during a reorganization, with their temporary location promptly forgotten.

Being able to use MotionEye to quickly create security cameras became quite handy very soon – when I needed it, I could make a simple camera to monitor my bicycle, verify that my neighbours didn’t forget to feed my pets as promised while I was away, and in a certain situation, I could even ensure mine and others’ physical safety with its help. How do you build a useful always-recording camera network in your house, hackerspace or other property? Here’s a simple and powerful software package I’d like to show you today, and it’s called MotionEye.

Continue reading “Make Your Pi Moonlight As A Security Camera” →

The project's wrist-worn heartrate sensor shown on someone's hand, Caption: Our device has three main components: watch electronics (arrow to watch display), organism enclosure (arrow to the 3D-printed case of the watch) and our living organism physarum polycephalum a.k.a slime mold.

What If Your Day-To-Day Devices Were Alive?

We take advantage of a variety of devices in our day-to-day life, and we might treat them as just pieces of hardware, elements fulfilling a certain purpose — forgotten about until it’s time to use them. [Jasmine Lu] and [Pedro Lopes] believe that these relationships could work differently, and their recent paper describes a wearable device that depends on you as much as you depend on it. Specifically, they built wrist-worn heart rate sensors and designed a living organism into these, in a way that it became vital to the sensor’s functioning.

The organism in question is Physarum polycephalum, a slime mold that needs water to stay alive and remain conductive — if you don’t add water on a regular basis, it eventually dries out and hibernates, and adding water then will revive it. The heart rate sensor’s power rail is controlled by the mold, meaning the sensor functions only as long as you keep the mold alive and healthy. In their study, participants were asked to wear this device for one-two weeks, and the results go way beyond what we would expect from, say, a Tamagotchi — with the later pages describing participant reactions and observations being especially impressive.

For one, the researchers found that the study participants developed a unique sense of connection towards the slime mold-powered device, feeling senses of responsibility and reciprocity, and a range of other feelings you wouldn’t associate with a wearable. Page 9 of the paper tells us how one participant got sick, but still continued caring for the organism out of worry for its well-being, another participant brought her “little pet mold friend” on a long drive; most participants called the slime a “friend” or a “pet”. A participant put it this way:

[…] it’s always good to be accompanied by some living creature, I really like different, animals or plants. […] carrying this little friend also made me feel happy and peaceful.

There’s way more in the paper, but we wouldn’t want to recite it in full — you should absolutely check it out for vivid examples of experiences that you’d never have when interacting with, say, your smartphone, as well as researchers’ analysis and insights.

With such day-to-day use devices, developing a nurturing relationship could bring pleasant unexpected consequences – perhaps, countering the “kept on a shelf since purchase” factor, or encouraging repairability, both things to be cherished. If you’ve ever overheard someone talking about their car or laptop as if it were alive, you too might have a feeling such ideas are worth exploring. Of course, not every device could use a novel aspect like this, but if you wanted to go above and beyond, you could even build a lamp that needs to be fed to function.

Continue reading “What If Your Day-To-Day Devices Were Alive?” →

A small widescreen laptop repeating the ThinkPad style. It looks cute; sadly, it does not exist.

[Dana Sibera] Creates Devices That Don’t Exist

[Dana Sibera], known as [@NanoRaptor] on Twitter, makes us wonder about devices that could have been, and wince about devices that must never see the light of day – summoned into existence by her respectable photo editing and 3D modeling skills. Ever wanted to see a Model M with a small green-tinted CRT built into its side? Now you have. Perhaps, a “self-tapping” DE-9 plug with wood screws for pins? Tough luck, here it is anyway, but you can have a palate cleanser if it was too much to bear. Having started over a year ago with the classic “spicy pillows, but actually pillows” design, she keeps gracing us with portrayals of tech and tech-adjacent objects straight from the depths of her imagination.

None of the things she shows exist in real life, some regretfully and some thankfully so, but that’s not the first thing on your mind when you stumble upon a cube-shaped iPod with a built-in equalizer in your Twitter feed. Pictures like this “cassette ROM” or the deluxe woodgrain 386DX are quite apparent in what they are. On the other hand, devices like this “Mini VGA” dongle or the amber CRT-adorned TI92 Plus might have you reach for your wallet before you realize what’s up, and the photographic-proof-accompanied assertion about early floppy drives being punchcard-based might have you believe you are just not up to date on your retrocomputing trivia. Continue reading “[Dana Sibera] Creates Devices That Don’t Exist” →
An Easy-To-Make Pi-Powered Pocket Password Pal

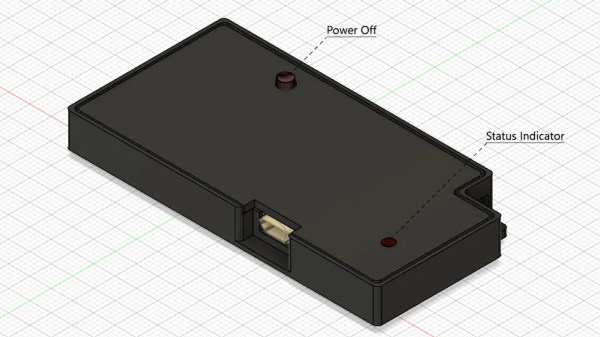
Sometimes, we see a project where it’s clear – its creator seriously wants to make a project idea accessible to newcomers; and today’s project is one of these cases. The BYOPM – Bring Your Own Password Manager, a project by [novamostra] – is a Pi Zero-powered device to carry your passwords around in. This project takes the now well-explored USB gadget feature of the Pi Zero, integrates it into a Bitwarden-backed password management toolkit to make a local-network-connected password storage, and makes a tutorial simple enough that anybody can follow it to build their own.

For the physical part, assembly instructions are short and sweet – you only need to solder a single button to fulfill the hardware requirements, and there’s a thin 3D-printable case if you’d like to make the Pi Zero way more pocket-friendly, too! For the software part, the instructions walk you step-by-step through setting up an SD card with a Raspbian image, then installing all the tools and configuring a system with networking exposed over the USB gadget interface. From there, you set up a Bitwarden instance, and optionally learn to connect it to the corresponding browser extensions. Since the device’s goal is password management and storage, it also reminds you to do backups, pointing out specifically the files you’ll want to keep track of.

Overall, such a device helps you carry your passwords with you wherever you need them, you can build this even if your Raspberry Pi skills are minimal so far, and it’s guaranteed to provide you with a feeling that only a self-built pocket gadget with a clear purpose can give you! Looking for something less reliant on networking and more down-to-commandline? Here’s a buttons-and-screen-enabled Pi Zero gadget that uses pass.

A Pi Pico plugged into a breadboard, with an I2C OLED display connected to it

Need An USB-I2C Adapter? Use Your Pico!

Given its abundance and simplicity, the RP2040 has no doubt become a favourite for USB peripheral building – in particular, USB-connected tools for electronics experiments. Today, we see one more addition to our Pico-based tool arsenal – a USB-I2C adapter firmware for RP2040 by [Renze Nicolai]. This is a reimplementation of the ATTiny-based I2C-Tiny-USB project and complies to the same protocol – thus, it’s compatible with the i2c-tiny-usb driver that’s been in the Linux kernel for ages. Just drag&drop the .uf2, run a script on your Linux system, and you will get a /dev/i2c-X device you can work with from userspace code, or attach other kernel drivers to.

The software will work with any RP2040 devboard – just connect your I2C devices to the defined pins and you’ll have them show up in i2cdetect output on your Linux workstation. As a demo, [Renze] has written a userspace Python driver for one of these SSD1306 128×64 OLEDs, and gives us a commandline that has the driver accept output of an ffmpeg command capturing your main display’s contents, duplicating your screen on the OLED – in a similar fashion that we’ve seen with the “HDMI” I2C-driven display a few months back. Everything you might need is available on the GitHub page, including usage instructions and examples, and the few scripts you can use if you want to add an udev rule or change the I2C clock frequency.

Just to name a few purposes, you can use a Pi Pico as a tool for SWD, JTAG, CAN, a logic analyser with both digital and analog channels, or even as a small EMP-driven chip glitching tool. The now-omnipresent $3 Pi Pico boards, it seems, are a serious contender to fondly remembered hacker tools of the past, such as the legendary BusPirate.

Continue reading “Need An USB-I2C Adapter? Use Your Pico!” →

The SSD described, a green board with a ZIP connector, a controller chip and two out of four NAND chips populated. There's traces of flux on the chip, as it hasn't been washed after soldering yet.

ZIF HDDs Dying Out? Here’s An Open-Source 1.8″ SSD

A lot of old technology runs on parts no longer produced – HDDs happen to be one such part, with IDE drives specifically being long out of vogue, and going extinct to natural causes. There’s substitutes, but quite a few of them are either wonky or require expensive storage medium. Now, [dosdude1] has turned his attention to 1.8 ZIF IDE SSDs – FFC-connected hard drives that are particularly rare and therefore expensive to replace, found in laptops like the Macbook Air 1,1 2008 model. Unsatisfied with substitutes, he’s designed an entire SSD from the ground up around an IDE SSD controller and NAND chips. Then, he made the design open-source and filmed an assembly video so that we can build our own. Take a look, we’ve put it below the break!

For an open-source design, there’s a respectable amount of work shared with us. He’s reverse-engineered some IDE SSDs based on the SM2236 controller to design the schematic, and put the full KiCad files on GitHub. In the video, he shows us how to assemble this SSD using only a hot air station and a soldering iron, talks about NAND matching and programming software intricacies, and shows the SSD working in the aforementioned Macbook Air. Certainly, assembly would have been faster and easier with a stencil, but the tools used work great for what’s a self-assembly tutorial!

Continue reading “ZIF HDDs Dying Out? Here’s An Open-Source 1.8″ SSD” →

Two chillers side-by-side - the fake chiller on the left and the water fountain chiller (lid-less) on the right

Gutting And Upgrading Laser “Chiller” With No Chill

Getting a cheap CO2 laser cutter is great for your workshop needs, and while you might get a weaker-than-declared laser tube, it’s still going to cut whatever you need to be cut. That might not be the case for the cooling equipment you’re getting alongside it, however, as [RealTimeKodi] shows in a post-project blogpost. They bought a CX3000 “chiller” and found out it had no chiller components (Nitter), only equipped with a radiator, a fan, and a pump.

Having your laser tube water be somewhat close to ambient temperature is something you can already achieve with an aquarium pump and a bucket of water — and it isn’t worth paying $100 for. Left with the sunk cost and an unfulfilled need for a proper chiller, [RealTimeKodi] started looking for paths to take – first one was using TEC elements. The upgrade process was fun, but the result was subpar, as the elements gobbled power with hardly any useful output to show for it.

[RealTimeKodi] didn’t give up, and eventually found an old water fountain chiller with chiller-like components inside, sold for $200. They could’ve used the water fountain as-is, but a few design issues and thirst for adventure got in the way, indisputably forcing them to stuff the fountain’s guts into the CX3000’s case.

Buying a laser cutter can sometimes feel like buying a 3D printer a decade ago — you get a K40, learn to use it, add the missing safety features, mod in autofocus, upgrade the control board, expand the work surface… That said, our experience shows that you don’t need any of those if A4-sized 3 mm wood cutting suit you, but a proper chiller is still worth its weight in gold-plated acrylic.

Continue reading “Gutting And Upgrading Laser “Chiller” With No Chill” →