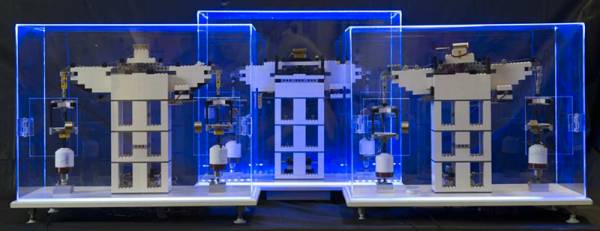
Measuring The Planck Constant With Lego

For nearly 130 years, the kilogram has been defined by a small platinum and iridium cylinder sitting in a vault outside Paris. Every other unit of measurement is defined by reproducible physical phenomenon; the second is a precise number of oscillations of a cesium atom, and a meter is the length light travels in 1/299792458th of a second. Only the kilogram is defined by an actual object, until NIST and the International Committee of Weights and Measures defines it as a function of the Planck constant. How do you measure the Planck constant? With a Watt balance. How do you build a Watt balance? With Lego, of course.

A Watt balance looks like a double-armed scale where one weight can be compared to another weight of known mass. Instead of using two arms, a Watt balance only has one arm, brought into balance by a current flowing through a coil. The mechanical power in the balance – brought about by whatever is on the balance plate – can then be compared to the electrical power, and eventually the Planck constant. This will soon be part of the formal definition of the kilogram, and yes, a machine to measure this can be made out of Lego.

The only major non-Lego parts in the Lego Watt balance are a few coils of wire wound around a PVC pipe and a few neodymium magnets. These are placed on both arms of the balance, and a pair of lasers are used to make sure both arms of the balance are level. Data are collected by measuring the coils through a few analog pins on a Labjack and a Phidget. Once the voltage and current induced in each coil is measured, the Wattage can be calculated, then the Planck constant, and finally how close the mass on the balance pan is to a real, idealized kilogram. Despite being made out of Lego, this system can measure a gram mass to 1% uncertainty.

The authors have included a list of Lego parts, most of which could be found in any giant tub of Lego in an 8-year-old’s closet. The only really expensive item on the BOM is a 16-bit USB DAQ; apart from that, it’s something anyone can build.

Thanks [Matt] for the tip.

Genetic Algorithm Programmer Gets Functions

[Kory] has been writing genetic algorithms for a few months now. This in itself isn’t anything unique or exceptional, except for what he’s getting these genetic algorithms to do. [Kory] has been using genetic algorithms to write programs in Brainfuck. Yes, it’s a computer programming a computer. Be thankful Skynet is 18 years late.

When we first saw [Kory]’s work, he had programmed a computer to write and run its own programs in Brainfuck. Although the name of the language [Kory] chose could use some work, it’s actually the ideal language for computer-generated programs. With only eight commands, each consisting of a single character, it greatly reduces the overhead of what any genetic algorithm must produce and what a fitness function must evaluate.

There was one shortcoming to [Kory]’s initial efforts: functions. It’s relatively easy to get a program to say Hello World, but to do something complex, you’re going to need something like a macro or a function. Brainfuck, it its most simple form, doesn’t support functions. This throws a wrench in [Kory]’s plan to have his computer programming computer grow smarter and get over local minima in its genetic algorithms.

The solution to this problem was the creation of a new dialect of Brainfuck [Kory] calls BrainPlus. This takes the best parts of Extended Brainfuck and adds a command that basically serves as a break statement.

With this, [Kory]’s self programming computer can develop more complex programs. Already it has created a program to generate the first few numbers of the Fibonacci sequence. It only goes up to 233 because 255 is the maximum value for a byte, and the program itself took seven hours to generate. It does, however, work. Other programs generated with the new Brainplus functions include reciting 99 bottles on the wall and a program that multiples two values.

Even though [Kory]’s computer is spending a long time to generate these programs, given enough time, there’s really not much this program can’t do. Brainfuck, and [Kory]’s Brainplus, are Turing complete, so that given infinite memory and time it can compute anything. With the new addition of functions, it can compute anything faster.

All the code for [Kyle]’s GA is available on Github.


RGB LED Matrices With The STM32 And DMA

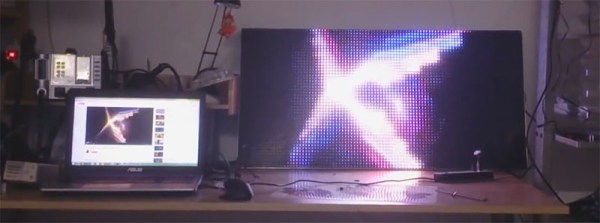
A few years ago, [Frans-Willem] bought a few RGB LED panels. Ten 32×16 panels is a lot of LEDs, and to drive all of these panels requires some sufficiently powerful hardware. He tried working with an FPGA development board, but that didn’t have enough memory for 24-bit color. The microcontroller du jour – a TI Stellaris – couldn’t get more than 16 bits of color without flickering. With a bunch of LEDs but no way to drive them, [Frans-Willem] put the panels in a box somewhere, waiting for the day they could be used to their fullest capacity.

This day came when [Frans-Willem] was introduced to the STM32 series of chips with the F1 Discovery board. While looking for some electronic playthings to use with this board, he stumbled upon the LED panels and gave them one more try. The results are spectacular, with 33 bits of color, with animations streamed over a router over WiFi.

The panels in question are HUB75 LED panels. In the 32×8 panels, there are six data pins – two each for each color – four row select pins, and three control pins. The row select pins select which row of pixels is active at any one time. Cycle through them fast enough, and it will seem like they’re all on at once. The control pins work pretty much like the control pins of a shift register, with the data pins filling in the obvious role.

The code that actually drives the LEDs all happens on an STM32F4 with the help of DMA and FSMC, or the Flexible Static Memory Controller found on the chip. This peripheral takes care of the control lines found in memory, so when you toggle the write strobe the chip will dump whatever is on the data lines to a specific address in memory. It’s a great way to take care of generating a clock signal.

For sending pixels to this display driver, [Frans-Willem] is using the ever-popular TP-Link WR703N. He had originally planned to send all the pixel data over the USB port, but there was too much overhead, a USB 1.1 isn’t fast enough. That was fixed by using the UART on the router with a new driver and a recompiled version of OpenWRT.

All the software to replicate this project is available on Github, and there’s a great video showing what the completed project can do. You can check that out below.

Continue reading “RGB LED Matrices With The STM32 And DMA”

Making Something Useful With The ESP8266

The ESP8266 is the latest and greatest way to get a project connected to the Internet, but so far we haven’t seen many projects that actually do something with this very cool chip. Yes, there are a few people pinging away with AT commands, and there is a thriving community building interpreters and flashing new code on this chip, but not much in the way of actual projects. [Martin] is the exception. He’s come up with two projects that use the ESP8266.

The first project is one that puts the readings from a DHT22 temperature/humidity sensor up on the Internet. Following the spirit of all the recent development of the ESP8266, [Martin] isn’t using an external microcontroller. Instead, he’s using the SDK to run an HTTP daemon using [Sprite_TM]’s code. This web server provides an interface to turn an LED on and off, and reports the temperature and humidity readings from the DHT22. It’s simple, but it’s easy to see how this tiny chip could become the basis for a smart thermostat.

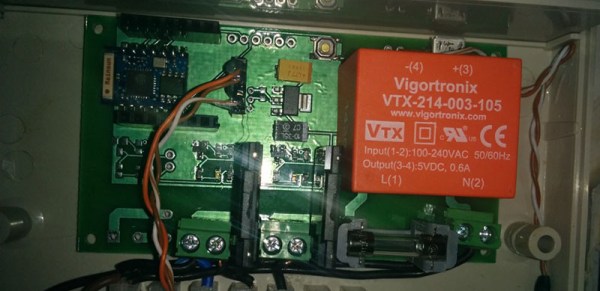
If lighting up LEDs isn’t enough, [Martin] has another project that includes three solid state relays. This one is a bit more complex with MQTT support, a fancy jQuery interface, and support for network time. [Martin] isn’t quite ready to publish the complete code for this project, but that’s only because there are a few features he’d like to implement before making it public. These include dynamic DNS, scheduling functionality, and support for an I2C status display. Even without these fancy features, it’s still a great project that’s still extremely capable for an Internet of Things thing. You can check out [Martin]’s video demo of this board below.

Continue reading “Making Something Useful With The ESP8266”

A Better Way To Hack The Wink

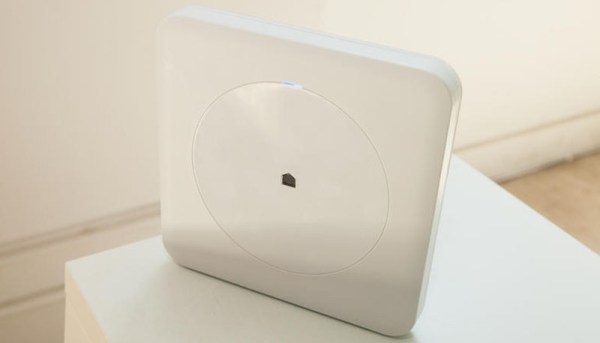
If you’re looking for Home Automation appliances, you might want to check out the Wink Hub. It’s fifty bucks, and has six radios on board: WiFi, Bluetooth, Z-Wave, Zigbee, and 433MHz Lutron and Kidde. That’s an insane amount of connectivity in a very cheap package. It’s been pwnzor3d before, but dinnovative has a much better solution for getting root on this device.

Earlier methods of rooting the Wink involved passing commands via URLs – something that’s not exactly secure. The new method leverages what’s already installed on the Wink, specifically Dropbear, to generate public keys on the Wink hub and getting that key onto another computer securely. The complete exploit is just a few lines in a terminal, but once that’s done you’ll have a rooted Wink hub.

Even though the Wink hub has been rooted a few times before, we haven’t seen anything that leverages the capabilities of this hardware. There isn’t another device with a bunch of IoT radios on the market for $50, and we’re dying to see what people can come up with. If you’ve done something with your Wink, send it in on the tip line.

Generating Video With The PIC

[bekeband] recently came across an old industrial monitor. It’s small, monochrome, has a beautiful green phosphor, and does not accept a composite signal. Instead, there’s a weird TTL input with connectors for horizontal sync, vertical sync, and video. Intrigued, [bekeband] brought it home and started working on a project that would drive this monitor. He succeeded, and with a chip we don’t see much of on the Hackaday tips line: a 16-bit PIC.

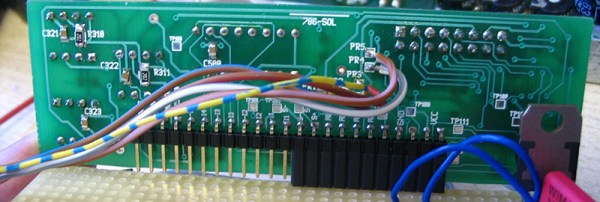
The project uses the dsPIC30F3011, a strange little 16-bit PIC in a 40-pin package. The board for this build actually comes from an earlier build, and after connecting the horizontal sync, vertical sync, and video to this tiny board, [bekeband] started writing some code.

There are two programs written for this board. The first is a static image tester that displays a single image on the CRT. The second is one that displays a simple animation, in this case, a horse running in place. It’s not the fanciest project, but it does work, and even though [bekeband] isn’t using a high-speed ARM, he is getting a reasonably high resolution out of this chip.

Video below.

Continue reading “Generating Video With The PIC”

Hackaday Links Column Banner

Hackaday Links: January 4, 2015

Chips as furniture is now a thing. It started off with a 555 footstool from Evil Mad Scientist and moved on to an EPROM coffee table. Now [msvm] over on the War Thunder forums has constructed a Nixie tube driver table. It’s based on the K155, and as a neat little addition, he’s included a real vintage chip under glass in the table.

Have some tongs, an anvil, and a blowtorch? Make some bottle openers out of framing nails. There’s a lot of variety here in the shapes of the bottle openers.

[Stephen] used a solid state relay he found on eBay to drive some Christmas lights. The SSR failed. That meant it was time to see inside of this relay looked like. The short answer is, ‘a lot of goop and epoxy’, but the traces look big enough to support the current it’s rated for.

Imagine a part of your 3D printer breaks. That’s alright, just print another…. oh, yeah. Well, I guess it’s time to make a bearing bracket out of wood.

The Electronica MK-54 and MK-61 (actually the Электроника МК-54) were incredibly popular Soviet programmable calculators. Now there’s an emulator for them.

[Rue Mohr] found a very cheap TFT display on an Arduino shield. The chip for the display was an SPF5408, a chip that isn’t supported by the most common libraries. He eventually got it to work after emailing the seller, getting some libraries, and renaming and moving a bunch of stuff. If you have one of these displays, [Rue] just saved you a bunch of time.