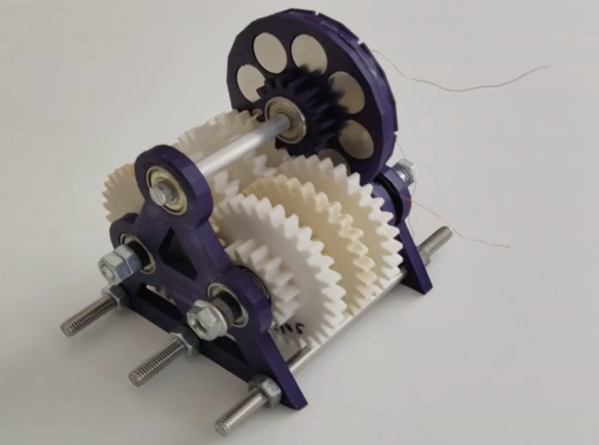
Printed Axial Generator Is Turned By Hand

While desktop 3D printing is an incredible technology, it’s got some pretty clear limitations. Plastic parts can be produced quickly in a 3D printer but can be more expensive or take longer to make than parts from materials like wood. Plastic parts can also be weaker than materials like metal. If a 3D printer is all you have on hand, though, you can often make some design choices that improve the performance of a plastic part over other materials. That’s what [1970sWizard] did to make this axial hand-cranked generator.

Besides a few pieces of off-the-shelf hardware and the wire and magnets, the entire generator is printed. The actual generator is made from coils of wire with exposed leads which snap into a plastic disc which acts as the generator’s stator. The magnets also snap into a separate disc which is the rotor of the generator and is attached to the drivetrain, with no glue or fasteners required. A series of gears on two other axes convert the torque from the hand crank into the high speed necessary to get usable electricity out of the generator.

The separate gear shafts were necessary to keep from needing a drillpress, which would have allowed fewer axes to be used. This entire machine can be built almost entirely with a desktop 3D printer, though, which was one of the design goals. While it’s largely a proof-of-concept, the machine does generate about 100 mW of power which is enough to slowly charge USB devices, power lights, or provide other sources of very small amounts of energy. If you do have access to some metalworking tools, though, take a look at this hand-cranked emergency generator.

Continue reading “Printed Axial Generator Is Turned By Hand”

A Simple Stove, Built For Beans

Sitting around a campfire or fireplace is an aesthetically pleasing experience in most situations, and can even provide some warmth. But unless you have a modern wood-burning appliance, it’s likely that most of the energy available in the biomass is escaping as un-burned vapors. Surprisingly, solving this problem is almost as easy as buying a can of beans at the store, and the result is a very efficient stove which can be used for heat in a pinch.

[Robert] is demonstrating this gasifier stove, not with beans but using both a can of peas and a larger can of potatoes. Various holes are drilled in each can in a specific pattern, and then the smaller pea can is fitted inside the larger potato can. Once a fire is going, the holes allow for air to flow in a way which traps the escaping un-burned vapors from the fuel and burns them as they flow through the contraption. No moving parts are required; this is all powered by the natural airflow that’s produced by the heat of the fire.

The result of a build like this is not only a stove which can extract a much higher percentage of the available fuel, but also quires much less fuel for a given amount of heat, and produces a much cleaner, less smokey fire. [Robert] also added a screen mantle which allows for this to be used more as a heat source, but similar builds can also be used just as effectively for cooking, too.

Continue reading “A Simple Stove, Built For Beans”

USB Power Isolator Keeps Smoke In

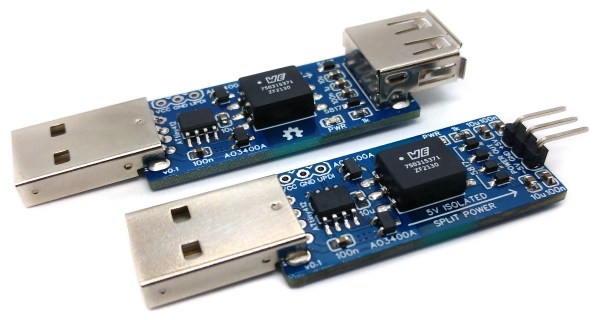
Anyone who’s done an electronics project knows the most important part of any good design is making sure to keep the magic smoke inside of all of the components. There are a lot of ways to make sure the smoke stays in there, but one of the most important is making sure that the power supply is isolated. If you’re using a USB port on a computer as your power source, though, it can be a little more complicated to isolate it from the computer.

The power supply is based around a small transformer with a set of diodes to act as a rectifier. Of course, while a transformer is great at isolating power supplies, it isn’t much good at DC. That’s what the ATtiny microcontroller is for. It handles the high-speed switching of the MOSFETs, which drive the transformer and handle some power regulation. There are two different power supplies created as part of this project as well — the first generates +5V much like a normal USB plug would have, and the other creates both +5V and -5V. It will be important not to mix these two up, or that tricky blue smoke may escape.

The project page goes into extensive details on the operation of the device, so if electrical theory is of interest, this will definitely be worth a read. Isolating a valuable computer from a prototype circuit is certainly important, but if you’re looking for a way to isolate a complete USB connection, look at this build which includes isolation for a USB to FTDI adapter.

A Raspberry Pi Phone For The Modern Era

While it might seem like mobile phones are special devices, both in their ease of use and in their ubiquity in the modern culture, they are essentially nothing more than small form-factor computers with an extra radio and a few specific pieces of software to run. In theory, as long as you can find that software (and you pay for a service plan of some sort) you can get any computer to work as a phone. So naturally, the Raspberry Pi was turned into one.

[asherdundas], the phone’s creator, actually found a prior build based around the Raspberry Pi before starting this one. The problem was that it was built nearly a decade ago, and hadn’t been updated since. This build brings some modernization to the antiquated Pi phone, and starts with a 3D printed case. It also houses a touchscreen and a GSM antenna to connect to the cell network. With some other odds and ends, like a speaker and microphone, plus a battery and the software to tie it all together, a modern functional Raspberry Pi phone was created, with some extra details available on the project page.

The phone has the expected features — including calling, texting, and even a camera. A small WiFi USB dongle allows it to connect to the Internet too, allowing it to do all of the internet browsing a modern smartphone might want to do. The only thing that it might be pretty difficult to do is install Android apps, and although there are ways to get Android apps working in Linux, it’s not always strictly necessary to have this functionality.

Ceiling Fan Adds CO2 Sensor

Ceiling fans seem to be an oft-misunderstood or overlooked household appliance. As such, they seem to have missed a lot of the IoT wave. Sure, you can get smart controllers for them to plug into your home automation system of choice, but these mostly rely on temperature sensors, simple timers, or voice commands. There’s a lot more to a ceiling fan than maintaining a comfortable temperature, as [EJ] demonstrates with this smarter ceiling fan build.

A big part of the job of a ceiling fan is to improve air circulation, which can help a room from feeling “stuffy”. This feeling is usually caused by excess CO2 as a result of respiration in an area where the air is not moving enough to exhaust this gas. Not only does [EJ]’s controller make use of a temperature monitor for controlling the fan automatically, but there is also a CO2 sensor integrated to improve this aspect of air quality when needed.

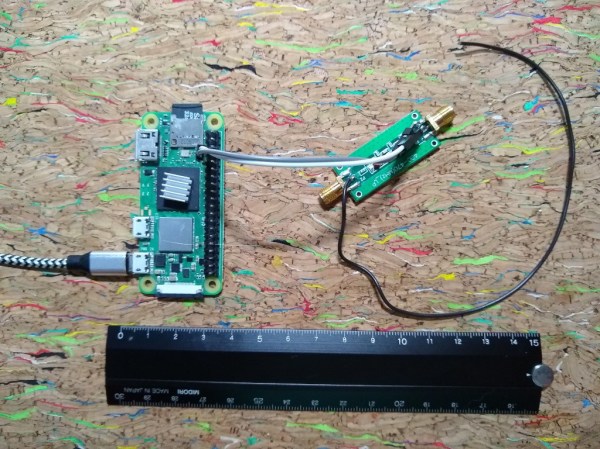
The entire build is based on a Raspberry Pi Zero, and nothing needed to be changed about the ceiling fan itself for this added functionality because it already included a radio-based remote control. With some monitoring of the signals produced by the remote, the Raspberry Pi was programmed to mimic these commands when the surrounding sensors captured a condition where [EJ] would want the fan on. There’s also a manual control button as well, so the fan control is not entirely in the hands of the computer.

For a little more detailed information about this build, there’s a separate project page which details a lot of the information about the RF waveform capturing and recreation. And, if you want to take your fan to the next level, take a look at this one which focuses on building a smartphone app to control the fan instead.

Mouse Finds New Home In Pinball Machine

Restoring pinball machines is an excellent hobby, and can even be more than that as we see businesses like bars and museums focusing on them as a main attraction. There’s all kinds of intrigue to be found, from esoteric mechanical systems to classic electronics and unique artwork. For those building new pinball machines, though, one way to bypass a lot of the hassle of finding antiquated parts is to build a digital machine with an analog feel, like this machine which repurposes a computer mouse in an interesting way.

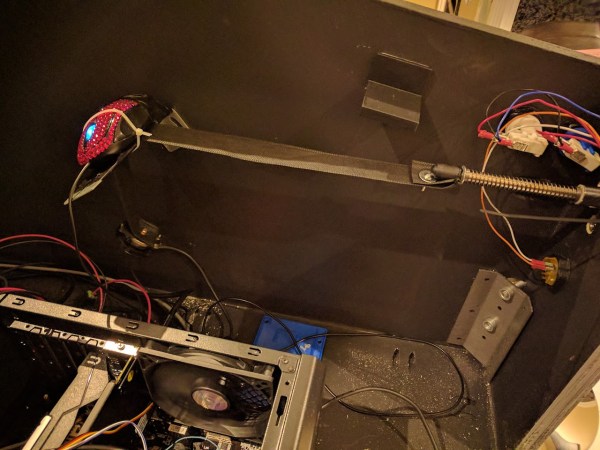
One of the important design considerations with a more modern system like this is to preserve the mechanical components that the player interacts with, in this case the plunger. This pinball machine is really just a large screen driven by a computer, but the plunger is a spring-loaded one from an old analog machine. Attached to the end of the plunger inside the cabinet is a cloth strap which passes underneath an old optical mouse. When the plunger is pulled and released, the mouse registers the position of the plunger and sends that information to the computer controlling the pinball display.

We really appreciate a KISS-style design like this in general. Mice are a proven, reliable technology and the metal components of the plunger are unlikely to ever wear out, which means that at least this part of the new pinball machine is unlikely to need much maintenance over the lifespan of the cabinet itself. For other ways of preserving the original feel of old machines, take a look at this build which incorporates all kinds of tricks within a MAME cabinet.

Winged Drone Gets Forward Flight Capability

Drones are pretty common in the electoronics landscape today, and are more than just a fun hobby. They’ve enabled a wide array of realtors, YouTubers, surveyors, emergency responders, and other professionals to have an extremely powerful tool at their disposal. One downside to these tools is that the power consumption tends to be quite high. You can either stick larger batteries on them, or, as [Nicholas] demonstrates, just spin them really fast during flight.

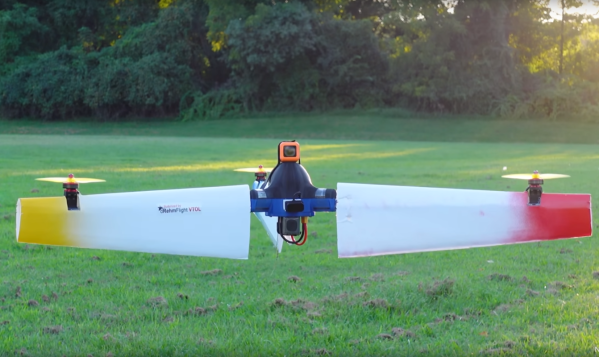
We featured his first tests with this multi-modal drone flight style a while back, but here’s a quick summary: by attaching airfoils to the arms of each of the propellers and then spinning the entire drone, the power requirements for level flight can be dramatically reduced. This time, he’s back to demonstrate another benefit to this unique design, which is its ability to turn on its side and fly in level flight like an airplane. It’s a little bizarre to see it in the video, as it looks somewhat like a stationary propeller meandering around the sky, but the power requirements for this mode of flight are also dramatically reduced thanks to those wings on the arms.

There are a few downsides to this design, namely that the vertical wing only adds drag in level flight, so it’s not as efficient as some bi-wing designs, but it compromises for that loss with much more effective hover capabilities. He also plans to demonstrate the use of a camera during spin-hover mode as well in future builds. It’s an impressive experiment pushing the envelope of what a multi-rotor craft can do, and [Nicholas] still has plans to improve the design, especially when it comes to adding better control when it is in spin-hover mode. We’d expect plenty of other drones to pick up some of these efficiency gains too, except for perhaps this one.

Continue reading “Winged Drone Gets Forward Flight Capability”