Laser Light Show Turned Into Graphical Equalizer

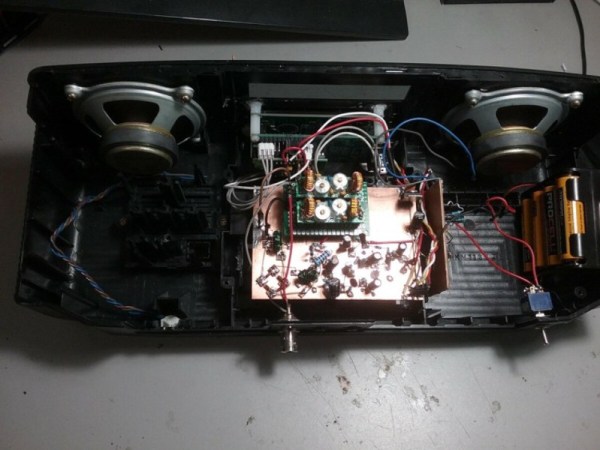
The gold standard for laser light shows during rock concerts is Pink Floyd, with shows famous for visual effects as well as excellent music. Not all of us have the funding necessary to produce such epic tapestries of light and sound, but with a little bit of hardware we can get something close. [James]’s latest project is along these lines: he recently built a laser light graphical equalizer that can be used when his band is playing gigs.

To create the laser lines for the equalizer bands, [James] used a series of mirrors mounted on a spinning shaft. When a laser is projected on the spinning mirrors it creates a line. From there, he needed a way to manage the height of each of the seven lines. He used a series of shrouds with servo motors which can shutter the laser lines to their appropriate height.

The final part of the project came in getting the programming done. The brain of this project is an MSGEQ7 which  takes an audio input signal and splits it into seven frequencies for the equalizer. Each one of the seven frequencies is fed to one of the seven servo-controlled shutters which controls the height of each laser line using an Arduino. This is a great project, and [James] is perhaps well on his way to using lasers for other interesting musical purposes.

Continue reading “Laser Light Show Turned Into Graphical Equalizer”

Tiny Amplifier With ATtiny

Small microcontrollers can pack quite a punch. With the right code optimizations and proper use of the available limited memory, even small microcontrollers can do things they were never intended to. Even within the realm of intended use, however, there are still lots of impressive uses for these tiny cheap processors like [Lukasz]’s audio amplifier which uses one of the smallest ATtiny packages around in the video embedded below.

Since the ATtiny is small, the amplifier is only capable of 8-bit resolution but thanks to internal clock settings and the fast PWM mode he can get a sampling rate of 37.5 kHz. Most commercial amplifiers shoot for 42 kHz or higher, so this is actually quite close for the limited hardware. The fact that it is a class D amplifier also helps, since it relies on switching and filtering to achieve amplification. This allows the amplifier to have a greater efficiency than an analog amplifier, with less need for heat sinks or oversized components.

All of the code that [Lukasz] used is available on the project site if you’ve ever been curious about switching amplifiers. He built this more as a curiosity in order to see what kind of quality he could get out of such a small microcontroller. It sounds pretty good to us too! If you’re more into analog amplifiers, though, we have you covered there as well.

Continue reading “Tiny Amplifier With ATtiny”

Test PCBs On A Bed Of Nails

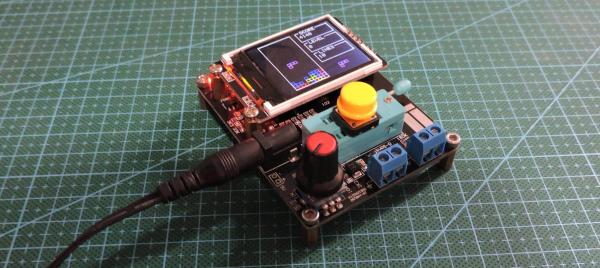
While it might be tempting to start soldering a circuit together once the design looks good on paper, experience tells us that it’s still good to test it out on a breadboard first to make sure everything works properly. That might be where the process ends for one-off projects, but for large production runs you’re going to need to test all the PCBs after they’re built, too. While you would use a breadboard for prototyping, the platform you’re going to need for quality control is called a “bed of nails“.

This project comes to us by way of [Thom] who has been doing a large production run of circuits meant to drive nixie tubes. After the each board is completed, they are laid on top of a number of pins arranged to mate to various points on the PCB. Without needing to use alligator clamps or anything else labor-intensive to test, this simple jig with all the test points built-in means that each board can be laid on the bed and tested to ensure it works properly. The test bed looks like a bed of nails as well, hence the name.

There are other ways of testing PCBs after production, too, but if your board doesn’t involve any type of processing they might be hard to implement. Nixie tubes are mostly in the “analog” realm so this test setup works well for [Thom]’s needs.

Ground Penetrating Radar For The Masses

Radar is a useful tool with familiar uses such as detecting aircraft and observing weather. It also has some less known applications, such as a technology known as ground-penetrating radar (GPR). Despite the difficulty of sending and receiving radio waves through solid objects, with the right equipment it’s possible to build a radar that works underground as well.

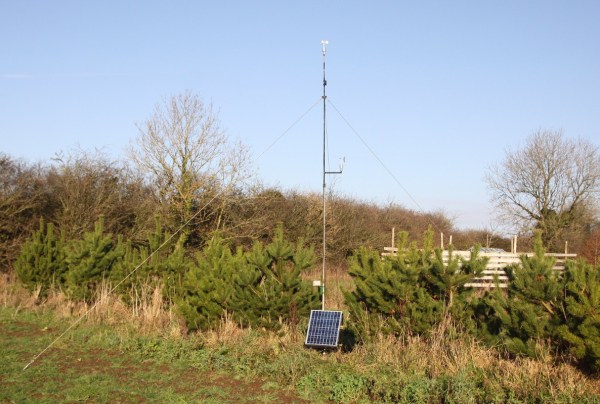
GPR is used often for detecting underground utilities, but also has applications in other fields such as archaeology and geology. For those people in these fields, a less expensive GPR was the priority of a group presenting at a 2017 National Institute of Telecommunications of Poland conference (pdf warning). The presentation goes into specific detail on how to build a GPR for around €600, much less than commercial offerings.

The presentation begins by highlighting the basics of GPR, then details the hardware bill of materials for the transmitting circuit, receiving circuit, and the DC power supplies. It also details the theory behind the software needed to get the circuit running properly, and has code as well. The processing is done on a 32-bit Mbed platform, and the rest of the GPR is built with easy-to-source components as well.

It’s always good to see useful hardware projects that bring costs of traditionally expensive equipment down to the grasp of average people. Even traditional radar systems are now available for hundreds of dollars, and we’ve even seen attempts at other GPR systems before as well.

Thanks to [Stefan] for the tip!

An Arduino From The Distant Past

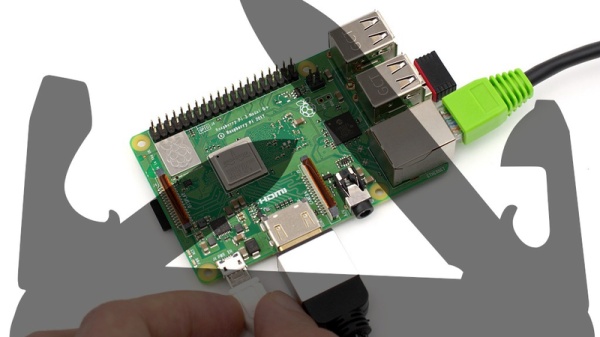
Arduinos are a handy tool to have around. They’re versatile, cheap, easy to program, and have a ton of software libraries to build on. They’ve only been around for about a decade and a half though, so if you were living in 1989 and wanted to program a microcontroller you’d probably be stuck with an 8-bit microprocessor with no built-in peripherals to help, reading from a physical book about registers and timing, and probably trying to get a broken ribbon cable to behave so it would actually power up. If you want a less frustrating alternate history to live in, though, check out the latest project from [Marek].

He discovered some 6502 chips (Polish language, Google Translate link) that a Chinese manufacturer was selling, but didn’t really trust that they were legitimate. On a lark he ordered some and upon testing them he found out that they were real 6502s. Building an 8-bit computer is something he’d like to do, but in the meantime he decided to do a project using one of these chips as a general-purpose microcontroller similar to a modern Arduino. The project has similar specs as an Arduino too, including 8kB of RAM memory, 8kB of I/O address space, and various EPROM capabilities. [Marek] went on to build a shield board for it as well, for easy access to some switches and LEDs. It’s a great build that anyone interested in microcontrollers should check out.

Keep in mind that an ATtiny45 has 8 bits like the 6502 but only costs around $1 USD, whereas a 6502 would have cost around $200 in today’s dollars. It’s really only in modern times that we can appreciate the 6502 as a cheap 8-bit microcontroller for that reason alone, but we can also appreciate how it ushered in a computer revolution since competing Intel and Motorola chips cost around six times more before it showed up. They became so popular in fact that people still regularly use them to build retrocomputers of all kinds.

Create An Aurora Of Your Own

Throughout our day-to-day experiences, we come across or make use of many scientific principles which we might not be aware of, even if we immediately recognize them when they’re described. One such curiosity is that of caustics, which refers not only to corrosive substances, but can also refer to a behavior of light that can be observed when it passes through transparent objects. Holding up a glass to a light source will produce the effect, for example, and while this is certainly interesting, there are also ways of manipulating these patterns using lasers, which makes an aurora-like effect.

The first part of this project is finding a light source. LEDs proved to be too broad for good resolution, so [Neuromodulator] pulled the lasers out of some DVD drives for point sources. From there, the surface of the water he was using to generate the caustic patterns needed to be agitated, as the patterns don’t form when passing through a smooth surface. For this he used a small speaker and driver circuit which allows precise control of the ripples on the water.

The final part of the project was fixing the lasers to a special lens scavenged from a projector, and hooking everything up to the driver circuit for the lasers. From there, the caustic patterns can be produced and controlled, although [Neuromodulator] notes that the effects that this device has on film are quite different from the way the human eye and brain perceive them in real life. If you’re fascinated by the effect, even through the lens of the camera, there are other light-based art installations that might catch your eye as well.

Continue reading “Create An Aurora Of Your Own”

Recover Data From Damaged Chips

Not every computer is a performance gaming rig. Some of us need cheap laptops and tablets for simple Internet browsing or word processing, and we don’t need to shell out thousands of dollars just for that. With a cheaper price tag comes cheaper hardware, though, such as the eMMC standard which allows flash memory to be used in a more cost-advantageous way than SSDs. For a look at some the finer points of eMMC chips, we’ll turn to [Jason]’s latest project.

[Jason] had a few damaged eMMC storage chips and wanted to try to repair them. The most common failure mode for his chips is “cratering” which is a type of damage to the solder that holds them to their PCBs. With so many pins in such a small area, and with small pins themselves, often traditional soldering methods won’t work. The method that [Jason] found which works the best is using 0.15 mm thick glass strips to aid in the reflow process and get the solder to stick back to the chip again.

Doing work like this can get frustrating due to the small sizes involved and the amount of heat needed to get the solder to behave properly. For example, upgrading the memory chip in an iPhone took an expert solderer numerous tries with practice hardware to finally get enough courage to attempt this soldering on his own phone. With enough practice, the right tools, and a steady hand, though, these types of projects are definitely within reach.