New (mis)Use For Lithophanes: Miniature Diorama Backgrounds

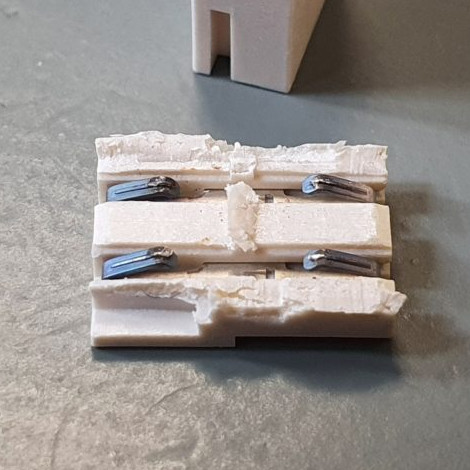
What’s better than a well-lit photo of a 3D-printed miniature? A photo of the miniature in a mini diorama, of course. [OrionDeHunter] shows off a clever technique that has something in common with old-timey photo stages and painted backgrounds, and (mis)uses 3D-printed lithophanes to pull it off. What [OrionDeHunter] does is use a curved and painted lithophane as a stand-in for a background, and the results look great!

Lithophanes are intended to be illuminated from behind to show an image, with thin areas showing as lighter and thicker areas darker, but when it comes to high contrast patterned images like brick walls, the same things that make a good lithophane just happen to also make a pretty good 3D model in the normal sense. No 3D scanning or photogrammetry required.

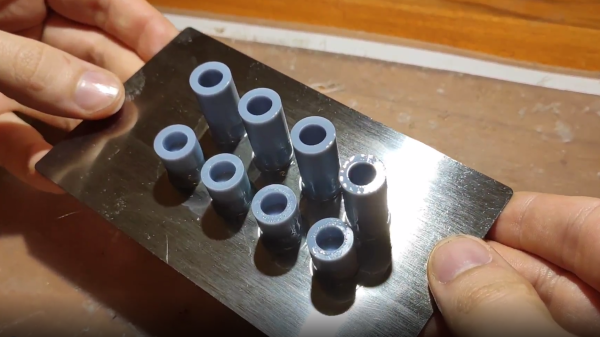
Here is the basic process: instead of creating a 3D model of a brick wall from scratch, [OrionDeHunter] simply converted an image of a brick wall (or stairs) into a curved lithophane with an online tool. The STL model of the lithophane is then 3D printed, painted, and used as a swappable background. When macro shots of the miniatures are taken, the curved background looks just right and allows for some controlled lighting. It’s a neat trick, and well applied in this project. Some sample images demonstrating how it works are just under the break.

Lithophanes were originally made using marble or thin porcelain, but a modern spin has been put on the technique with 3D printing. Enterprising hackers have even discovered ways to add color, too.

DIY Filtered Positive Pressure Suit Shows Fine Workmanship

[Andrew]’s Air filtering unit & positive pressure supply might look like something off the set of Ghostbusters, but it’s an experiment in making a makeshift (but feasible) positive pressure suit. The idea is to provide an excess of filtered air to what is essentially an inflatable soft helmet. The wearer can breathe filtered air while the positive pressure means nothing else gets in. It’s definitely an involved build that uses some specific hardware he had on hand, but the workmanship is great and shows some thoughtful design elements.

The unit has three stacked filters that can be easily swapped. The first stage is medical mask material, intended to catch most large particles, which is supported by a honeycomb frame. The next filter is an off-the-shelf HEPA filter sealed with a gasket; these are available in a wide variety of sizes and shapes so [Andrew] selected one that was a good fit. The third and final stage is an activated carbon filter that, like the first stage, is supported by a honeycomb frame. The idea is that air that makes it through all three filters is safe (or at least safer) to breathe. There isn’t any need for the helmet part to be leakproof, because the positive pressure relative to the environment means nothing gets in.

Air is sucked through the filters and moved to the helmet by an HP BLc7000 server fan unit, which he had on hand but are also readily available on eBay. These fan units are capable of shoveling a surprising amount of air, if one doesn’t mind a surprising amount of noise in the process, so while stacked filter stages certainly impede airflow, the fan unit handles it easily. The BLc7000 isn’t a simple DC motor and requires a driver, so for reference [Andrew] has a short YouTube video of how the fan works and acts.

All the 3D models and design files are available online should anyone wish to take a closer look. It’s certainly a neat experiment in making a filtered positive pressure supply and head cover with materials that are fairly common. If [Andrew] ever wants to move to a whole-body suit, maybe repurpose an old Halloween costume into a serviceable positive pressure suit.

Watch Conway’s Game Of Life Flutter Across A Flip-Dot Display

Like many of us, [John Whittington] was saddened with the news that John Horton Conway passed away a little earlier this year, and in honor of his work, he added the Game of Life to a flip-dot display that he has been working on. The physicality of an electromechanical display seems particularly fitting for cellular automata.

Like what you see? If you’re curious about what makes it all tick, the display shown is an Alfa-Zeta XY5 28×14 but [John] is currently working on building them into a much larger 256 x 56 display. GitHub hosts the flip-dot simulator and driver software [John] is using, and the Game of Life functions are here.

If you’re new to the Game of Life and are not really sure what you’re looking at, [Elliot Williams] tells you all you need to know in his writeup celebrating its profound impact and lasting legacy. Watch the flip-dot display in action in the video embedded below.

Continue reading “Watch Conway’s Game Of Life Flutter Across A Flip-Dot Display”

Mini Library For Kids Gets Blinky Lights And Solar Upgrade

Reading is big in Québec, and [pepelepoisson]’s young children have access to a free mini library nook that had seen better days and was in dire need of maintenance and refurbishing. In the process of repairing and repainting the little outdoor book nook, he took the opportunity to install a few experimental upgrades (link in French, English translation here.)

The mini library pods are called Croque-Livres, part of a program of free little book nooks for children across Québec (the name is a bit tricky to translate into English, but think of it as “snack shack, but for books” because books are things to be happily devoured.)

After sanding and repairs and a few coats of new paint, the Croque-Livres was enhanced with a strip of WS2812B LEDs, rechargeable battery with solar panel, magnet and reed switch as door sensor, and a 3.3 V Arduino to drive it all. [pepelepoisson]’s GitHub repository for the project contains the code and CAD files for the 3D printed pieces.

The WS2812B LED strip technically requires 5 V, but as [pepelepoisson] found in his earlier project Stecchino, the LED strip works fine when driven directly from a 3.7 V lithium-polymer cell. It’s not until around 3 V that it starts to get unreliable, so a single 3.7 V cell powers everything nicely.

When the door is opened, the LED strip lights up with a brief animation, then displays the battery voltage as a bar graph. After that, the number of times the door as been opened is shown on the LED strip in binary. It’s highly visual, interactive, and there’s even a small cheat sheet explaining how binary works for anyone interested in translating the light pattern into a number. How well does it all hold up? So far so good, but it’s an experiment that doesn’t interfere at all with the operation of the little box, so it’s all good fun.

How To Retrofit A Pick And Place Machine For OpenPnP, In Detail

[Erich Styger] owns a Charmhigh CHM-T36VA pick and place machine, which he describes as well-built and a great value of hardware for the money. However, the software end is less impressive, with a proprietary controller that is functional but not great. The good news is that it is possible to retrofit the machine to use the OpenPnP framework, which is open-source and offers more features. Even better, [Erich] has already done and documented all the hard parts!

The CHM-T36VA has two heads, vision system, and uses drag feeders.

The conversion requires upgrading a few hardware parts such as the cameras, replacing the controller’s firmware, then installing and configuring OpenPnP (which runs on an attached PC.)

[Erich] does not recommend this conversion for anyone who is not very familiar with electronics, or has any worries about voiding warranties. Barring that, he suspects the conversion could be done in about a day or two’s worth of focused work. It took him two weeks, including time spent fine-tuning the first production job. He says the bulk of the time was spent on configuration, but he has shared his configuration on GitHub in the hopes that it will save a lot of time for anyone using the same hardware.

After populating some 300 boards and placing over 7000 parts, he’s very happy with the results. The machine places between 600 and 700 parts per hour, so speed might not be amazing but it’s perfectly serviceable. [Erich] finds that while the machine runs a little slower than it did with the original controller, it also runs much smoother and quieter overall. In return he gets what he truly wanted: a pick and place machine whose operation and configuration is entirely open and accessible. You can see it in action in the video, embedded below.

Continue reading “How To Retrofit A Pick And Place Machine For OpenPnP, In Detail”

Great Badge Concept: A “Geiger Counter” For WiFi Deauthentication Frames

[Nick Price] had a wonderful concept for a DEFCON badge: a device that worked a lot like a directional Geiger counter, but chirped at detecting WiFi deauthentication packets instead of radiation. That’s a wild idea and it somehow slipped past us last year. Why detect such a thing? Well, the WiFi deauth attack is a kind of invisible toxicity, effectively jamming wireless communications by forcing users to be constantly tied up with authentication, and this device would detect it.

A few things were harder than expected, however. To make the device directional, [Nick] designed and built a PCB Yagi antenna but it wasn’t practical. Not only was it far too big, it would also have required going to four layers on a PCB that was already expensive. The solution he settled on — inspired by a friend’s joke about just dropping the badge into a Pringles can — was to surround the PCB omni antenna with a copper pipe end cap from the plumbing section of any hardware store. [Nick] figured that soldering that to the ground plane should result in a simple, cheap, and attractive directional antenna mod. Did it work? We’ll all have to wait and see.

Sadly, [Nick] wasn’t able to finish in time for last year’s DEFCON. Hardware revisions mounted, and fabrication times for his specialized PCB were longer than usual. Worse news is that this year’s is cancelled, or rather is going virtual, which means he’s going to have to deauth himself. The good news is that now he’s got another 12-month extension. Watch the brief video of the functional prototype, embedded below.

Continue reading “Great Badge Concept: A “Geiger Counter” For WiFi Deauthentication Frames”

Boston Dynamics’ Spot Robot Gets A Price Tag: $75 Grand

One of Spot’s features is the ability to navigate real-world environments. This has not historically been a strong point for robots.

Not long ago, Boston Dynamics’ Spot finally went on sale, meaning the dog-like robot can now be purchased online. Previously it was available only to be leased by early adopters willing to pay to see what the robot had to offer. Pricing was tucked behind an NDA, and Spot could be only leased and not actually purchased — until now.

From a hobbyist’s perspective, Spot’s price is of course eye-watering; the cost of the accessories even more so. It would be perfectly understandable to ask what good is a robotic dog and what makes it worth such a cost?

From an industrial equipment point of view, the cost is perhaps less shocking. Maybe it’s a reminder that from an industrial and commercial perspective, the price of a thing matters mainly in relation to what kind of benefits it can bring, and what kind of price or savings can be hung on that.

Hackers being hackers and free from having to worry about such things, some choose to make their own four-legged robot pals with no winning lotto tickets, juicy grants, or enormous R&D budgets needed.