Cloudy with a chance of concrete? The “success” of last week’s brief but eventful Starship launch has apparently raised some regulatory eyebrows, with the Federal Aviation Administration launching an investigation into the destruction wrought by the mighty rocket. And it’s not just the hapless Dodge Caravan that they’re concerned with — although we found some fantastic POV footage that shows the kill shot as well as close-ups of the results — but also the damage rained down upon residents around the Boca Chica launch complex. Tons of concrete and rebar were excavated by the 33 Raptor engines during the launch and sent in all directions, reportedly landing up to 6 miles (10 kilometers) from the pad. What’s worse, a lot of debris ended up on beaches that are home to endangered species, which has the Sierra Club also taking an interest. The FAA has apparently nixed any launches from the Texas facility until they complete their investigation.
Author: Dan Maloney3367 Articles
Add A Little Quindar To Your Comms For That Apollo-Era Sound
If there’s one thing that ties together all the media coming out of the Apollo era, it’s probably the iconic Quindar tones. These quarter-second beeps served as control tones for the globe-spanning communications network needed to talk to the Apollo astronauts, and any attempt to recreate the Apollo-era sound would be glaringly wrong without them. And that’s why [CuriousMarc] whipped up this Quindar tone system.
The video below starts with a detailed treatment of what Quindar tones are and why they were used, a topic we’ve covered ourselves in the past. To recap, Quindar tones are a form of in-band signaling, with a 2,525-Hz pure sine wave intro tone that signaled the transmitters connected to Mission Control in Houston over leased telephone lines to key up. The 2,475-Hz outro tone turned off the transmitters and connected the line to the receivers.
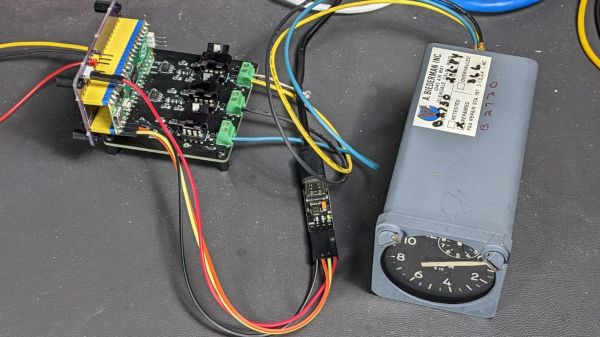
To recreate the sound quality of the original circuitry, and to keep in the retro vibe, [Marc]’s Quindar homage avoided digital circuitry as much as possible, opting instead to generate the two tones with an XR-2206 function generator chip. The chip can rapidly switch back and forth between two frequencies, making it perfect for FSK applications or, in this case, reproducing the two slightly different tones. [Marc] added a dual mono-stable multi-vibrator to pulse the tone, giving the 250-ms pulse, and an audio gate, which uses a MOSFET to switch the tone into an audio stream. All this got soldered up to a piece of perf board and stuffed in the base of a cheap intercom microphone, which while not period accurate still has a cool retro look — and now, a retro sound, too.
Hats off to [CuriousMarc] and his merry band for probing the mysteries of Apollo-era comms and keeping the accomplishments of all those engineers alive. The methods they used are still relevant after all these years, and there seems to be no end to what we can learn from them.
Continue reading “Add A Little Quindar To Your Comms For That Apollo-Era Sound”
USB Borescope Lets Doctors Hone Intubation Skills On The Cheap
One of the most critical skills in emergency medicine is airway management. Without a patent airway, a patient has about four minutes to live, so doctors and paramedics put a huge amount of effort into honing their intubation skills. They have to be able to insert an endotracheal tube quickly and efficiently, without damaging sensitive structures like the vocal cords. It’s a tricky skill to master without a ton of practice.
The perfect tool to practice these skills is a video laryngoscope, but these are wildly expensive and reserved for clinical use. Luckily, with a little ingenuity and a cheap USB borescope, [Dr. Adam Blumenberg] and [Dr. Erin Falk] were able to come up with this low-cost video-assisted laryngoscopy setup to reach as many students as possible. The idea is to use a single-use laryngoscope blade, which replicates the usual tool used to visualize the patient’s vocal cords. The blade is made from clear plastic, which makes it perfect for the application. The borescope is passed through an opening in the blade and affixed to it with adhesives. A little Dremel work might be necessary to get the optical axes of the blade and the camera to line up; failing that, there’s always the option to disassemble the camera to get a better angle.
The chief advantage of this setup, aside from being cheap, is that it’s something that it’s not intended to be used on patients. Along with an airway manikin, the tricked-out borescope can sit in a conference room waiting for students to have a go. Using a large screen allows the whole group to watch the delicate procedure and learn from the mistakes of others. It may not be as detailed a simulation environment as some, but “blade time” is really what counts here.
The Nuts And Bolts Of Nuts And Bolts
If you’re a mechanical engineer, the material covered in this video on the basics of bolted joints probably won’t cover any new ground. On the other hand, if you aren’t a mechanical engineer but still need to bring a little of that discipline to your projects, there’s a lot to learn here.
If there’s one takeaway lesson from [The Efficient Engineer]’s excellent examination of the strength of bolted joints, it’s the importance of preload. Preload is the tensile force created by tightening a bolt or a screw, which provides the clamping force that keeps the joined members together. That seems pretty self-obvious, but there’s more to the story, especially with joints that are subject to cycles or loading and unloading. Such joints tend to suffer from fatigue failure, but proper preloading on the bolts in such a joint mitigates fatigue failure because the bolts are only taking up a small fraction of the total cyclical force on the joint. In other words, make sure you pay attention to factory torque specs.
LED Matrix Displays Get New Look Thanks To SMD Stencils
Even if surface-mount skills aren’t in your repertoire, chances are pretty good that most of us are at least familiar with SMD stencils. These paper-thin laser-cut steel sheets are a handy way to apply a schmear of solder paste to the pads of a PCB before component placement and reflowing. But are stencils good for anything else?
It turns out they are, if you’ve got some plain old 8×8 LED matrix displays you want to jazz up a bit. In this case, [upir]’s displays were of the square pixel type, but this trick would work just as well for a matrix with circular elements. Most of the video below is a master class in Adobe Illustrator, which [upir] used to generate the artwork for his stencils. There are a lot of great tips here that make creating one simple shape and copying it over the whole array with the proper spacing a lot easier. He also details panelizing multiple stencils, as well as the workflow from Illustrator to manufacturing.
When lined up properly over the face of the LED matrix, the stencils have quite an effect. We really liked the narrow vertical bars, which make the LED display look a bit like a VFD. And just because [upir] chose to use the same simple shape over all the LEDs in a matrix doesn’t mean that there aren’t other options. We can see how you might use the same technique to create different icons or even alphanumeric characters to create custom LED displays. The possibilities are pretty much limited to your imagination.
This isn’t the first time we’ve seen [upir] teaching old displays new tricks.
Continue reading “LED Matrix Displays Get New Look Thanks To SMD Stencils”
Smooth Animations, Slick Bar Graphs, But No Custom Characters On This 16×2 OLED
Sometimes, finding new ways to use old hardware requires awesome feats of reverse engineering, software sleight of hand, and a healthy dose of good fortune. Other times, though, it’s just as simple as reading the data sheet and paying attention to details.
Not that we’re knocking [upir]’s accomplishment with these tricked-out 16×2 OLED displays. Far from it, in fact — the smoothly animated bar graph displays alphanumerics look fantastic. What’s cool about this is that he accomplished all this without resorting to custom characters. We’ve seen him use this approach before; this time around, the hack involves carefully shopping for a 16×2 OLED display with the right driver chip — a US2066 chip. You’ll still need a few tricks to get things working, like extra pull-up resistors to get the I2C display talking to an Arduino, plus a little luck that you got a display with the right character ROM.
Once all that is taken care of, getting the display to do what you want is mainly a matter of coding. In the video below, [upir] does a great job of walking through the finer points, and the results look great. The bar graphs in particular look fantastic, with silky-smooth animations.
Continue reading “Smooth Animations, Slick Bar Graphs, But No Custom Characters On This 16×2 OLED”
Compressed Air Keeps Screws Moving Through Modular Production System
If there’s an unsung hero of manufacturing, it’s the engineer who figures out how to handle huge numbers of small parts. It’s one thing to manually assemble something, picking each nut, bolt, and washer by hand. It’s another thing to build a machine that can do the same thing, but thousands of times in a row, ideally without making mistakes.
Most of us don’t need that level of automation in our processes, but when you do, it results in some interesting challenges. Take this pneumatic screw accelerator that [Christopher Helmke] designed for his modular production system. One of the custom machines in his system is a screw counter, which uses a magnetic wheel to feed screws — or nuts or washers — from a hopper, orient them correctly, and drop them into an output chute. While the counting bit worked quite well, parts would only go so far under the force of gravity in the clear vinyl tube used to connect the counter to the next process.
[Christopher]’s solution was simple but effective. His first prototype simply injects compressed air into the parts feed tube, which pushes the screws through the tubing. It works surprisingly well, propelling the parts through quite a long length of tubing, handling twisting paths easily and even working against gravity. Version 2 integrated the accelerator and a re-orienting fixture into a single part, which mates with a magazine that holds a large number of screws.
There are a lot of interesting features [Christoper] built into these simple parts that are worth keeping in mind. Our favorite is printing channels to guide small cable ties around the tubing to clamp it into the accelerator. We’ll be keeping that trick in mind.
Continue reading “Compressed Air Keeps Screws Moving Through Modular Production System”