Looking to hone his hardware hacking skills, [James Chambers] recently set out to reverse engineer a common cheap wireless keyboard: the Logitech K360. The chipset it uses has already been fairly well explored (and exploited) by security researchers, but the goal here was more about gaining some practical hands-on experience than it was breaking any new ground.
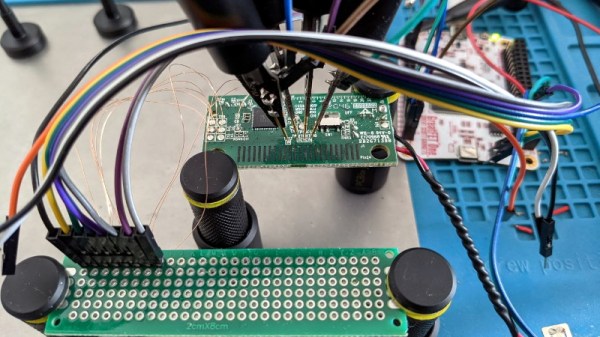
The first post in what we’re sure will be a fascinating series deals with dumping the board’s firmware using the GreatFET. We actually haven’t seen too many projects that showcase the capabilities of this highly capable open hardware multi-tool, so the post serves as a nice demonstration of how one goes about writing the necessary Python scripts to put it to work in a practical scenario.
Of course, even with the best of tools, there’s always a few stumbling blocks. After identifying what was clearly some kind of programming header on the K360’s diminutive PCB, it took a few failed attempts at reading the firmware before [James] realized he needed to tap into more pins on the keyboard’s nRF24LE1 microcontroller. Once everything was physically wired up, he wrote some code for the GreatFET that would perform the proper incantations on the chip’s PROG and RESET pins to enable its programming interface.
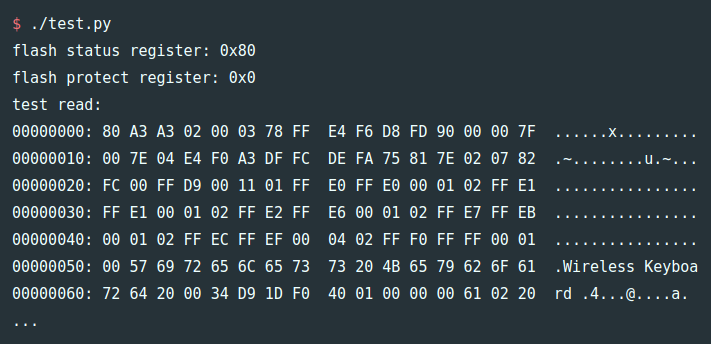
[James] goes on to explain how you can pull some extended chip information out of the hardware and verify the contents of the firmware dump with Gihdra, but any more advanced analysis will have to wait until the next post in the series. In the meantime, if you like reading about hardware hacking from this “over the shoulder” viewpoint, you should check out some of the fantastic work that [wrongbaud] has sent in over the last year or so.