Toddler-Friendly MP3 Player Navigates With Light

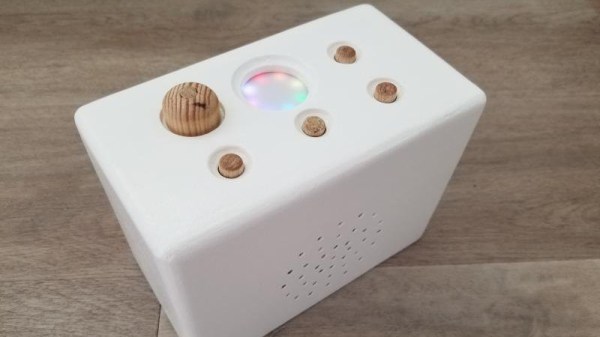
When designing this custom MP3 player for his grandson, [Luc Brun] ran into a unique problem. He wanted the boy to be able to operate the player on his own, but being only 2½ years old, the user interface would have to be exceedingly straightforward. Too many buttons would just be a distraction, and a display with text would be meaningless at his age.

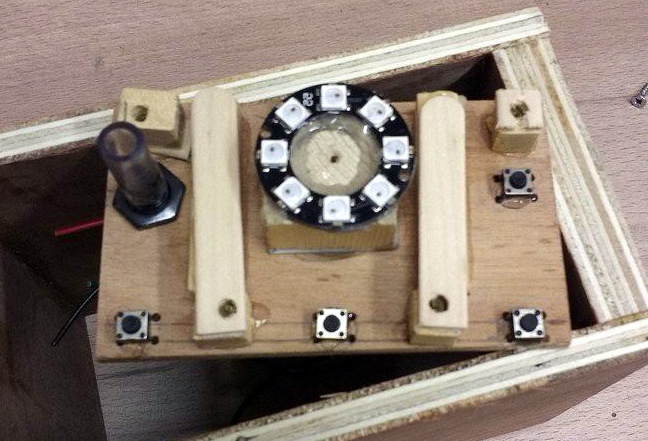
In the end, [Luc] came up with a very interesting way of navigating through directories full of MP3 files using a few push buttons and a ring of WS2812 LEDs. The color of the LEDs indicate which directory or category is currently being selected: spoken nursery rhymes are red, music is orange, nature sounds are yellow, and so on. The number of LEDs lit indicate which file is selected, so in other words, three orange LEDs will indicate the third music track.

At his grandson’s age, we imagine at least a little bit of him navigating through this system is just luck. But as he gets older, he’ll start to form more solid connections between what he’s hearing and the color and number of the LEDs. So not only is this interface a way to help him operate the device himself, but it may serve as a valuable learning tool in these formative years.

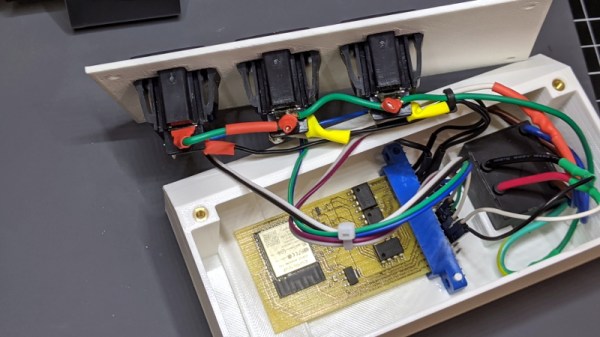
On the other hand, if your goal is just to distract a youngster for as long as possible, an overwhelming number of LEDs, buttons, and switches might be exactly what you want.

School’s In Session With HackadayU

The global COVID-19 pandemic has kept many of us socially isolated from friends, family, and colleagues for several months at this point. But thanks to modern technology, the separation has only been in the physical sense. From job interviews to grade school book reports, many of the things we’d previously done in person are now happening online. The social distancing campaign has also shown that virtual meetups can be a viable alternative to traditional events, with several notable hacker conventions already making the leap into cyberspace.

With this in mind, we’re proud to announce HackadayU. With weekly online videos and live office hours, these online classes will help you make the most of your time in isolation by learning new skills or diving deeper into subjects with experienced instructors from all over the world. Whether you’re just curious about a topic or want to use these classes to help put yourself on a new career path, we’re here to help.

In a community like ours, where so many people already rely on self-study and tutorial videos, these four week classes are perfect for professional engineers and hobbyists alike. To make sure HackadayU is inclusive as possible, classes will be offered on a pay-as-you-wish basis: we’ll pick up the tab for the instructor’s time, and you kick in whatever you think is fair. All money collected will be donated to charities that help feed, house, and educate others. We know these are tough times, and the hope is that HackadayU can not only benefit the members of our core community, but pass on some goodwill to those who are struggling.

Classes will be rolling out through the rest of 2020, but here’s a look at some of what we’ve got planned: Continue reading “School’s In Session With HackadayU”

Bluetooth Development Board Goes The Distance

Have you ever come across an interesting chip or component that you wanted to experiment with, only to find that there doesn’t seem to be a development board for it? Spinning up your own board is a lot easier today than it has been in the past, but it’s still a bit of a hassle to do it just for your own personal use. This is why [Nikolaj Andersson Nielsen] has decided to release RFCat, his custom long-range Bluetooth development board, onto the community.

The board is based around a module from MeshTek that’s essentially an amplified version of the Nordic nRF52832. According to [Nikolaj], this gives the module 30 times the transmit power of the base model chip.

RFCat is compatible with the Arduino IDE and uses the Adafruit nRF52 bootloader, making it easy to write your own code to take advantage of all this new-found power. Primarily you’d be programming the board over USB-C, but it also supports Serial Wire Debug (SWD) and over-the-air updates that can be triggered with a physical push button on the device.

If you want to get an RFCat of your own, it’s available on Tindie now. The amplified modules were originally intended for building Bluetooth mesh networks, but we’re sure there are other interesting applications out there just waiting to be discovered.

Continue reading “Bluetooth Development Board Goes The Distance”

Mobile Power From Cordless Tool Batteries

For years, [Michael Davis] has been using a large lead-acid battery to power the electronic components of his custom Dobsonian telescope; but that doesn’t mean he particularly enjoyed it. The battery was heavy, and you always had to be mindful of the wires connecting it to the scope. Looking to improve on the situation somewhat, he decided to build an adapter for Ryobi cordless tool batteries.

[Michael] had already seen similar 3D printed adapters, but decided to make his the traditional way. Well, sort of. He used a CNC router to cut out the distinctive shape required to accept the 18 V lithium-ion battery pack, but the rest was assembled from hardware store parts.

Bent mending plates with nuts and bolts were used to create adjustable contacts, and a spring added to the top ensures that there’s always a bit of tension in the system so it makes a good electrical contact. This setup makes for a very robust connector, and as [Michael] points out, the bolts make a convenient place to attach your wires.

With the logistics of physically connecting to the Ryobi batteries sorted out, the next step was turning that into useful power for the telescope. A stable 12 V is produced by way of a compact DC-DC converter, and a toggle switch and fuse connect it to a pair of automotive-style power sockets. Everything is held inside of a wooden box that’s far smaller and lighter than the lead-acid monster it replaced, meaning it can get mounted directly to the telescope rather than laying on the ground.

If you want to build a similar adapter, the 3D printing route will potentially save you some time and effort. But we have to admit that the heavy-duty connection [Michael] has rigged up here looks quite stout. If you’ve got an application where the battery could be knocked around or vibrated lose, this may be the way to go.

Building An ESP32 Smart Power Strip From Scratch

Surely the most straightforward way of creating a smart power strip would be to take an existing model and hack in some relays that you could fire with a WiFi-enabled microcontroller. But where’s the fun in that? Instead of repurposing a commercial power strip for his recent project, [Md Raz] decided to just build the whole thing himself.

The project started with a 3D printed enclosure that could hold the electronics and three panel mount sockets. The use of heat-set inserts makes it a bit more robust for future upgrade work, but otherwise it’s a fairly simple rectangular design. Nobody ever said a power strip had to be pretty, right? In addition to the panel mount sockets, there’s also a AC-DC converter to step mains voltage down to 5 VDC for the ESP32.

In addition to the microcontroller, the custom PCB in the power strip holds a trio of MOSFETs connected to AQH2223 solid state relay (SSR) chips. Once the ESP32 toggles the line attached to each MOSFET, the indicator LED above the outlet goes on and the appropriate SSR is thrown to turn on the power. With a simple web interface running on the microcontroller, all three outlets can be independently controlled from any device with a web browser.

If you’d like to limit your interaction with mains voltages, then we’ve seen some projects that commandeer the low-voltage side of a commercial smart power strip. But remember, putting a Raspberry Pi inside of a power strip might seem suspicious to some folks.

STM32 Blue Pill Turned GPG Security Token

Feeling the cost of commercial options like the YubiKey and Nitrokey were too high, [TheStaticTurtle] started researching DIY alternatives. He found an open source project allows the STM32F103 to act as a USB cryptographic token for GNU Privacy Guard, which was a start. All he had to do was build a suitable device to install it on.

Blue Pill proof of concept

The first step was to test the software out on the popular “Blue Pill” development board, which [TheStaticTurtle] documents in the write-up should anyone want to give it a try themselves. The ST-Link V2 was already a supported target, so it only took some relatively minor tweaks to get running and add support for a simple push button. The output of gpg --card-status showed the device was working as expected, so with the software sorted, it was time to take a closer look at the hardware.

To create his “TurtleAuth” dongle, [TheStaticTurtle] started with the basic layout of the Blue Pill and added in a TTP223E touch control IC. The original Micro USB port was also swapped for a male USB-A connector so the device could be plugged directly into a computer. An upper PCB, containing the status LEDs and touch pad, was then designed so it would fit over the main board as an enclosure of sorts. While the sides are still open, the device looks robust enough to handle life in a laptop bag at least.

While it’s not exactly a common project, this isn’t the first time we’ve seen somebody spin up their own hardware token. More evidence of what the dedicated individual can accomplish these days on a relatively limited budget.

An Open Hardware Modem For The Modern Era

Readers of a certain age will no doubt remember the external modems that used to sit next to their computers, with the madly flashing LEDs and cacophony of familiar squeals announcing your impending connection to a realm of infinite possibilities. By comparison, connecting to the Internet these days is about as exciting as flicking on the kitchen light. Perhaps even less so.

But while we don’t use them to connect our devices to the Internet anymore, that doesn’t mean the analog modem is completely without its use. The OpenModem by [Mark Qvist] is an open hardware and software audio frequency-shift keying (AFSK) modem that recalls some of the charm (and connection speeds) of those early devices.

It’s intended primarily for packet radio communications, and as such is designed to tie into a radio’s Push-to-Talk functionality with a standard 3.5 mm jack connector. Support for AES-128 encryption means it will take a bit more than an RTL-SDR to eavesdrop on your communications. Though if you’re really worried about others listening in, the project page says you could even use the OpenModem over a wired connection as you would have in the old days.

If you just want a simple and reliable way to get a secure AFSK communication link going, the OpenModem looks like it would be a great choice. But more than that, it offers a compelling platform for learning and experimentation. The hardware is compatible with the Arduino IDE, so you can even write your own firmware should you want to spin up your own take on this classic communications device.

The OpenModem is the evolution of the MicroModem that [Mark] developed years ago, and it’s clear that the project has come a long way since then. Of course, if you’re more about the look than the underlying technology, you could always just put a WiFi access point into the case of an old analog modem.

[Thanks to Boofdas for the tip.]