Get Your PCBs Made At The Mall

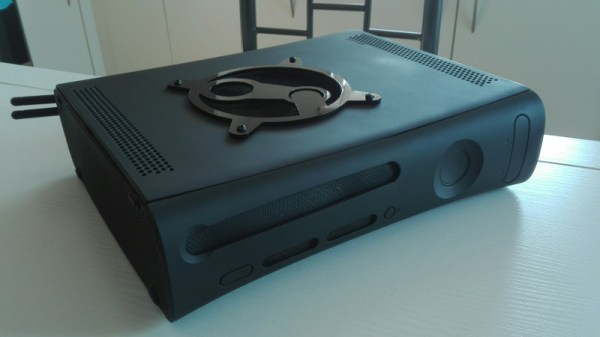
As we’ve seen with some recent posts on the subject here at Hackaday, there seems to be a growing schism within the community about the production of PCBs. Part of the community embraces (relatively) cheap professional fabrication, where you send your design off and get a stack of PCBs in the mail a couple weeks later. Others prefer at home methods of creating PCBs, such as using a CNC, laser engraver, or even the traditional toner transfer. These DIY PCBs take some skill and dedication to produce, but the advantage is that you can have the board in hand the same day you design it. But there may be a third option that seems to have slipped through the cracks.

[Virgil] writes in with a very interesting method of producing professional looking prototype PCBs that doesn’t involve weeks of waiting for the results, nor does it require any complicated techniques or specialized equipment. In this method, a UV printer is used to deposit your mask directly onto the copper clad board, which you then etch with whatever solution you like. Don’t have a UV printer you say? No worries, there’s probably somebody at the mall that does.

As [Virgil] explains, the little kiosks at the mall which offer to personalize items for customers generally use a UV printer which allows them to shoot ink on nearly any material. Instead of asking them to put a logo on the back of your phone, you’ll just be asking them to put the vector file of your mask, which you can bring along on a USB flash drive, onto the bare copper board. They may tell you they can’t guarantee the ink will stick to the bare copper, but just tell them you’re willing to take the risk. It’s one of those situations in which your money will be glad to speak on your behalf.

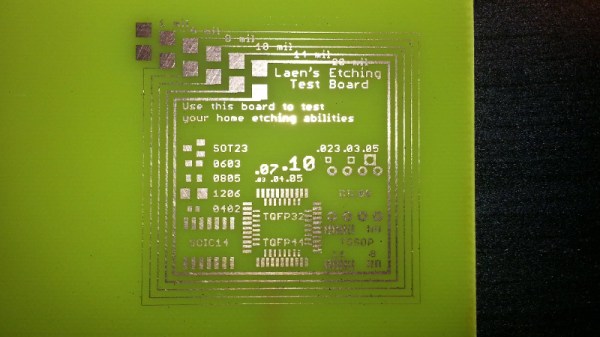
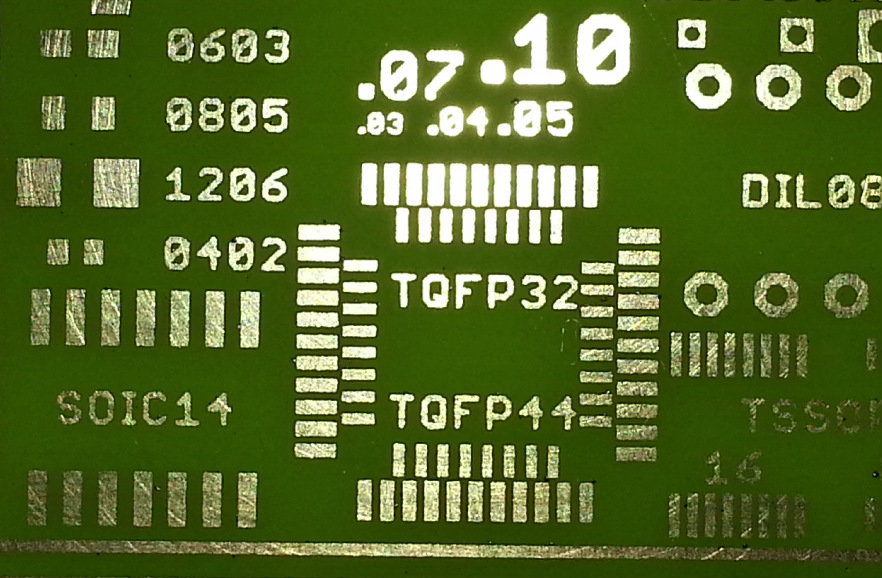
After the UV printer does its thing, the mask might be somewhat fragile. [Virgil] likes to wrap the boards in plastic for the ride home to make sure they don’t get damaged. Then it’s a quick dunk in the etching solution followed by a rinse and some isopropyl alcohol to get the remainder of the UV ink off. The results really do speak for themselves: nice sharp lines with exceptionally little manual work.

We’ve covered some relatively easy ways of quickly producing nice PCBs at home, as long as you don’t mind spending a couple hundred US dollars to get the hardware together. This seems to be the best of both worlds, though it does have the downside of requiring you speak with another human. We’d love to hear from any readers who give this particular method a shot.

Continue reading “Get Your PCBs Made At The Mall”

Open Source Paramotor Using Quadcopter Tech

Have you ever dreamed of flying, but lack the funds to buy your own airplane, the time to learn, or the whole hangar and airstrip thing? The answer might be in a class of ultralight aircraft called powered paragliders, which consist of a soft inflatable wing and a motor on your back. As you may have guessed, the motor is known as a paramotor, and it’s probably one of the simplest powered aircraft in existence. Usually little more than big propeller, a handheld throttle, and a gas engine.

But not always. The OpenPPG project aims to create a low-cost paramotor with electronics and motors intended for heavyweight multicopters. It provides thrust comparable to gas paramotors for 20 to 40 minutes of flight time, all while being cheaper and easier to maintain. The whole project is open source, so if you don’t want to buy one of their kits or assembled versions, you’re free to use and remix the design into a personal aircraft of your own creation.

It’s still going to cost for a few thousand USD to get a complete paraglider going, but at least you won’t need to pay hangar fees. Thanks to the design which utilizes carbon fiber plates and some clever hinges, the whole thing folds up into a easier to transport and store shape than traditional paramotors with one large propeller. Plus it doesn’t hurt that it looks a lot cooler.

Not only are the motors and speed controls borrowed from the world of quadcopters, but so is the physical layout. A traditional paramotor suffers from a torque issue, as the big propeller wants to twist the motor (and the human daring enough to strap it to his or her back) in the opposite direction. This effect is compensated for in traditional gas-powered paramotor by doing things like mounting the motor at an angle to produce an offset thrust. But like a quadcopter the OpenPPG uses counter-rotating propellers which counteract each others thrust, removing the torque placed on the pilot and simplifying design of the paraglider as a whole.

If you still insist on the fixed-wing experience, you could always get some foam board and hope for the best.

[Thanks to Luke for the tip.]

Continue reading “Open Source Paramotor Using Quadcopter Tech”

Exploring An Abandoned Toys “R” Us

If someone asked me to make a list of things I didn’t expect to ever hear again, the question “Do you want to go to a Toys “R” Us?” would be pretty near the top spot. After all of their stores (at least in the United States) closed at the end of June 2018, the House of Geoffrey seemed destined to join Radio Shack as being little more than a memory for those past a certain age. A relic from the days when people had to leave their house to purchase goods.

But much to my surprise, a friend of mine recently invited me to join him on a trip to the now defunct toy store. His wife’s company purchased one of the buildings for its ideal location near a main highway, and before the scrappers came through to clean everything out, he thought I might like a chance to see what was left. Apparently his wife reported there was still “Computers and stuff” still in the building, and as I’m the member of our friend group who gets called in when tangles of wires and sufficiently blinking LEDs are involved, he thought I’d want to check it out. He wasn’t wrong.

Readers may recall that Toys “R” Us, like Radio Shack before it, had a massive liquidation sale in the final months of operations. After the inventory was taken care of, there was an auction where the store’s furnishings and equipment were up for grabs. I was told that this location was no different, and yet a good deal of material remained. In some cases there were no bidders, and in others, the people who won the auction never came back to pick the stuff up.

So on a rainy Sunday evening in September, armed with flashlight, camera, and curiosity, I entered a Toys “R” Us for last time in my life. I found not only a stark example of what the changing times have done to retail in general, but a very surprising look at what get’s left behind when the money runs out and the employees simply give up.

Continue reading “Exploring An Abandoned Toys “R” Us”

DIY Rubber Ducky Is As Cheap As Its Namesake

The “Rubber Ducky” by Hak5 is a very powerful tool that lets the user perform rapid keystroke injection attacks, which is basically a fancy way of saying the device can type fast. Capable of entering text at over 1000 WPM, Mavis Beacon’s got nothing on this $45 gadget. Within just a few seconds of plugging it in, a properly programmed script can do all sorts of damage. Just think of all the havoc that can be caused by an attacker typing in commands on the local machine, and now image they are also the Flash.

But unless you’re a professional pentester, $45 might be a bit more than you’re looking to spend. Luckily for the budget conscious hackers out there, [Tomas C] has posted a guide on using open source software to create a DIY version of Hak5’s tool for $3 a pop. At that cost, you don’t even have to bother recovering the things when you deploy them; just hold on tight to your balaclava and make a run for it.

The hardware side of this hack is the Attiny85-based Digispark, clones of which can be had for as low as $1.50 USD depending on how long your willing to wait on the shipping from China. Even the official ones are only $8, though as of the time of this writing are not currently available. Encapsulating the thing in black shrink tubing prevents it from shorting out, and as an added bonus, gives it that legit hacker look. Of course, it wouldn’t be much of a hack if you could just buy one of these little guys and install the Rubber Ducky firmware on it.

In an effort to make it easier to use, the official Rubber Ducky runs scripts written in a BASIC-like scripting language. [Tomas C] used a tool called duck2spark by [Marcus Mengs], which lets you take a Rubber Ducky script (which have been released by Hak5 as open source) and compile it into a binary for flashing to the Digispark.

Not quite as convenient as just copying the script to the original Ducky’s microSD card, but what do you want for less than 1/10th the original’s price? Like we’ve seen in previous DIY builds inspired by Hak5 products, the trade-off is often cost for ease of use.

[Thanks to Javier for the tip.]

Raspberry Pi Projection Mapping Crash Course

Projection mapping might not be a term you’re familiar with, but you’ve certainly seen the effect before. It’s when images are projected onto an object, usually one that has an interesting or unusual shape, to create an augmented reality display. Software is used to map the image or video to the physical shape it’s being projected on, often to surreal effect. Imagine an office building suddenly being “painted” another color for the Holidays, and you’ll get the idea.

This might seem like one of those things that’s difficult to pull off at the hobbyist level, but as it turns out, there’s a number of options to do your own projection mapping with the lowly Raspberry Pi. [Cornelius], an avid VJ with a penchant for projection mapping, has done the legwork and put together a thorough list of different packages available for the Pi in case you want to try your hand at the futuristic art form. Many of them are even open source software, which of course we love around these parts.

[Cornelius] starts by saying he’s had Pis running projection installations for as long as three years, and while he doesn’t promise the reader it’s always the best solution, he says its worth getting started on at least. Why not? If the software’s free and you’ve already got a Raspberry Pi laying around (we know you do), you just need a projector to get into the game.

There’s a lot of detail given in the write-up, including handy pro and con lists for each option, so you should take a close look at the linked page if you’re thinking of trying your hand at it. But the short version is that [Cornelius] found the paid package, miniMAD, to be the easiest to get up and running. The open source options, ofxPiMapper and PocketVJ, have a steeper learning curve but certainly nothing beyond the readers of Hackaday.

To make things easier, [Cornelius] even goes on to give the reader a brief guide on setting up ofxPiMapper, which he says shouldn’t take more than 30 minutes or so using its mouse and keyboard interface. It would be interesting to see somebody combine this with the Raspberry Pi integrated projector we saw a couple years back to make a highly portable mapping setup.

This Xbox 360 Is Powered By Steam

Now that we’re far enough into the next generation of home video game consoles that we can’t really keep calling them that anymore, yard sales are sure to be full of lonely Xbox 360s and PS3s that have been put out to pasture. You’ll probably even find a Wii U or two out there that somebody accidentally purchased. This is great for hackers who like cramming new electronics into outdated consumer gear, and accordingly, we’re starting to see the fruits of that generational shift.

Case in point, this Xbox 360 which has been transformed into a “Steam Box” by [Pedro Mateus]. He figured the Xbox 360 was the proper size to fit a full PC plus PSU, while still looking contemporary enough that it won’t seem out of place in the entertainment center. Running SteamOS on Fedora 28, it even offers a traditional game console experience and user interface, despite the decidedly PC internals.

On the outside, the only thing that really gives away this particular Xbox’s new lease on life (when the purple LEDs are off, anyway) is the laser cut acrylic Steam logo on the top that serves as a grill for the internal CPU cooler. Ironically, [Pedro] did spray the Xbox white instead of just starting with a black one, but otherwise, there wasn’t much external modification necessary. Inside, of course, is a very different story.

It’s packing an AMD Ryzen 5 2400G processor with Radeon RX Vega 11GPU and 8GB of Corsair Vengeance LPX DDR4 3200MHz RAM. Power is provided by a Seasonic SS-300TFX 300W, and a Noctua NH-L9a-AM4 keeps the system cool. Even with all that gear in there, the thing is probably still quieter than the stock Xbox 360.

[Pedro] helpfully provides quite a few benchmarks for those wondering how this hacked-up Xbox fares against a more traditional gaming setup, though peak performance was obviously not the goal here. If you’ve got 45 minutes or so to spare, you should check out the video he’s put together after the break, which goes over the machine’s construction.

We’ve seen it done with the original Xbox, and now the Xbox 360. Who will be the first to send in their build that guts a current-generation Xbox and turns it into a PC for Internet fame?

[Thanks to Mike for the tip.]

Continue reading “This Xbox 360 Is Powered By Steam”

Adding 3D Printer Power And Light Control To OctoPrint

OctoPrint is a great way to monitor your printer, especially with the addition of a webcam. Using a tablet or mobile phone, you can keep an eye on what the printer is doing from anywhere in the house (or world, if you take the proper precautions), saving you from having to sit with the printer as if it’s an infant. But simply watching your printer do its thing is only a small slice of the functionality offered by OctoPrint’s vast plugin community.

As [Jeremy S Cook] demonstrates, it’s fairly easy to add power control for the printer and auxiliary lighting to your OctoPrint setup. Being able to flick the lights on over the print bed is obviously a big help when monitoring it via webcam, and the ability to turn the printer off can provide some peace of mind after the print has completed. If you’re particularly brave it also means you could power on the printer and start a print completely remotely, but good luck if that first layer doesn’t go down perfectly.

In terms of hardware, you only need some 3.3V relays for the Raspberry Pi running OctoPrint to trigger, and an enclosure to put the wiring in. [Jeremy] uses only one relay in this setup to power the printer and lights at once, but with some adjustment to the software, you could get independent control if that’s something you’re after.

On the software side [Jeremy] is using an OctoPrint plugin called “PSU Control”, which is actually intended for controlling an ATX PSU from the Pi’s GPIO pins, but the principle is close enough to throw a relay. Other plugins exist which allow for controlling a wider away of devices and GPIO pins if you want to make a fully remote controlled enclosure. Plus you can always whip up your own OctoPrint plugin if you don’t find anything that quite meets your switching needs.

[Jeremy] previously documented his unique mount to keep his Raspberry Pi and camera pointed at his printer, which is naturally important if you want to create some cool videos with Octolapse.

Continue reading “Adding 3D Printer Power And Light Control To OctoPrint”