Lots of us have– thanks to repetative stress injuries– developed mobility issues that we have to work around when using computers. Maybe it’s a trackball instead of a mouse, or a split keyboard, or mechanical keys with very specific force requirements– but those are small potatoes compared to people with such severe movement issues such as quadriplegia who need to fall back on things like a sip-and-puff device to control the computer with their mouths. Commercial options of course come with absurd price tags, but a DIY option is a different story. [DanielYordanov]’s L.I.P.S project can be built for only a couple percent of what the big boys want, and it’s fully-open source.
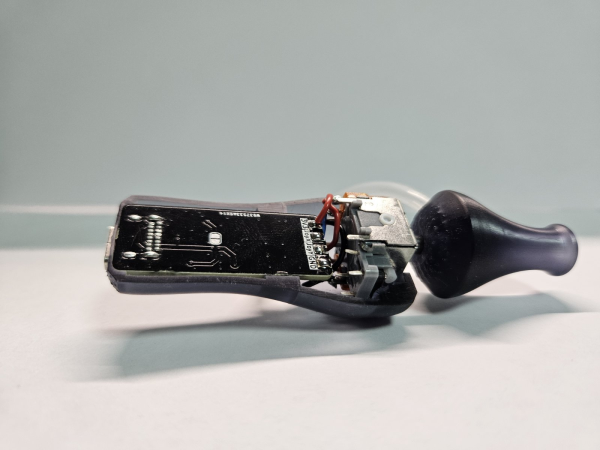
So you might think a sip-and-puff device is a two-bit interface, only slightly more advanced than the morse terminal we featured earlier. While Morse code might be an option, these devices also act as pointers, as the lips and chin can be used to point the mouthpiece. Thus there are a few sensors needed: a hall-effect joystick for pointing info, and one or more pressure sensors to detect the breathing interface for ‘clicks’. [Daniel] has single and dual-sensor versions, creating at minimum a four-button mouse. In reality this hardware can distinguish long and short pulses, or combinations of breath to run some nice macros. With operating-system features like an on-screen keyboard, L.I.P.S. can provide someone with digital freedom– and at a tiny fraction of the cost of a ‘real’ medical device.
Despite the DIY nature, for the end-user control and config is easy enough thanks to a webserial portal run on the CH552 that you can preview on the official website. Code, ki-cad and STL files are all on his GitHub repository. If you’re interested in the design process, we’ve embedded his video about that below.
Thanks to [Daniel] for the tip! Do you know of a hack to make life better for someone, disabled or otherwise? Send us a tip!
From one-handed typing to open-source prosthesis, this sort quality-of-life hack may be the best thing about our community. Continue reading “LIPS Is An Open Source Sip-And-Puff Interface”