Party Drone Comes Up Roses

[Nicomedia] (a team of two) built a payload for their drone with two distinct purposes: to allow it to drop things like rose petals and to fire off fireworks. Honestly, while it is a cool idea, we are a little worried that dropping things from a height might not be a good idea (although rose petals are probably OK) and lighting off fireworks from a drone didn’t seem like a good idea at all. If you want to reproduce this, you probably need to make sure either of these things are legal in your part of the planet.

In the video below, you can see the effect. A servo tied to the drone’s controller opens the box to release the payload. In this case, the team didn’t have a spare channel so they used a separate controller, but if you had a spare channel on the flight controller, that would probably be better.

Continue reading “Party Drone Comes Up Roses”

Orka Controls The (Pi) World

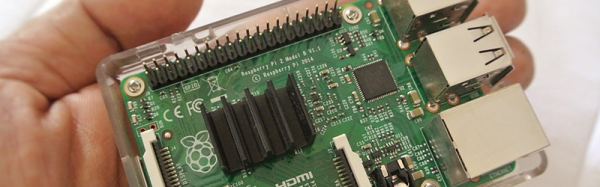
If you deploy a lot of Raspberry Pi computers, you might find it inconvenient to log into each one to perform different tasks. Orka, an open source project by [Karthik K], is a server that runs on a desktop PC (Windows, Linux, or Mac) and can control multiple Orka clients (that can run on a Pi, or a desktop PC). We understand that [Karthik K] is looking for Mac testers, by the way.

From the server, you can execute commands and create tasks. You can also receive notification when a client PC reaches a threshold (for example, over temperature or too much CPU or RAM usage). You can open a shell on a client and do other operations.

Continue reading “Orka Controls The (Pi) World”

BuildTak, PEI, And Early Adopter Syndrome

I’m guessing most of the members of the Hackaday community are what most people would consider early adopters. Sure, there’s variation among us, but compared to the general population we probably all qualify. I’ve spent many years being an early adopter. I owned a computer, a TiVO, a digital camera, a 3D printer, a drone, and many other gadgets before they became well known. I’ve avoided the self-balancing conveyance craze (I’ll stick with my motorcycle).

Of course, you know if you are an early adopter, you will overpay. New has a premium, after all. But there is another price: you often have the first, but not the optimum. My first digital camera took 3.5 inch floppies. My TiVO has an analog tuner.

I was reminded of this last week. A number of years ago, I built a 3D printer. A lot of printers back then didn’t have heated build plates, so printing ABS required rafts and ABS juice and frustration. I made sure to get a heated bed and, like most people in those days, I had a glass print surface covered in Kapton.

That works pretty well with ABS, but it isn’t perfect. Aqua Net hair spray makes it stick better, but large flat prints still take a little work. With a little practice, it isn’t bad. I eventually switched to an aluminum bed and didn’t have to level the head quite as often, but it didn’t really make things any better, just more repeatable.

The years pass and other gadgets beckon. I use the printer about like I use a drill press. I don’t use it every day, but when you need it it is handy. I have to admit, I’ve been getting partial to PLA since it doesn’t warp. But PLA in the hot Houston sun isn’t always a good mix, so I still print a fair amount of ABS.

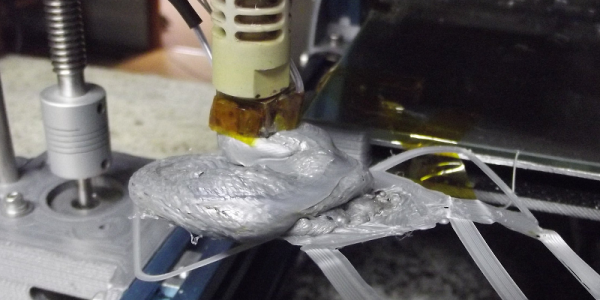
The other day I noticed a product called BuildTak. I also heard some people are printing on PEI sheets. I decided to try the BuildTak. Wow! What a difference.

Continue reading “BuildTak, PEI, And Early Adopter Syndrome”

Open Design Oscilloscope Could Be (Almost) Free

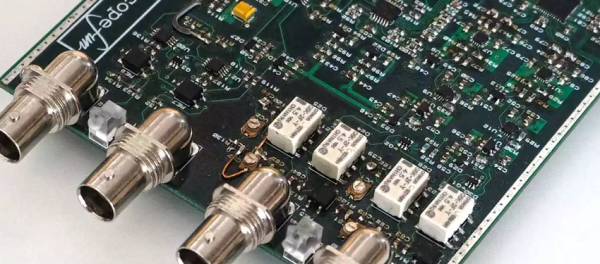
If you could only own one piece of test equipment, it should probably be an oscilloscope. Then again, modern scopes often have multiple functions, so maybe that’s not a fair assertion. A case in point is the Scopefun open hardware project. The device is a capable 2-channel scope, a logic analyzer and also a waveform and pattern generator. The control GUI can work with Windows, Linux, or the Mac (see the video, below).

The hardware uses a Xilinx Spartan-6 FPGA. A GUI uses a Cypress’s EZ-USB FX2LP chip to send configuration data to the FPGA.  Both oscilloscope channels are protected for overvoltage up to +/- 50 V. The FPGA samples at 100 Mhz through a 10-bit dual analog-to-digital converter ( ADC ). The FPGA handles triggering and buffers the input before sending the data to the host computer via the USB chip. Each channel has a 10,000 sample buffer.

There are also two generator outputs with short circuit and overvoltage protection ( +/- 50 V ). Generator channels have 50 Ohm internal impedance and also operates via the GUI using the same USB chip. The FPGA generates signals at 50 Mhz using counters, algorithms, or simple waveform data and feeds a DAC.

A 16-bit digital interface can be set as inputs or outputs. The FPGA samples inputs at 100 MHz. The output voltage can be set, but inputs are 5 V tolerant.

According to the developer, you can build the scope from the information provided by using free sample chips from the various vendors, only paying for the small components and the cost of the PCB.

We’ve looked at several low-cost scope options before. Labtool even boasts some similar features.

Hackaday Prize Entry: Head-up For High Voltage

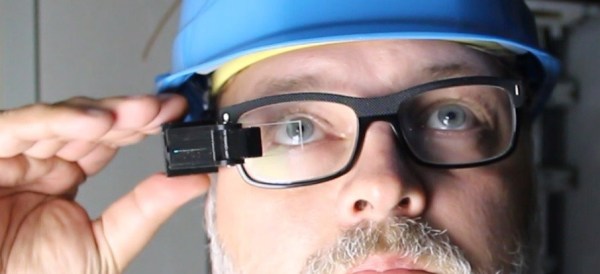
[Alain Mauer] wanted to build something like a Google Glass setup using a small OLED screen. A 0.96 inch display was too large, but a 0.66 inch one worked well. Combining an Arduino, a Bluetooth module, and battery, and some optics, he built glasses that will show the readout from a multimeter.

You’d think it was simple to pull this off, but it isn’t for a few reasons as [Alain] discovered. The device cost about 70 Euro and you can see a video of the result, below.

Continue reading “Hackaday Prize Entry: Head-up For High Voltage”

Hello 3D Printed Dolly

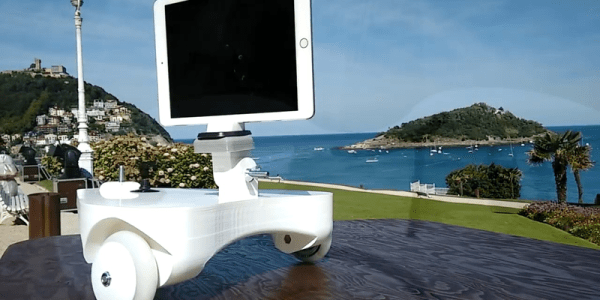
[Ivan] likes to take time lapse videos. Using his 3D printer and a stepper motor he fashioned a rig that allows him to control the camera moving any direction on a smooth floor.

The dolly has a tripod-compatible mounting plate and scooter wheels. An Arduino runs the thing and a cell phone battery provides power. A pot sets the speed and [Ivan] provides code for both a linear pot, which he suggests, and for a logarithmic pot, which he had on hand. You can see a video of the results below.

Continue reading “Hello 3D Printed Dolly”

Raspberry Pi, Send Me A Letter

The abundance of small networked boards running Linux — like the Raspberry Pi — is a boon for developers. It is easy enough to put a small cheap computer on the network. The fact that Linux has a lot of software is a double-edged sword. On the one hand, it is a good bet that anything you want to do has been done. On the other hand, some of the solutions are a bit large for a tiny embedded system.

Take, for example, e-mail. Historically, Linux hosts operate as mail transfer agents that can send and receive mail for all their users and possibly even relay mail to others. In today’s world, that’s usually overkill, but the capability is there. It is possible to install big mail transfer agents into a Raspberry Pi. The question is: should you?

What Do You Want?

The answer, of course, depends on what you want to do. If you have a dedicated board sending out text and maybe even files using an external mail server (like, say, Gmail), then the answer is no. You don’t need a piece of software listening for incoming connections, sorting through multiple users, and so on.

Luckily, there are some simple solutions if you know how to set up and configure them. The key is to avoid the big mail programs that do everything you don’t need.

Mail Front Ends

Let’s tackle sending mail first. If you try to grab the mailutils package, you’ll see it drags along a lot of stuff including mysql. Keep in mind, none of this will actually send mail. It just gives you some tools to get mail ready to send.

Luckily, the bsd-mailx package has a lot less overhead and will do the job. Look at the man page to see what options you have with mailx; you can do things like attach files, set a subject, and specify addresses.

It is a little difficult to set up for Gmail, though, thanks to Google’s security. You’ll need the certutil tool from the libnss3-tools package. You’ll need to create a certificate store, import Google’s certificate, and then set up a lot of options to mailx. I don’t suggest it. If you insist, though, you can find directions on the Web.

SSMTP

By default, programs like mailx and other Linux mail commands rely on a backend (often sendmail). Not only does that drag around too much overhead, it is also a full mail system, sending and receiving and relaying–overkill for our little Pi computers.

Luckily, SSMTP is available which only sends mail and is relatively lightweight. You need a configuration file to point it to your mail server. For Gmail, it would look like this:

#
# Config file for sSMTP sendmail
#
# The person who gets all mail for userids < 1000
# Make this empty to disable rewriting.
root=postmaster

# The place where the mail goes. The actual machine name is required no 
# MX records are consulted. Commonly mailhosts are named mail.domain.com
mailhub=smtp.gmail.com:587

# Where will the mail seem to come from?
rewriteDomain=yourdomain.com

# The full hostname
hostname=yourhostname
AuthUser=YourGmailUserID
AuthPass=YourGmailPassword
UseTLS=Yes
UseSTARTTLS=YES
# Are users allowed to set their own From: address?
# YES - Allow the user to specify their own From: address
# NO - Use the system generated From: address
FromLineOverride=YES

You can use a mail agent like mailx or you can just use ssmtp directly:

ssmtp someone@somewhere.com

Enter a message on the standard input and end it with a Control+D (standard end of file for Linux).

Google Authentication

There’s only one catch. If you are using Gmail, you’ll find that Google wants you to use stronger authentication. If you are using two-factor (that is, Google Authenticator), this isn’t going to work at all. You’ll need to generate an app password. Even if you aren’t, you will probably need to relax Google’s fear of spammers on your account. You need to turn on the “Access for less secure apps” setting. If you don’t want to do this on your primary e-mail account, considering making an account that you only use for sending data from the Pi.

Sending Files

Depending on the mail software you use, there are a few ways you can attach a file. However, the mpack program makes it very easy:

mpack -a -s 'Data File' datafile.csv me@hackaday.com

The above command will send datafile.csv as an attachment with the subject “Data File.” Pretty simple.

Receiving Mail

What if you want to reverse the process and receive mail on the Pi? There is a program called fetchmail that can grab e-mails from an IMAP or POP3 server. It is possible to make it only read the first unread message and send it to a script or program of your choosing.

You have to build a configuration file (or use the fetchmailconf program to build it). For example, here’s a simple .fetchmailrc file:

poll imap.gmail.com
protocol IMAP
user "user@gmail.com" with password "yourpassword" mda "/home/pi/mailscript.sh"
folder 'INBOX'
fetchlimit 1
keep
ssl

You can leave the “keep” line out if you don’t mind fetchmail deleting the mail after processing. The file should be in your home directory (unless you specify with the -f option) and it needs to not be readable and writable by other users (e.g., chmod 600 .fetchmailrc). According to the fetchmail FAQ, there are some issues with Gmail, so you might want to consider some of the suggestions provided. However, for simple tasks like this, you should be able to work it all out.

In particular, the mailscript.sh file is where you can process the e-mail. You might, for example, look for certain keyword commands and take some action (perhaps replying using ssmtp).

Special Delivery

You might not think of the Raspberry Pi as an e-mail machine. However, the fact that it is a pretty vanilla Linux setup means you can use all sorts of interesting tools meant for bigger computers. You just have to know they exist.