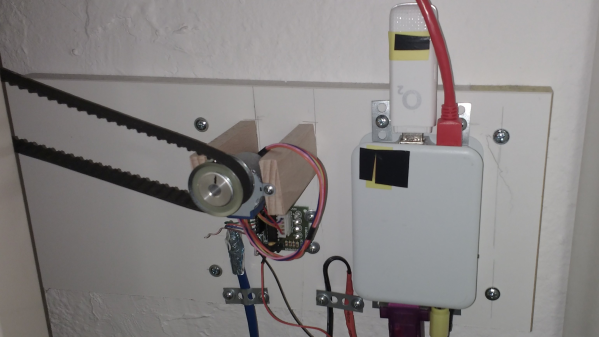
A Raspberry Pi in an enclosure, connected to a stepper motor controller and a UMTS stick

2024 Home Sweet Home Automation: SMS Controlled Heating

Hackaday.io user [mabe42] works during the week away from their home city and rents a small apartment locally to make this life practical. However, the heating system, a night-storage system, is not so practical. They needed a way to remotely control the unit so that the place was habitable after a long winter commute; lacking internet connectivity, they devised a sensible solution to create an SMS-controlled remote heating controller.

The controller runs atop an old Raspberry Pi B inside a 3D-printed case. Seeing such an old board given a real job to do is nice. Connectivity is via a USB UMTS stick which handles the SMS over the cellular network. The controller knob for the heater thermostat (not shown) is attached via a toothed belt to a pully and a 28BYJ-48 5V geared stepper motor. Temperature measurement is via the ubiquitous DS1820 module, which hooks straight up to the GPIO on the Pi and works out of the box with many one-wire drivers.

The software is built on top of Gammu, which handles the interface to the UMTS device. Daily and historical temperature ranges are sent via SMS so [mabe42] can decide how to configure the heating before their arrival. The rest of the software stack is in Python, as per this (German-language) GitHub project.

While we were thinking about storage heating systems (and how much of a pain they are), we came across this demonstration of how to build one yourself.

ChatGPT Rules The World… Or, At Least, The Home

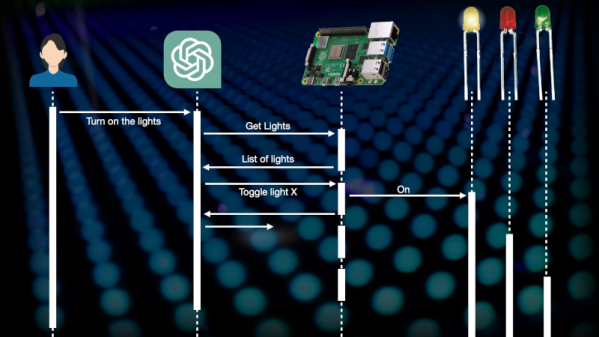
With all the hype about ChatGPT, it has to have crossed your mind: how can I make it control devices? On the utopia side, you could say, “Hey, ChatGPT, figure out what hours I’m usually home and set the thermostat higher when I am away.” On the dysfunctional side, the AI could lock you in your home and torment you like some horror movie. We aren’t to either extreme yet, but [Chris] couldn’t resist writing a ChatGPT plugin to control a Raspberry Pi. You can see a video of how it turned out below.

According to [Chris], writing a ChatGPT plugin is actually much simpler than you think. You can see in the video the AI can intuit what lights to turn on and off based on your activity, and, of course, many more things are possible. It can even detect snoring.

Continue reading “ChatGPT Rules The World… Or, At Least, The Home”

Trigger Your Home Automation Routines With Home Buttons

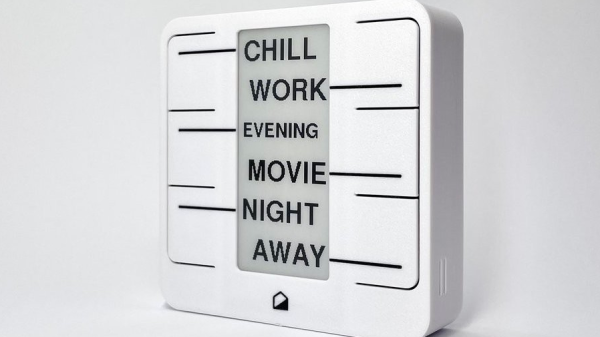
Home automation systems are all well and good, so long as the person who built it all is around to drive it. Let’s face it, they’re quite often a complex web of interconnected systems, all tied to the specifics of one’s home — and someone less familiar with it all could get a little irritated if, on a chilly day, the interface to the boiler is via a Python script, and something won’t work. Just saying. Home Buttons by [Matej Planinšek] over on Hackaday.IO is a nicely polished project, which aims to take some of the hackiness out of such automation by providing a sleek front end to those automation routines, enabling anyone to rock on over and set one in action without hassle.

Internal PCB shown in the foreground, with the complete unit behind.The PCB is based around the ESP32-S2-mini which deals with WiFi connectivity and integration with Home Assistant using the usual MQTT protocol. We expect integration with other flavors of home automation would not be difficult to achieve. The center of the unit holds a simple E-Ink display, for that low-standby power. Specifically, the unit chosen is a Good Display GDEY029T94 2.9″ which this scribe can confirm is easy to interface and pretty cheap to purchase from the usual Chinese online vendors. This was matched up with six clicky Alps SKRB-series low-profile tact switches, which sit on either side of the display, and corresponds to a flexure-type affair on the 3D printed front casing. Neat and simple.

The PCB design was provided in Altium format, which you can find on the project GitHub page. This shows a straightforward design, with a few nice little details here and there. The internally mounted 18650 cell is reportedly good for at least a year of operation, but when time, it can be charged via USB. A Xysemi XB8608AF (PDF) protection chip provides appropriate limiting for the 18650 cell, shielding it from the perils of overcharging, discharging, and whatnot. Not that that is likely in this current setup. A Sensiron SHTC3 humidity and temperature sensor is also in there, hanging off the I2C bus, which makes sense for this application.

Home Automation hacks are plenty on these pages, like this scroll-wheel interface, for instance. If all this stuff is looking quite overbearingly complicated to get into, how about starting with a Pico W?

Minimal MQTT With Micropython

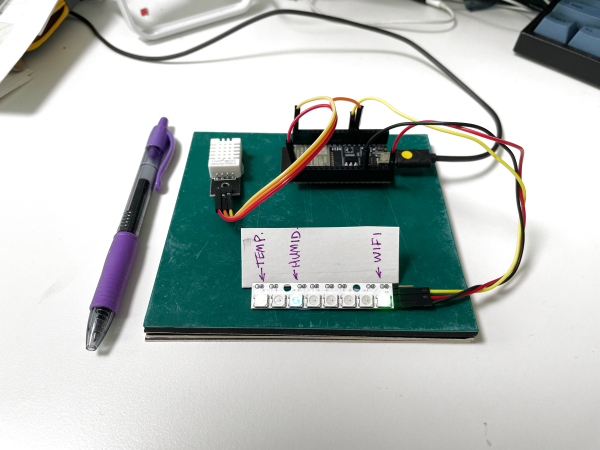
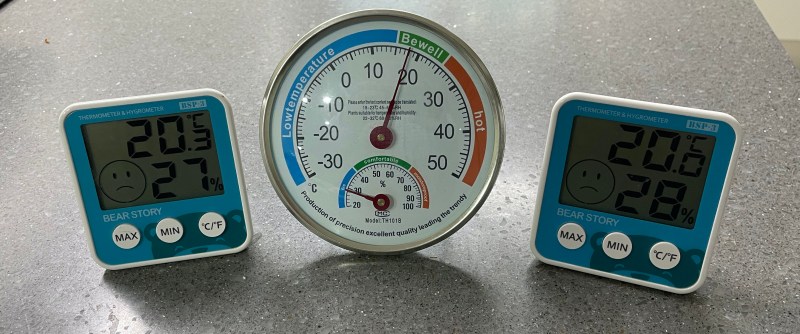
I have been meaning to play around with MQTT for some time now, and finally decided to take the plunge one evening last week. I had three cheap home temperature and humidity sensors, and was bothered that they often didn’t agree. Surprisingly, while the analog one had a calibration adjustment in the back, I have no idea how to calibrate the two digital ones. I took this as a sign that it was time to learn MQTT and be able to install my own, accurate sensors. Of course, I began by ordering the cheapest sensors I could find, but I can always upgrade later on.

Three Cheap Sensors

While we have written quite a bit about MQTT in Hackaday, I had to go all the way back to 2016 to find this introductory four-part series by Elliot Williams. Five years is a long time in the tech world, but I decided to give it a try anyway. Continue reading “Minimal MQTT With Micropython”

Smart Home Meets Dumb Terminal

Most smart home products are designed to be controlled from a mobile device, which makes sense since that’s what the average consumer spends most of their day poking around on these days. But you aren’t the average consumer, are you? If you’re looking for a somewhat more tactile experience, then why not put your smart home dashboard on a vintage serial terminal as [Daniel Karpantschof] did?

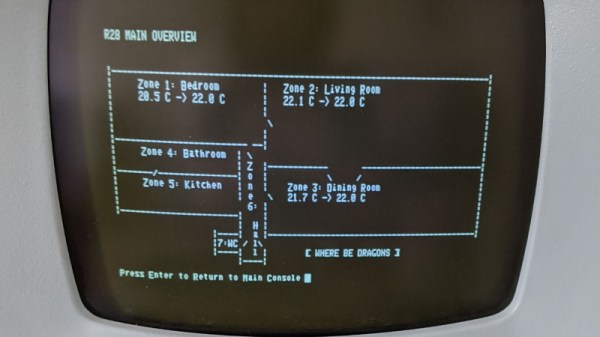
So how do you get the latest and greatest in home automation talking to a serial terminal built before the Internet as we know it? With Python, of course. [Daniel] has some code running on a Linux server that’s actually taking to his various smart home gadgets, which then spits out a simple ASCII user interface that his circa 1976 ADM-3A terminal can handle; complete with a floor plan view of the house that shows the temperature in different rooms.

Naturally, that’s only half the battle. You still need to get that interface onto the terminal. For that, [Daniel] is using the “Simulant Retro WiFi Modem” that we’ve covered in the past. An ESP8266 connects to the network and shuffles data over to the target device over serial. It’s all transparent to the terminal itself, so this project could be reproduced with whatever vintage machine holds a special place in your heart.

An Eight-Day Home Automation Hackathon Is Inspiration For Getting More Projects Done

There’s nothing quite like a deadline to cut through extras and get right at the heart of the problem. Maybe we should all follow Interpreet’s example and stop thinking about automating our homes and just make it in an eight-day hackathon. His talk at the 2019 Hackaday Superconference covers the zero-to-deployment home automation build he finished in the eight days leading up to his move from one continent to another.

Hackaday’s very own Inderpreet Singh found himself pulling up roots and moving from his home in India to teach at Centennial College in Toronto, Canada. He needed a way to keep an eye on his home from afar and the name of the game is IoT. When the only choice is “whatever works right now”, you can learn a lot about simple solutions.

He chose familiar hardware to work with, with the ESP8266 making up the bulk of the nodes and a Raspberry Pi as as a central hub for the setup. He chose to communicate between all the nodes on his system using WiFi because the hardware is robust and available. With security in mind, he keeps the automation system separate from the daily use WiFi system by grabbing an extra access point to serve as the automation network. The Raspberry Pi serves as a router of sorts; its Ethernet port is connected to the IoT device’s AP, while the onboard WiFi is used to connect to the home’s main AP for a connection to the wider Internet.

Software for the system is built on a REST API served by a Python Flask app. Many would advocate for using MQTT but Inderpreet’s testing with that protocol came up short as the broker he intended to use was no longer available. One of the interesting parts of his system design is that all nodes will check in at regular intervals; this allows them to inquire about actions they need to take, but it also allows the system to detect a malfunctioning node immediately. I’ve seen a similar trick used by Elliot Williams where he assigns a “ping” topic to all MQTT devices that causes them to report in with their IP address. Having a system to query and ensure the health of every node is a big tip to take away from this talk.

Continue reading “An Eight-Day Home Automation Hackathon Is Inspiration For Getting More Projects Done”

Python Keeps A Gecko Happy: Terrarium Automation With Raspberry Pi

For better or worse, pets often serve as inspiration and test subjects for hardware hacks: smarten up that hamster wheel, tweet the squirrel hunting adventures from a dog’s point of view, or automate and remote control a reptile enclosure. [TheYOSH], a gecko breeder from the Netherlands, chose the latter and wrote TerrariumPi for the Raspberry Pi to control and monitor his exotic companion’s home through a convenient web interface.

The right ecosystem is crucial to the health and happiness of any animal that isn’t native to its involuntarily chosen surroundings. Simulating temperature, humidity and lighting of its natural habitat should therefore be the number one priority for any pet owner. The more that simulation process is reliably automated, the less anyone needs to worry.

TerrariumPi supports all the common temperature/humidity sensors and relay boards you will find for the Raspberry Pi out of the box, and can utilize heating and cooling, watering and spraying, as well as lighting based on fixed time intervals or sensor feedback. It even supports location based sunrise and sunset simulation — your critter might just think it never left Madagascar, New Caledonia or Brazil. All the configuration and monitoring happens in the browser, as demonstrated in [TheYOSH]’s live system with public read access (in Dutch).

It only seems natural that Python was the language of choice for a reptile-related system. On the other hand, it doesn’t have to be strictly used for reptiles or even terrariums; TerrariumPi will take care of aquariums and any other type of vivarium equally well. After all, we have seen the Raspberry Pi handling greenhouses and automating mushroom cultivation before.