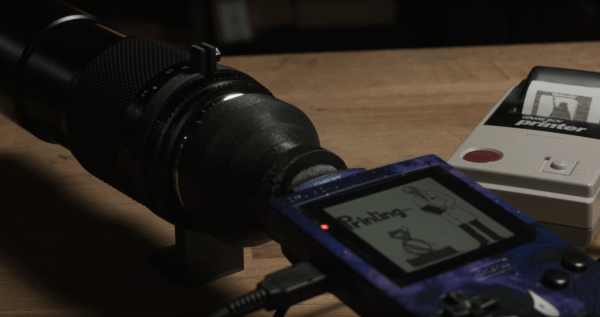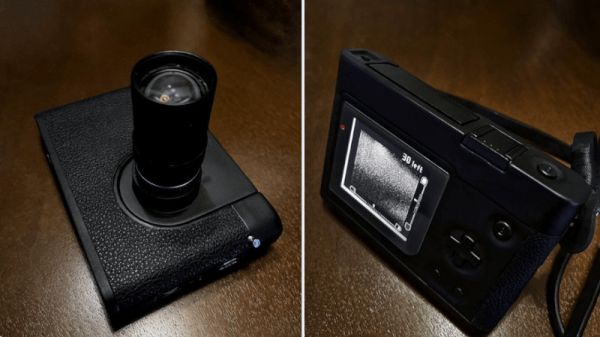
As much as we all love the Game Boy Camera, it’s really just an add-on to the popular handheld console. Twitter user [@thegameboycam] decided to build a dedicated camera platform using the hardware, and the result was the Game Boy DSLR.
Camera pedants will note that it’s not really a DSLR, but that’s not really the point. It’s a Game Boy with the camera accessory built into a proper camera-like housing. There’s a CS/C mount for the lens, and it’s got a custom shell with leatherette, just like the cameras of last century. It’s also got a cold shoe, and a 1/4″ screw thread for tripod mounting. Oh, and strap lugs! So you can really rock that old-school aesthetic with your tweed suit on.
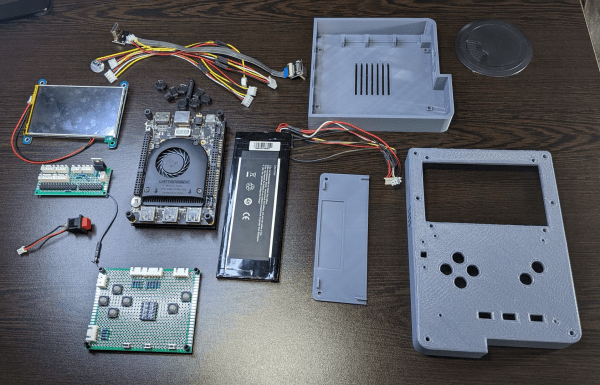
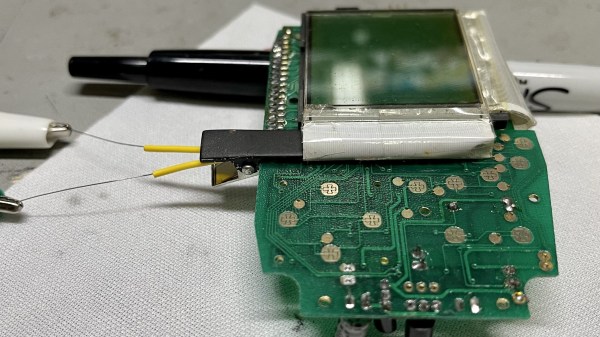
More practical modern features include a 1800 mAh battery that charges over USB Type C and a backlit IPS display. The screen has been turned through 90 degrees, and the cartridge port and buttons are relocated to create a more traditional camera-like form factor. If you really want, though, you can still play it like a regular Game Boy. Just swap out the modified camera cart with the lens mount for a regular Game Boy Camera or another game cartridge.
It’s a fun hack that scores big on style points. No longer can you be the cool kid just by rocking a Game Boy with a big ol’ lens hanging off the back. Now you gotta compete with this!
Our tipsline is waiting for when you’ve got the next big thing in Game Boy Camera hacks. Video after the break.