How To Restore A Musical Amiga

Despite the huge strides in computing power and functionality that have been achieved in the past few decades, there are still some things that older computers can do which are basically impossible on modern machines. This doesn’t just include the ability to use older hardware that’s now obsolete, either, although that is certainly a perk. In this two-part restoration of an Amiga 500, [Jeremy] shows us some of these features like the ability to directly modify the audio capabilities of this retro machine.

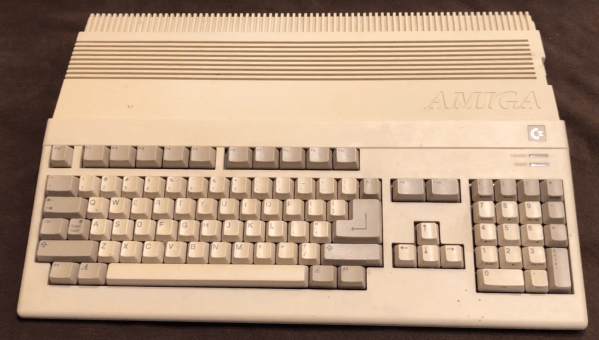
The restoration starts by fixing some damage and cleaning up the rest of the machine so it could be powered up for the first time in 30 years. Since it was in fairly good shape he then started on the fun part, which was working with this computer’s audio capabilities. It includes a number of amplifiers and filters in hardware that can be switched on or off, so he rebuilt these with new op-amps and added some new controls so that while he is using his MIDI software he can easily change how it sounds. He also restored the floppy disk drives and cleaned up the yellowing on the plastic parts to improve the overall appearance, as well as some other general improvements.

These old Amigas have a lot going for them, but since [Jeremy] is a musician he mostly focused on bringing back some of the musical functionality of his childhood computer, although he did build up a lot of extra features in this machine as well. These types of audio circuits are not something found in modern computers, though, so to get a similar sound without using original hardware you’ll need to build something like this NES audio processing unit programmed in Verilog.

Continue reading “How To Restore A Musical Amiga”

CoreFreq Gives Peek At CPU Performance Info On Linux

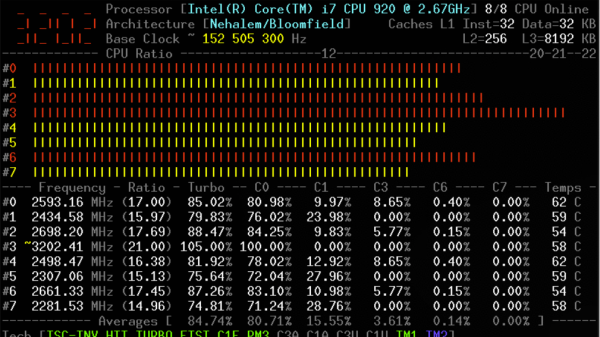
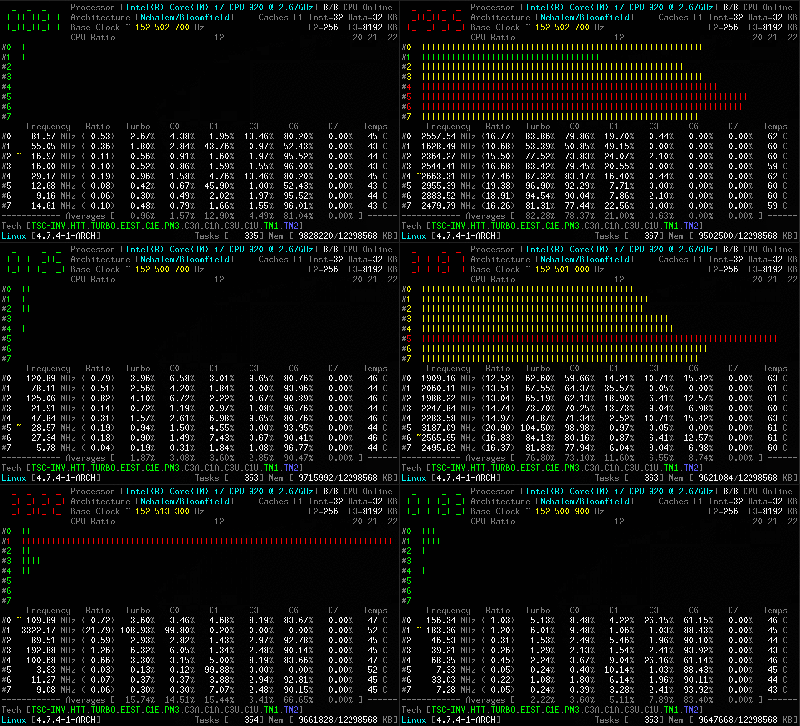
The CPU is the part of the computer that makes everything else tick. While GPUs have increasingly become a key part of overall system performance, we still find ourselves wanting to know how our CPU is doing. CoreFreq is a Linux tool that aims to tell you everything you want to know about your modern 64-bit CPU.

The tool relies on a kernel module, and is coded primarily in C, with some assembly code used to measure performance as accurately as possible. It’s capable of reporting everything from core frequencies to details on hyper-threading and turbo boost operation. Other performance reports include information on instructions per cycle or instructions per second, and of course, all the thermal monitoring data you could ask for. It all runs in the terminal, which helps keep overheads low.
The hardcore among us can build it from source, available on GitHub, though it’s reportedly available in package form, and as a live CD, too. We could imagine data captured from CoreFreq could be used for some fun performance visualizations, too. If you’ve been whipping up your own nifty command-line tools, be sure to drop us a line!

Three purple OshPark boards and a white bread board all attached using a number of jumper wires on a grey cutting mat.

An (Almost) Single-Chip Apple IIe

The Apple II is one of the most iconic microcomputers, and [James Lewis] decided to use the Mega-II “Apple IIe on a chip” from an Apple IIgs to build a tiny Apple IIe.

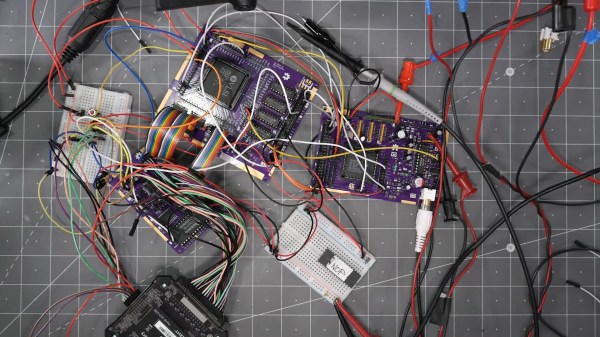
While there was an Apple II compatibility card using the related Gemini chip, it was initially unclear whether the Mega-II could even work outside of an Apple IIgs given the lack of documentation for either Apple II SOC. [Lewis] did finally get the Mega-II to boot after a great deal of effort in debugging and design. The system is built with three boards: the Mega-II and RAM board, a CPU board with a 65C02, and a video out board.

To simplify routing, the boards are all four layer PCBs. Unfortunately, the chips needed to make this system, especially the Mega-II, aren’t available on their own and must be harvested from an existing IIgs. [Lewis] took care to make sure any desoldering or other part removal was done in a way that it could be reversed. If you want to see all the nitty gritty details, check out his GitHub for the project.

If you want another 6502-based computer in a tiny package, why not try this one built on Perf+ boards?

Continue reading “An (Almost) Single-Chip Apple IIe”

Chainless “Digital Drive” Bikes Use Electric Power Transmission Instead

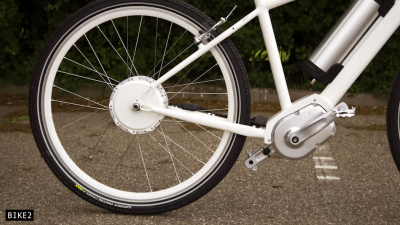
We’re all familiar with how regular bikes work, with the pedals connected to the rear wheel via a simple chain drive. This setup is lightweight, cheap, and highly efficient. It’s not the only way to drive a bike though, and there’s plenty of buzz around the concept of “digital drive” bikes.

Look, ma – no chains!

These drivetrains rely on electrical methods to transfer power in place of mechanical. The pedals are used to turn an electric generator, with power then sent to an electric motor which drives the rear wheel. The concept may sound overly complicated, but it does offer some benefits. The generator can change its operation to keep the rider pedalling at their most efficient, consistent rate. There would also be no chain to fall off, get snagged on clothing, or require regular maintenance.

It would make integrating regenerative braking possible, too, allowing the bike to harvest energy when going downhill too. This could be achieved with a storage battery or supercapacitor. As a bonus, it would be very easy to integrate power assist for the rider when tackling tough hills, for example. The lack of requirement for direct mechanical power transfer also means that there’s far more flexibility to design a bike with interesting geometry.

Such drive systems do give up some efficiency, however. All the power conversions between mechanical and electrical energy mean that a “digital drive” would likely only be 58% efficient. This compares poorly to the roughly 95% efficiency of power transfer in regular mechanically-driven bikes. There’s also a weight penalty, too.

Presnetly, there’s only one “digital drive” bike on the market – known as the Mando Footloose. It’s a swooping, folding, futuristic design, that has some feel issues when it comes to pedalling. And, given the added complexity and expense of these systems, it’s unlikely regular bikes or e-bikes are going away any time soon. Regardless, it’s fun to think about the potential for other drivetrain concepts to change the way we cycle. Video after the break.

Continue reading “Chainless “Digital Drive” Bikes Use Electric Power Transmission Instead”

Harmonic Vs Cycloidal Show Down

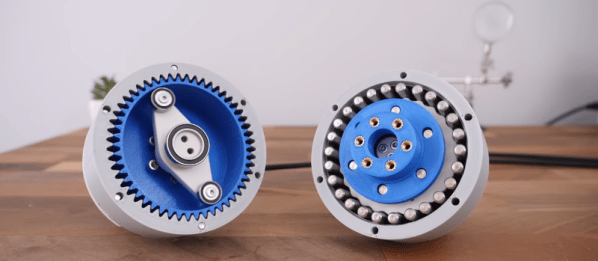
What’s better? Harmonic or cycloidal drive? We aren’t sure, but we know who to ask. [How To Mechatronics] 3D printed both kinds of gearboxes and ran them through several tests. You can see the video of the testing below.

The two gearboxes are the same size, and both have a 25:1 reduction ratio. The design uses the relatively cheap maker version of SolidWorks. Watching the software process is interesting, too. But the real meat of the video is the testing of the two designs.

Continue reading “Harmonic Vs Cycloidal Show Down”

This WiFi Signal Strength Meter Ain’t Afraid Of No Ghosts

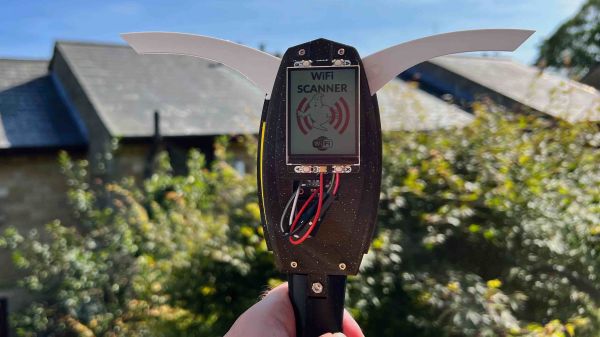
The original Ghostbusters movie is a classic that’s still delivering nearly 40 years after its release — just let that sink in for a minute. Almost every aspect of the film, from hand props to quotes, is instantly recognizable, even to people who haven’t based their lives on the teachings of [Venkman], [Stantz], and [Spengler]. To wit, we present this PKE meter-style WiFi scanner.

Of course, [Kevin McAleer]’s project is strictly in the “Just for Fun” category. But that doesn’t mean it’s not at least somewhat useful. The design is pretty close to the original PKE meter, with a little bit of creative license taken to make it easier to build. Guts include a Raspberry Pi Pico W and a generous 320×240 LCD display. The body of the meter is entirely 3D printed; design files are of course available. The meter’s arms are geared together to move with a single hobby servo.

On the software side, [Kevin]’s GUI lets users see a list of WiFi hotspots in the area and select one from the list. From there, the position of the arms is determined by the RSSI for the hotspot, similar to how the prop was supposed to indicate the proximity to a spook, specter, or ghost. There’s perhaps a bit of a missed opportunity by not adding LEDs to the arms, but we’ll let that slide.

The video below has full design and build details, but fair warning that it’s a bit on the long side. That’s probably just a reflection of how much work [Kevin] put into this, though. Of course, you may rather build a PKE meter that “actually” detects ghosts, in which case we’ve got you covered.

Continue reading “This WiFi Signal Strength Meter Ain’t Afraid Of No Ghosts”

Laser Scanning Microscope Built With Blu-ray Parts

Laser scanning microscopes are useful for all kinds of tiny investigations. As it turns out, you can build one using parts salvaged from a Blu-ray player, as demonstrated by [Doctor Volt].

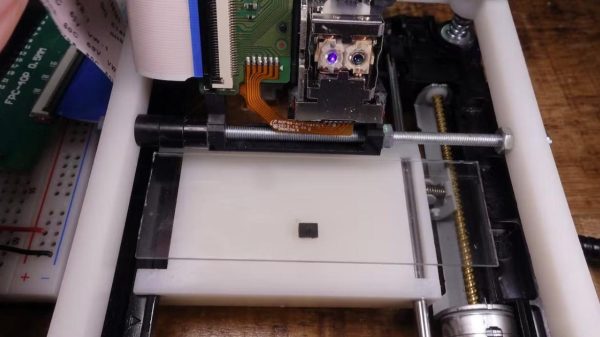
The trick is repurposing the optical pickup unit that is typically used to read optical discs. In particular, the build relies on the photodiodes that are usually used to compute focus error when tracking a disc. To turn this into a laser scanning microscope, the optical pickup is fitted to a 3D printed assembly that can slew it linearly for imaging purposes.

Meanwhile, the Blu-ray player’s hardware is repurposed to create a sample tray that slews on the orthogonal axis for full X-Y control. An ESP32 is then charged with running motion control and the laser. It also captures signals from the photodiodes and sends them to a computer for collation and display.

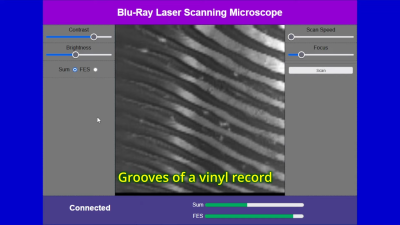
[Doctor Volt] demonstrates the microscope by imaging a small fabric fragment. The scanned area covers less than 1 mm x 1 mm, with a resolution of 127 x 127, though this could be improved with finer pitch on the slew mechanisms.

While it’s hardly what we’d call a beginner’s project, this technique still looks a lot more approachable than building your own scanning electron microscope.

Continue reading “Laser Scanning Microscope Built With Blu-ray Parts”