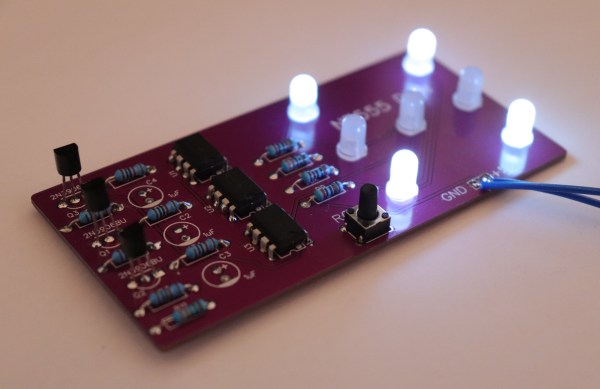
photograph of custom PCB assembly of NE555-based electronic dice

NE555-Based Electronic Dice

It has become a bit of a running joke in the Hackaday community to suggest that a project could or should have been done with a 555 timer. [Tim] has rather taken this to heart with his latest Electronic Dice project, which uses three of the venerable devices.

If three seems like a lot of 555s to make an electronic die, then it may be worth considering that the last time we shared his project he was using 22 of them! Since then, [Tim] has been busy optimising his design, whilst keeping within the constraints of an old-school through-hole soldering kit.

Maybe the most surprising thing about this project is the purpose to which the NE555 devices are pressed. Rather than using them for their famous oscillation properties, they are in actual fact just being used as Schmitt Triggers to clean up the three-phase ring oscillator that is constructed from discrete transistors and passives.
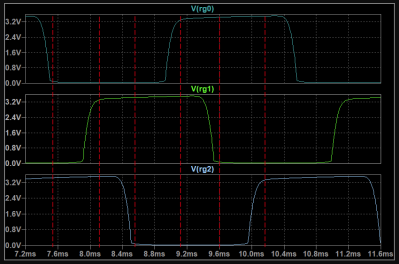
scope trace of the electronic dice ring oscillator
Simulation trace of the three-phase ring oscillator before Scmitt Trigger stages

The ring oscillator cleverly produces three phase-shifted square waves such that a binary combination of the three phases offers six unique states. Six being the perfect number for a dice throw, all that then remains is to figure out which LEDs need to be switched on in which state and wire them up accordingly.

To “roll” the dice, a push-button powers up the oscillator, and stops it again when it is released, displaying the random end-state on the LEDs.

It can be fun to see what can be done using old technology, and educational to try to optimise a design down to the fewest parts possible.

[Tim]’s earlier project is here if you want to see how the design has evolved. The documentation on both of these iterations is excellent and well worth a read.

Continue reading “NE555-Based Electronic Dice”

Fixing (And Improving!) An Annoying Apartment Entry System

[Zak]’s two-floor apartment has a typical door entry control system, but the setup is less than ideally convenient. The wall-mounted telephone-like intercom is downstairs, but [Zak] is usually upstairs. What’s an enterprising hacker to do? Obviously the most elegant solution is to simply do without visitors in the first place, but [Zak] opted for a more full-featured solution to the problem.

The layout of the typical wall-mounted door intercom is less than ideal.

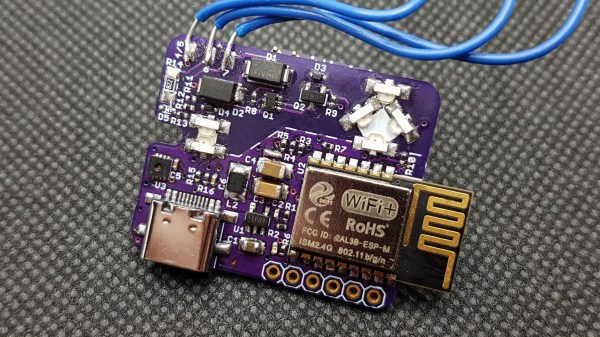
He fixed things with a custom ESP8285-based board that, with the help of opto-isolation, allows him to detect visitors and grant entry without having to be physically present at the wall-mounted intercom. It’s even integrated into Telegram, and has a few neat new features. Let’s take a look.

The first interesting bit is how [Zak] rolled his own opto-isolation. The door entry system uses 14 VAC and is frankly — electromagnetically-speaking — a very noisy device. Attaching GPIO pins directly to this system from the ESP board for interfacing is not an option. The solution in situations like this is to use opto-isolation, so that interfaced devices can be electrically isolated from one another.

Rather than use off-the-shelf options, [Zak] opted to keep things small and economical by rolling his own solution using side-mounted IR LEDs on the small interface PCB. LEDs can also act as photodiodes, so by pointing two LEDs directly at one another and driving one LED from the door control system and measuring the small amount of resulting current on the other LED, [Zak] can detect states without having to directly connect a GPIO pin.

Continue reading “Fixing (And Improving!) An Annoying Apartment Entry System”

A VM In An AI

AI knoweth everything, and as each new model breaks upon the world, it attracts a new crowd of experimenters. The new hotness is ChatGPT, and [Jonas Degrave] has turned his attention to it. By asking it to act as a Linux terminal, he discovered that he could gain access to a complete Linux virtual machine within the model’s synthetic imagination.

The AI’s first response was a prompt, so he of course first tried to list the files. Up came a list of directories, so the next step was to create a file and put some text in it. All of this resulted in a readable file, so there was some promise in this unexpected computing resource. But can it run code? Continue reading “A VM In An AI”

Lisp Runs This Microcontroller Pendant

As a programming language, Lisp has been around longer than any other active language except for Fortran. To anyone who regularly uses it, it’s easy to see why: the language allows for new syntax and macros to be created fluidly, which makes it easy to adapt it to new situations, like running it on a modern Atmel microcontroller to control the LEDs on this star pendant.

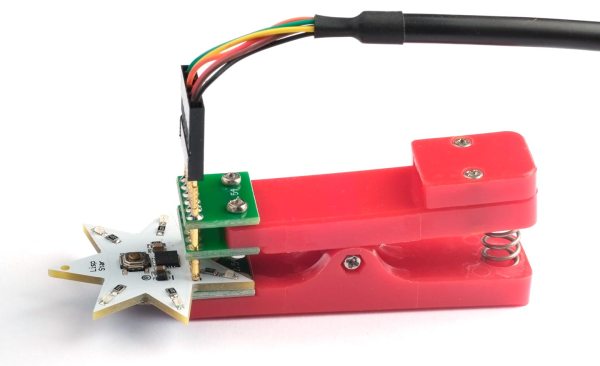
The pendant has simple enough hardware — six LEDs arranged around the points of the star, all being driven by a small ATtiny3227 operating from a coin cell battery. This isn’t especially spectacular on it’s own, but this particular microcontroller is running an integer version of a custom-built Lisp interpreter called uLisp. The project’s creator did this simply because of the whimsy involved in running a high-level programming language on one of the smallest microcontrollers around that would actually support the limited functionality of this version of Lisp. This implementation does stretch the memory and processing capabilities of the microcontroller quite a bit, but with some concessions, it’s able to run everything without issue.

As far as this project goes, it’s impressive if for nothing other than the ‘I climbed the mountain because it was there’ attitude. We appreciate all kinds of projects in that same vein, like this Arduino competitor which supports a programming language with only eight commands, or this drone which can carry a human.

Gaze Upon The Swimming Mechanical Stingray, Made With LEGO

Stingrays have an elegant, undulating swimming motion that can be hypnotic. [Vimal Patel] re-created this harmony with his fantastic mechanical mechanical stingray using LEGO pieces and a LEGO Technics Power Functions motor. The motor is set in a clever arrangement that drives the motion remotely, so that it and electrical elements can stay dry.

The mechanical stingray sits at the end of a sort of rigid umbilical shaft. This shaft connects the moving parts to the electrical elements, which float safely on the surface. This leaves only the stingray itself with its complex linkages free to move in the water, while everything else stays above the waterline.

We’ve seen some impressive LEGO creations before, like this race car simulator and pneumatic engine, and the mechanical action in this stingray is no exception. Interested in making your own? The part list and build directions are available online, and you can see it in action in the video embedded below.

Continue reading “Gaze Upon The Swimming Mechanical Stingray, Made With LEGO”

An alarm clock with a Nixie tube display

Retro Alarm Clock With Nixies Is Thoroughly Modern Inside

We feature a lot of clocks here at Hackaday, but alarm clocks seem to be less popular for some reason. Maybe that’s because no-one enjoys being woken up in the morning, or simply because everyone uses their smartphone for that purpose already. In any case, we’re delighted to bring you [Manuel Tosone]’s beautiful Nixie tube alarm clock that cleverly combines modern and classic technologies in a single package.

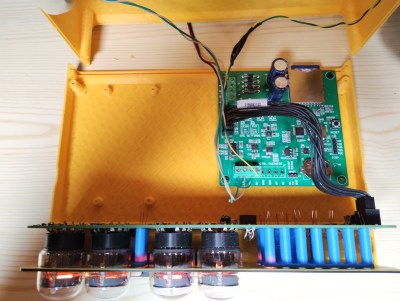
An alarm clock with a Nixie tube display, openedThe clock and alarm functionalities are implemented by a PIC24 microcontroller on a custom mainboard. It keeps track of time through its real-time clock with battery backup, and plays a song from an SD card when it’s time to wake up. A 2 x 3 W class D audio amplifier plus a pair of stereo speakers should be able to wake even the heaviest sleepers.

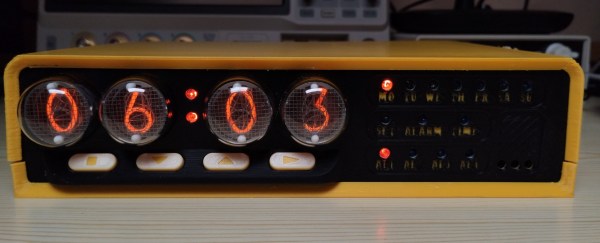
Of course, the real party piece is the clock’s display: four IN-4 Nixie tubes show the time, with neon tubes indicating the day of the week. The 180 V needed for the Nixies is generated by an MC34063A-based boost converter, which also powers the neon tubes.

Instead of using the standard current-limiting resistor for each Nixie tube, [Manuel] designed an array of transistor-based current sources: this enables linear control of the tubes’ brightness, and should keep the amount of light constant even as the tubes age. The individual segments are switched by SN75468 Darlington arrays, with no need for those hard-to-find SN74141 drivers.

The mainboard and the display are housed inside a 3D-printed case that mimics the style of 1980s digital alarm clocks, but with a nice 1970s twist courtesy of those Nixie tubes. [Manuel]’s GitHub page has all the schematics as well as extensive documentation describing the circuit’s operation — an excellent resource if you’re planning to build a Nixie project yourself. If Nixies aren’t your thing, you can also make an alarm clock with a VFD tube, or even roll your own luminous analog dial.

Continue reading “Retro Alarm Clock With Nixies Is Thoroughly Modern Inside”

Old-School Video Switching Levels Up With Modern USB Control

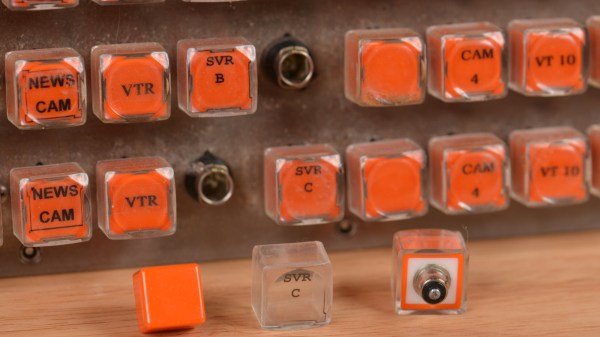
Video effects and mixing are done digitally today, but it wasn’t always so. When analog ruled the video world, a big switch panel was key to effective results.

VIdeo like this was the result of combining different analog feeds with different effects. The better the hardware, the more was possible.

Devices like [Glen]’s Grass Valley Series 300 Crosspoint Switch Panel were an important part of that world. With tools like that, a human operator could set up a composited preview feed in true WYSIWYG style, and switch to live on cue. All done with relatively simple CMOS ICs and buttons. Lots and lots of buttons.

[Glen] reverse engineers the panel to show how it works, and most of the heavy lifting is done by the MC14051B analog multiplexer/demultiplexer, and the MC14532B 8-bit priority encoder. Once that’s figured out, the door is open to modernizing things a little by using a microcontroller to drive the device, turning it into a USB peripheral.

With a little design work, [Glen] builds a PCB around the EFM8UB2 8-bit microcontroller to act as a USB peripheral and control the switch panel, taking care of things like key scanning and lamp control. The last step: a GUI application for monitoring and controlling the panel over USB.

This isn’t [Glen]’s first time interfacing to vintage video mixing and switching, and as many of us know it’s sometimes tricky work to interface to existing hardware. We covered his earlier video switcher project using hardware that was not nearly as easy to work with as this one.