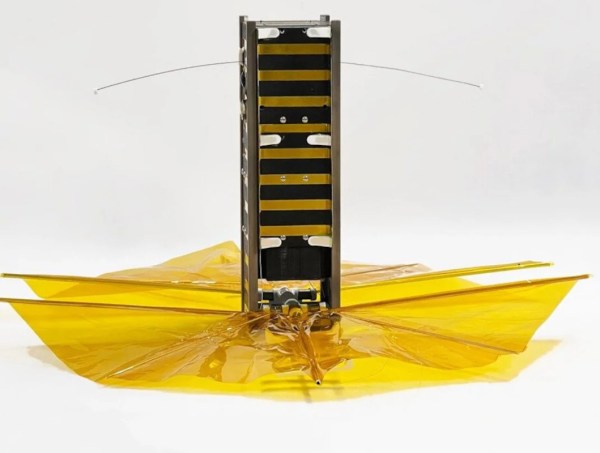
When sending satellites into space, the idea is to place them into as stable an orbit as possible in order to maximize both the time the satellite is useful and the economics of sending it there in the first place. This tends to become rather untenable as the amount of space junk continues to pile up for all but the lowest of orbits, but a team at Brown University recently tested a satellite that might help solve this problem, at least for future satellite deployments.
The main test of this satellite was its drag sail, which increases its atmospheric drag significantly and reduces its spaceflight time to around five years. This might make it seem like a problem from an economics standpoint, as it’s quite expensive to build satellites and launch them into space, but this satellite solves these problems by being both extremely small to minimize launch costs, and also by being built out of off-the-shelf components not typically rated for spaceflight. For example, it gets its power solely from AA batteries and uses an Arduino for its operation and other research.
The satellite is currently in orbit, and has already descended from an altitude of 520 km to 470 km. While it won’t help reduce the existing amount of debris in orbit, the research team hopes to demonstrate that small satellites can be affordable and economically feasible without further contributing to the growing problem of space junk. If you’re looking to launch your own CubeSat one day, take a look at this primer which goes over most of the basics.

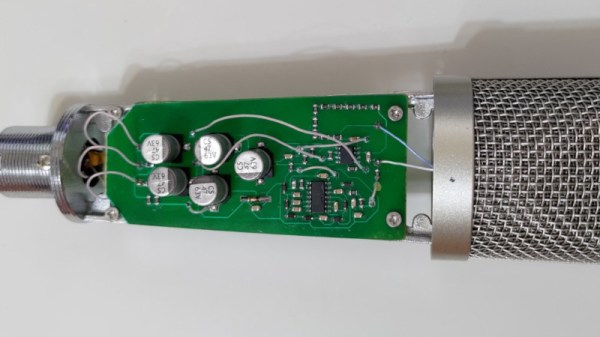
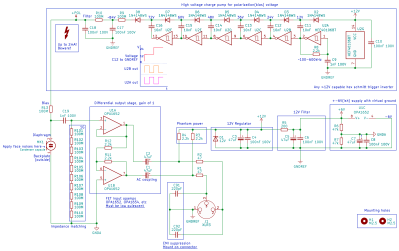 The capsule and body are off-the-shelf items — what he’s produced is the bias voltage supply and preamplifier. In both cases these are the interesting parts of a condenser microphone, so their circuit bears a second look.