Repetitive strain injuries (RSI) can be a real pain. You’ve got a shiny new laptop, and everything’s going smoothly, but suddenly you can’t use it without agonizing (as in typing-speed reducing) pain caused by years of keyboard bashing or just plain bad posture. All of us hacker types will likely have or will experience this at some point, and luckily there are many potential solutions.
[Zihao Wang] writes to show us kseqi, another chord-like textual input method, with a focus on the input sequences, as opposed to any particular mechanical arrangement of keys. The idea is to make use of two sets of independent inputs, where the sequence of actuation codes for the keystrokes to be emitted into the application.
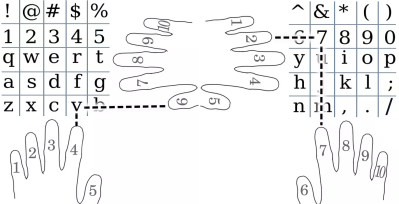
An example interface would be to arrange two sets of five keys as the input mechanism. One can arrange characters in a matrix. The left key is pressed and held first which selects a column (1 out of 5) then the right key is pressed to select a row, and thus a character. Next, you release in the same order, left, then right, to send the character.
Swapping left and right allows a different set of characters. In this simple scheme, fifty characters can be coded. Check out this web assembly demo for how this operates. Swapping out the physical inputs for a pair of joysticks is another option, which may be better for some folks with specific physical difficulties, or maybe because it just looks fun. As [Zihao] mentions in the write-up, the sequence order can be changed to code for other character sets, so this simple scheme can handle many more character codings than this simple example. All you have to do is remember them. Interested parties may want also wish to dig into the kseqi Rust crate for information.
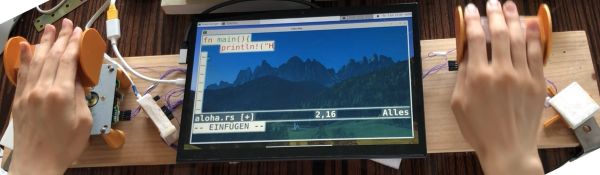
Chorded keyboard projects are plentiful out there, here’s a nice Bluetooth-connected keeb, and another one that’s all wiggly.