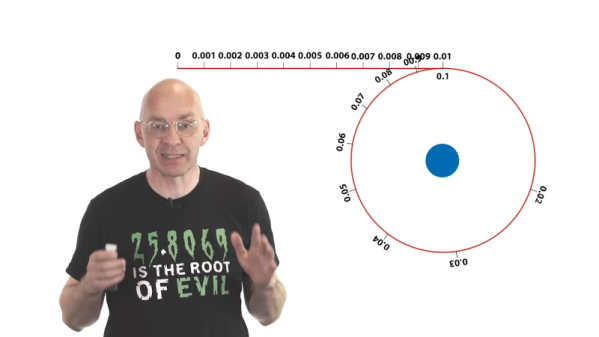
Parts of the automated soil moisture monitoring station

Solar Stevenson Screen For Smart Sprinkler

It’s not infrequent that we see the combination of moisture sensors and water pumps to automate plant maintenance. Each one has a unique take on the idea, though, and solves problems in ways that could be useful for other applications as well. [Emiliano Valencia] approached the project with a few notable technologies worth gleaning, and did a nice writeup of his “Autonomous Solar Powered Irrigation Monitoring Station” (named Steve Waters as less of a mouthful).

Of particular interest was [Emiliano]’s solution for 3D printing a threaded rod; lay it flat and shave off the top and bottom. You didn’t need the whole thread anyway, did you? Despite the relatively limited number of GPIO pins on the ESP8266, the station has three analog sensors via an ADS1115 ADC to I2C, a BME280 for temperature, pressure, and humidity (also on the I2C bus), and two MOSFETs for controlling valves. For power, a solar cell on top of the enclosure charges an 18650 cell. Communication over wireless goes to Thingspeak, where a nice dashboard displays everything you could want. The whole idea of the Stevenson Screen is clever as well, and while this one is 3D printed, it seems any kind of stacking container could be modified to serve the same purpose and achieve any size by stacking more units. We’re skeptical about bugs getting in the electronics, though.

We recently saw an ESP32-based capacitive moisture sensor on a single PCB sending via MQTT, and we’ve seen [Emiliano] produce other high quality content etching PCBs with a vinyl cutter.

Keep Coffee Warm Through Induction Heating

Transformers have an obvious use for increasing or decreasing the voltage in AC systems, but they have many other esoteric uses as well. Electric motors and generators are functionally similar and can be modeled as if they are transformers, but the truly interesting applications are outside these industrial settings. Wireless charging is essentially an air-core transformer that allows power to flow through otherwise empty space, and induction cooking uses a similar principle to induce current flow in pots and pans. And, in this case, coffee mugs.

[Sajjad]’s project is an effort to keep his coffee warm while it sits on his desk. To build this special transformer he places his mug inside a coil of thick wire which is connected to a square wave generator. A capacitor sits in parallel with the coil of wire which allows the device to achieve resonance at a specific tuned frequency. Once at that frequency, the coil of wire efficiently generates eddy currents in the metal part of the coffee mug and heats the coffee with a minimum of input energy.

While this project doesn’t work for ceramic mugs, [Sajjad] does demonstrate it with a metal spoon in the mug. While it doesn’t heat up to levels high enough to melt solder, it works to keep coffee warm in a pinch if a metal mug isn’t available. He also plans to upgrade it so it takes up slightly less space on his desk. For now, though, it can easily keep his mug of coffee hot while it sits on his test bench.

Continue reading “Keep Coffee Warm Through Induction Heating”

The Dynamotor Simplified

[Robert Murray-Smith] doesn’t like the price of inverters to convert DC to AC. That led him to build a dynamotor, or what is sometimes called a motor-generator set. These devices are just DC motors driving a generator. Of course, motors can also be used as generators and [Robert] had a stack of brushless motors in the form of PC fans. A two-fan dynamotor was born.

The brushless motors are attractive because, traditionally, the brushes are what usually fail on a dynamotor. The fan that will act as a generator needs some surgery, but it is simple. He scraped off all the control electronics and connected wires to the coils to form a three-phase generator. There’s no need for the fan blades in that configuration, either. If you were using ordinary motors and a generator, getting shafts concentric would be an important task. With the fans, it is simple to just line up the mounting holes and you get perfect alignment for free.

How does it work? [Robert] has a second video showing the output on a scope. You can see both videos below. The dynamotor makes a good-looking sine wave, probably much better than most reasonable-priced solid state inverters. He didn’t mention how much current he could successfully draw, but it probably isn’t much. You’d also need a transformer to replace a commercial inverter that would put out line voltage, so that would be some more loos in the system. On the other hand, if you wanted AC at a lower voltage, you might just replace all the transformers, if you were building a piece of gear yourself.

We’ve looked at how these things work in some detail. There were common in old tube radios, particularly military ones.

Continue reading “The Dynamotor Simplified”

A Fresh E-Ink Newspaper Delivered Every Morning

[Greg Raiz] recently set out to make it easy to read multiple newspapers in the morning over breakfast. Inspired by a similar project, he built an e-ink newspaper that hangs on his wall, delivering fresh news every ten minutes.

The project started with a 32″ Visionect e-ink display configured as a thin client. With a battery life measured in months thanks to the low power electronics, most of the work here was focused on the backend. A docker container running on a local NAS server collects newspapers via freedomforum.org, formats them to fit the aspect ratio of the display, and serves them up. [Greg] is really trying to preserve the design and thought that goes into the front page of each of these publications as traditional newspaper layouts are often designed by hand.

We love the simplicity and the “it-just-works” feel of this project as there are no buttons, wires, or anything that you need to fiddle with. [Greg] points out that it could also be used for other purposes, and we’d love to see a large calendar such as this e-ink calendar or perhaps even a 32″ version of this e-ink laptop. The code for this is on his GitHub with a video after the break.

Continue reading “A Fresh E-Ink Newspaper Delivered Every Morning”

New Part Day: Espressif ESP32-C6 Includes WiFi 6 And A RISC-V Core

If you’re a reader of Hackaday, then you’ve almost certainly encountered an Espressif part. The twin microcontroller families ESP8266 and ESP32 burst onto the scene and immediately became the budget-friendly microcontroller option for projects of all types. We’ve seen the line expand recently with the ESP32-C3 (packing a hacker-friendly RISC-V core) and ESP32-S3 with oodles of IO and fresh new CPU peripherals. Now we have a first peek at the ESP32-C6; a brand new RISC-V based design with the hottest Wi-Fi standard on the block; Wi-Fi 6.

There’s not much to go on here besides the standard Espressif block diagram and a press release, so we’ll tease out what detail we can. From the diagram it looks like the standard set of interfaces will be on offer; they even go so far as to say “ESP32-C6 is similar to ESP32-C3” so we’ll refer you to [Jenny’s] excellent coverage of that part. In terms of other radios the ESP32-C6 continues Espressif’s trend of supporting Bluetooth 5.0. Of note is that this part includes both the coded and 2 Mbps Bluetooth PHYs, allowing for either dramatically longer range or a doubling of speed. Again, this isn’t the first ESP32 to support these features but we always appreciate when a manufacturer goes above and beyond the minimum spec.

Welcome to the ESP32-C6

The headline feature is, of course, Wi-Fi 6 (AKA 802.11ax). Unfortunately this is still exclusively a 2.4GHz part, so if you’re looking for 5GHz support (or 6GHz in Wi-Fi 6E) this isn’t the part for you. And while Wi-Fi 6 brings a bevy of features from significantly higher speed to better support for mesh networks, that isn’t the focus here either. Espressif have brought a set of IoT-centric features; two radio improvements with OFDMA and MU-MIMO, and the protocol feature Target Wake Time.

OFDMA and MU-MIMO are both different ways of allowing multiple connected device to communicate with an access point simultaneously. OFDMA allows devices to slice up and share channels more efficiency; allowing the AP more flexibility in allocating its constrained wireless resources. With OFDMA the access point can elect to give an entire channel to a single device, or slice it up to multiplex between more than once device simultaneously. MU-MIMO works similarly, but with entire antennas. Single User MIMO (SU-MIMO) allows an AP and connected device to communicate using a more than one antenna each. In contrast Multi User MIMO (MU-MIMO) allows APs and devices to share antenna arrays between multiple devices simultaneously, grouped directionally.

Finally there’s Target Wake Time, the simplest of the bunch. It works very similarly to the Bluetooth Low Energy (4.X and 5.X) concept of a connection interval, allowing devices to negotiate when they’re next going to communicate. This allows devices more focused on power than throughput to negotiate long intervals between which they can shut down their wireless radios (or more of the processor) to extended battery life.

These wireless features are useful on their own, but there is another potential benefit. Some fancy new wireless modes are only available on a network if every connected device supports them. A Wi-Fi 6 network with 10 Wi-Fi 6 devices and one W-Fi 5 (802.11ac) one may not be able to use all the bells and whistles, degrading the entire network to the lowest common denominator. The recent multiplication of low cost IoT devices has meant a corresponding proliferation of bargain-basement wireless radios (often Espressif parts!). Including new Wi-Fi 6 exclusive features in what’s sure to be an accessible part is a good start to alleviating problems with our already strained home networks.

When will we start seeing the ESP32-C6 in the wild? We’re still waiting to hear but we’ll let you know as soon as we can get our hands on some development hardware to try out.

Thanks to friend of the Hackaday [Fred Temperton] for spotting this while it was fresh!

Learn Multirotors From First Principles

Multirotors, or drones as they’re popularly called, are so ubiquitous as to have become a $10 toy. They’re no less fun to fly for it though, and learning how they work is no less fascinating. It’s something [Science Buddies] has addressed in a series of videos examining them from first principles. They may be aimed at youngsters, but they’re still an entertaining enough watch for those of advancing years.

Instead of starting with a multirotor control board, the video takes four little DC motors and two popsicle sticks to make a rudimentary drone frame. Then with the help of dowels and springs it tethers the craft as the control mechanisms are explained bit by bit, from simple on-off motor control through proportional control to adding an Arduino and following through to how a multirotor stays in flight. It’s instructional and fun to watch, and maybe even for some of us, a chance to learn something.

We’ve had multirotor projects aplenty here over the years, but how about something completely different made from popsicle sticks?

Continue reading “Learn Multirotors From First Principles”

Camera Zero Looks Cool, Runs Cool

Security cameras are a commodity item these days, but that doesn’t mean [edgett’s] design using a Pi Zero, an Arducam, an LED ring, and active cooling isn’t worth a look. This is a great example of how integrating some off-the-shelf modules and 3D printing can create very professional-looking results. There’s also a trackball interface so you can control the camera. The software, written in Python, is available on GitHub.

The trackball doesn’t move the camera, but it does manage a menu system that lets you capture a photo or video, set the optical parameters like exposure, shutter, and ISO, and launch Camera Remote to offer a Web-based interface instead of the trackball.

If you add infrared illumination, you can swap out the camera for an IR version and have a nice-looking night vision camera, too. The camera is reasonably compact. Not including the lens and the tripod, the camera measures 100 by 44 by 44 mm. So under two inches square and about 4 inches long.

We worried a little about gluing the LED ring down, but then again our phones are all glued together these days, so maybe we should stop fretting. One thing we didn’t see on either site, though, was a picture taken with the camera itself. However, the 12-megapixel camera and quality lens should do a great job. We’ve even seen that particular camera module work with a much smaller computer recently.