Batteries are amazing. Batteries are horrible. Batteries are a necessary evil in today’s world of portable everything. If you’re reading this sentence, even if it’s not on a mobile device, somewhere there is a battery involved. They’re that ubiquitous. There’s another thing batteries are: Expensive! And at $350 each for a specialized battery, [Linus] of Linus Tech Tips decided to take battery repair into his own hands.
Rather than do a quick how-to video about putting new cells in an old enclosure, [Linus] does a deep dive into the equipment, skills, and safety measures needed when dealing with Lithium Ion cells. And if you watch the video through, you’ll even get to see those safety measures put to good use!
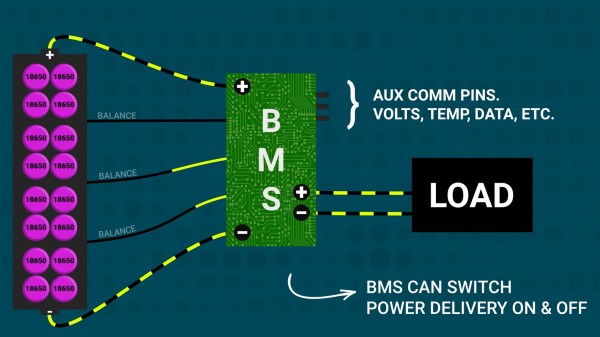
The real meat of the video comes toward the end however, with its explanation of the different Battery Management Systems (BMS), and a discussion of the difficulty of doing battery repair correctly and safely. Lastly, the video covers something a bit more sinister: Batteries that are made to resist being repaired with new cells; DRM for batteries, so to speak.
Overall we found the video informative, and we hope you do too. You might also enjoy this peek into the chemistry behind your favorite battery types.
Continue reading “When Battery Rebuilds Go Wrong: Understanding BMSs, Spot Welders, And Safety”