Coding A Custom Driver For The Adafruit Mini Thermal Printer

Thermal printers are cool… or, uh, warm actually. They use heat to make images, so they never need ink and they print on receipt rolls. The thermal printer available from Adafruit is a particularly tasty example, as it comes fully documented for the budding hacker. [Ed] is one such person, who set about writing his own driver to use the hardware with Linux on a Raspberry Pi.

The project came about as [Ed] didn’t like the halftone output from the standard Adafruit CUPS driver. Thus, a dithering-capable driver was needed instead. The first step of the project was to get dithering working via running such an algorithm into a custom driver, as well as to vary the heating time of the print head to gain greyscale capability. From there, the driver was integrated with CUPS and could be used with the Linux lp command. Finally, measures to deal with the paper running out were coded in as well.

It’s a fun dive into the nitty-gritty of talking to printers at the low level, something that few of us think about when printing concert tickets in a rush. There’s a lot that goes on to get a page to print successfully, and [Ed]’s work leaves us more respect for everything that goes on to get an image on the paper. The driver is available for keen tinkerers over at Github.

Meanwhile, consider a thermal printer for all your banner-printing needs.

Emulating A Power Grid

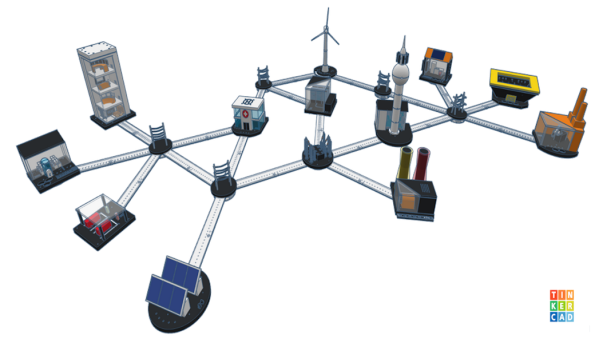
The electric power grid, as it exists today, was designed about a century ago to accommodate large, dispersed power plants owned and controlled by the utilities themselves. At the time this seemed like a great idea, but as technology and society have progressed the power grid remains stubbornly rooted in this past. Efforts to modify it to accommodate solar and wind farms, electric cars, and other modern technology need to take great effort to work with the ancient grid setup, often requiring intricate modeling like this visual power grid emulator.

The model is known as LEGOS, the Lite Emulator of Grid Operations, and comes from researchers at RWTH Aachen University. Its goal is to simulate a modern power grid with various generation sources and loads such as homes, offices, or hospitals. It uses a DC circuit to simulate power flow, which is visualized with LEDs. The entire model is modular, so components can be added or subtracted easily to quickly show how the power flow changes as a result of modifications to the grid. There is also a robust automation layer to the entire project, allowing real-time data acquisition of the model to be gathered and analyzed using an open source cloud service called FIWARE.

In order to modernize the grid, simulations like these are needed to make sure there are no knock-on effects of adding or changing such a complex system in ways it was never intended to be changed. Researchers in Europe like the ones developing LEGOS are ahead of the curve, as smart grid technology continues to filter in to all areas of the modern electrical infrastructure. It could also find uses for modeling power grids in areas where changes to the grid can happen rapidly as a result of natural disasters.

Custom 3D Printer Cart Hides Clever Features

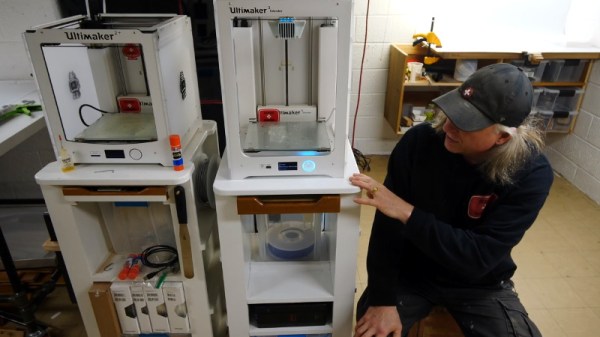
Even if you’ve got a decent sized workshop, there’s only so much stuff you can have sitting on the bench at one time. That’s why [Eric Strebel], ever the prolific maker, decided to build this slick cart for his fairly bulky Ultimaker 3 Extended printer. (Video, embedded below.) While the cart is obviously designed to match the aesthetics of the Ultimaker, the video below is sure to have some useful tips and tricks no matter which printer or tool you’re looking to cart around the shop in style.

[Eric] made a second video on sketching out the design.
On the surface this might look like a pretty standard rolling cart, and admittedly, at least half of the video is a bit more New Yankee Workshop than something we’d usually be interested in here on Hackaday. But [Eric] has built a number of neat little details into the cart that we think are worth mentally filing away for future projects.

For example, we really liked his use of magnets to hold the plastic totes in place, especially his method of letting the magnets align themselves first before locking everything down with screws and hot glue. The integrated uninterruptible power supply is also a nice touch, as it not only helps protect your prints in the event of a power outage, but means you could even move the cart around (very carefully…) as the printer does its thing.

But perhaps the most interesting element of the cart is that [Eric] has relocated the Ultimaker’s NFC sensors from the back of the printer and into the cart itself. This allows the printer to still read the NFC chip built into the rolls of Ultimaker filament, even when they’re locked safely away from humidity in a sealed box.

Now all you’ve got to do is apply for the loan it will take to pay for all of the MDF you’ll need to build your own version. At this point, we wouldn’t be surprised if encasing your 3D printer in metal would end up being cheaper than using wood.

Continue reading “Custom 3D Printer Cart Hides Clever Features”

LoRa Messenger In Nokia’s Shell

The arrival of LoRa a few years ago gave us at last an accessible licence-free UHF communication protocol with significant range. It’s closed-source, but there are plenty of modules available so it’s found its way into a variety of projects in our community over the years. Among them we’ve seen a few messaging devices, but none quite so slick as [Trevor Attema]’s converted Nokia E63 BlackBerry-like smartphone. The original motherboard with its cellphone radio and Symbian-running processor have been tossed aside, and in its place is a new motherboard that hooks into the Nokia LCD, keypad, backlighting and speaker. To all intents and purposes from the outside it’s a Nokia phone, but one that has been expertly repurposed as a messenger.

On the PCB alongside a LoRa module is an STM32H7 microcontroller and an ATECC608 secure authentication chip for encrypted messages. It’s designed to form a mesh network, further extending the range across which a group can operate.

We like this project for the quality of the work, but we especially like it for the way it uses the Nokia’s components. We’ve asked in the past why people aren’t hacking smartphones, but maybe we’re asking the wrong question. If the smartphone as a unit isn’t useful, then how about its case, components, and form factor? Perhaps a black-brick Android phone will yield little, but the previous generation such as this Nokia use parts that are easy to interface with and well understood. Let’s hope it encourages more experimentation.

Raspberry Pi Pico Oscilloscope

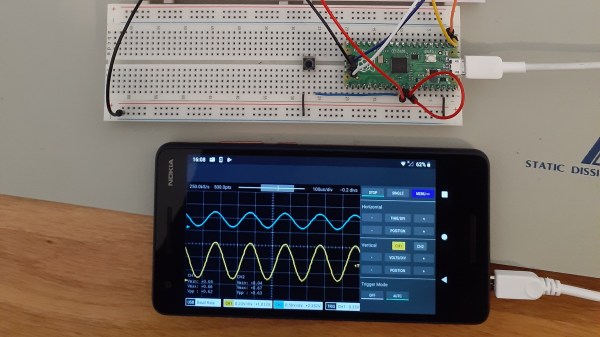
As you dive deeper into the world of electronics, a good oscilloscope quickly is an indispensable tool. However, for many use cases where you’re debugging low voltage, low speed circuits, that expensive oscilloscope is using only a fraction of its capabilities. As a minimalist alternative for these use cases [fhdm-dev] created Scoppy, a combination of firmware for the Raspberry Pi Pico and an Android app to create a functional oscilloscope.

As you would expect, the specifications are rather limited, capturing a maximum of 100 kpts at a speed of 500 kS/s shared between the two channels. Without some additional front end circuitry to protect the Pico, the input voltage is limited to 0-3.3 V. Neither the app nor the firmware is open source, and getting access to the second channel and removing ads requires a ~$3 in-app purchase. Even so, we can still think of plenty of practical uses for a ~$7 oscilloscope. If you do decide to add some front-end circuitry to change to voltage range, you can set them in the app, and switch between them by pulling certain GPIO pins high or low. The app has most of the basic oscilloscope features covered, continuous and single shot capture, adjustable trigger settings and a scalable waveform display.

Simple, cheap oscilloscopes like these have their place, but you start to understand why the “real” ones are so expensive when you see what goes into developing a high performance oscilloscope.

How Did I Live Without A Microscope?

Get yourself a decent stereo inspection microscope, preferably optical. Something that can magnify from maybe 4x to 40x is fine, anything outside this range is icing on the cake. Some people claim they’re fine with a minimum of 10x, but if you go there, you’re going to need a reducing lens eventually. Either way, get one, and you’ll thank me.

How do I know this? I finally caved in and bought one about two years ago now, and while it’s not something I use daily, it’s something that I use at least once a month and for which there is simply no substitute.

This is Hackaday, so a lot of you will be thinking “inspection scope = fine-pitch soldering” and you’re not wrong. With clearance of 10 cm or more, and a slab of sacrificial optical glass (“neutral density filter”) to protect the optics from tarry flux fumes, a stereo scope at 4x makes even the fiddliest solder joints possible. Good lighting, and sharp tweezers are also a must, of course. That’s what got me in the door.
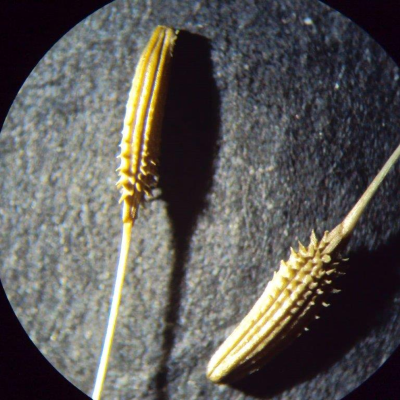
But that’s the half of it, or less. When my scope was new to me — it hasn’t been “new” since the late 1980s — we spent a whole rainy Sunday afternoon microscoping whatever would fit under the lens. Grains of salt, blades of grass, all manner of bugs living and otherwise, shells, skin, textiles. Everything is cooler under the microscope.

The event that triggered this article wasn’t my son’s school project this week to photograph dandelion seeds. Nope, today my wife found a bug in the basement; to the microscope! And with a very quick and unfortunately very positive identification, we now know that we have to strain all of our flour for bread beetles and pitch whichever bags they came in with. Hooray!

The inspection scope was intended for the soldering bench, but has found general use as an irreplaceable household tool. While I admittedly also intended to use it to lure my son into science, the real fight over scope time has been with my wife. And that’s why you want an optical scope instead of one that’s tethered to a monitor — as a general-purpose tool, portability is paramount. No menu diving, no power source, and anyone can just grab it and go.

Convinced? Ready to pull out your wallet? Microscopes are like cars. You can spend as much as you’d like on one, the cheapest will cause you nothing but pain and suffering, and the difference between the mid-range and high-end is full of diminishing returns. Buying used, especially if you can kick the metaphorical tires, can be a great bargain, and a high-end used scope will hold its value a lot better than a new budget model. Just around $200 is a sweet spot new and $300-$400 will get you the top of the line from yesteryear if you shop around. That’s not cheap, but if you’re the microscope type, it’s easily worth it. Trust me.

Can The Solenoid Engine Power A Car?

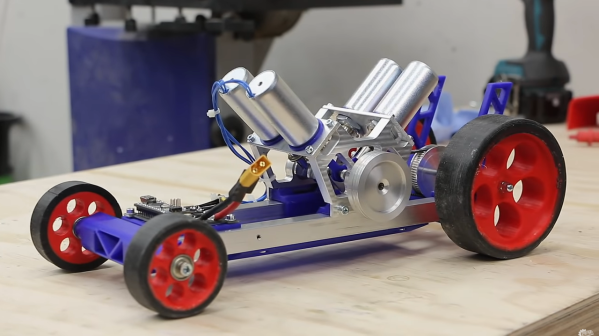
[Emiel] aka [The Practical Engineer] makes all kinds of fun projects in his fully-featured shop, and one of his tangents has been building a series of solenoid engines. These engines mimic the function of an internal combustion engine, with each solenoid acting as a piston. The only problem with [Emiel]’s concept engines, though, was that he never actually put them into a vehicle to prove their effectiveness. This build finally proves that they can work at powering a vehicle.

The project starts with a new engine. [Emiel] chose a V4 design using four solenoids and an Arduino-based controller. After some trouble getting it to operate properly, he scavenged a small circuit board he built in his V8 solenoid engine to help with timing. With that installed, the solenoids click away and spin the crankshaft at a single constant speed. The vehicle itself was mostly 3D printed, with two aluminum tubes as support structures to mount the engine. Even the wheels were 3D printed with a special rubber coating applied to them. With a small drive train assembled, it’s off to the races for this tiny prototype.

While the small car doesn’t have steering and only goes at a constant speed, the proof of concept that these tiny electric engines actually work is a welcomed addition to [Emiel]’s collection of videos on these curious engines. Of course they’re not as efficient as driving the wheels directly with an electric motor, but we all know there’s no fun in that. If you haven’t seen his most intricate build, the V8 is certainly worth checking out, and also shows off the timing circuitry he repurposed for this car.

Continue reading “Can The Solenoid Engine Power A Car?”