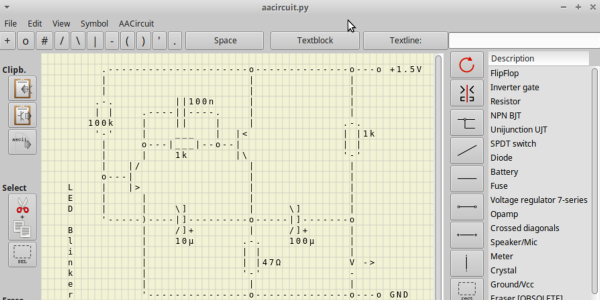
We wondered recently about those crude ASCII schematics you see in some documentation — are there any dedicated schematic-focused tools to draw them, or are they just hand-crafted using various ASCII-art drawing tools? To our surprise, there is such a tool. It is called AACircuit and was developed by [Andreas Weber]. It has a history going back to 2001 when it was first introduced as ASCIIPaint. Be forewarned, however, the quality of the code may be questionable. According to the notes on [Andy]’s GitHub repository:
WARNING: a lot of spaghetti code ahead
This code was created in 2001-2004 when I taught Borland Delphi 3 to myself. It contains many, many global variables, unstructured and undocumented procedural code and bad variable names.
If you don’t want to wrestle with old and sketchy object-oriented Pascal code, you’re in luck. [Chaos Ordered] has made a Pythonized version which you can get from his GitHub repository. We tried it out and got it working on Ubuntu in short order (after wrestling with a pycairo dependencies). This might not be everyone’s cup of tea, but it has some uses now and then. While we wouldn’t want to document a computer motherboard with ASCII schematics, it’s great for a quick-and-dirty circuit diagrams.
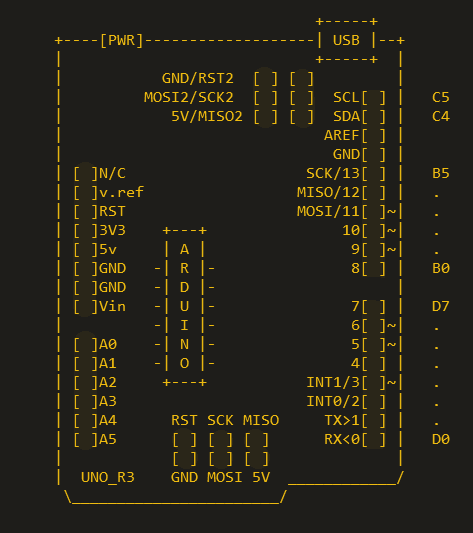
Not exactly schematics, but [Duckman] has some Arduino pinout diagrams he made using ASCII-art. These could be useful when pasted into source code as comments, documenting the pinouts for your project.
Do you recommend any tools for making ASCII schematics, or this just a waste of time?